Short answer
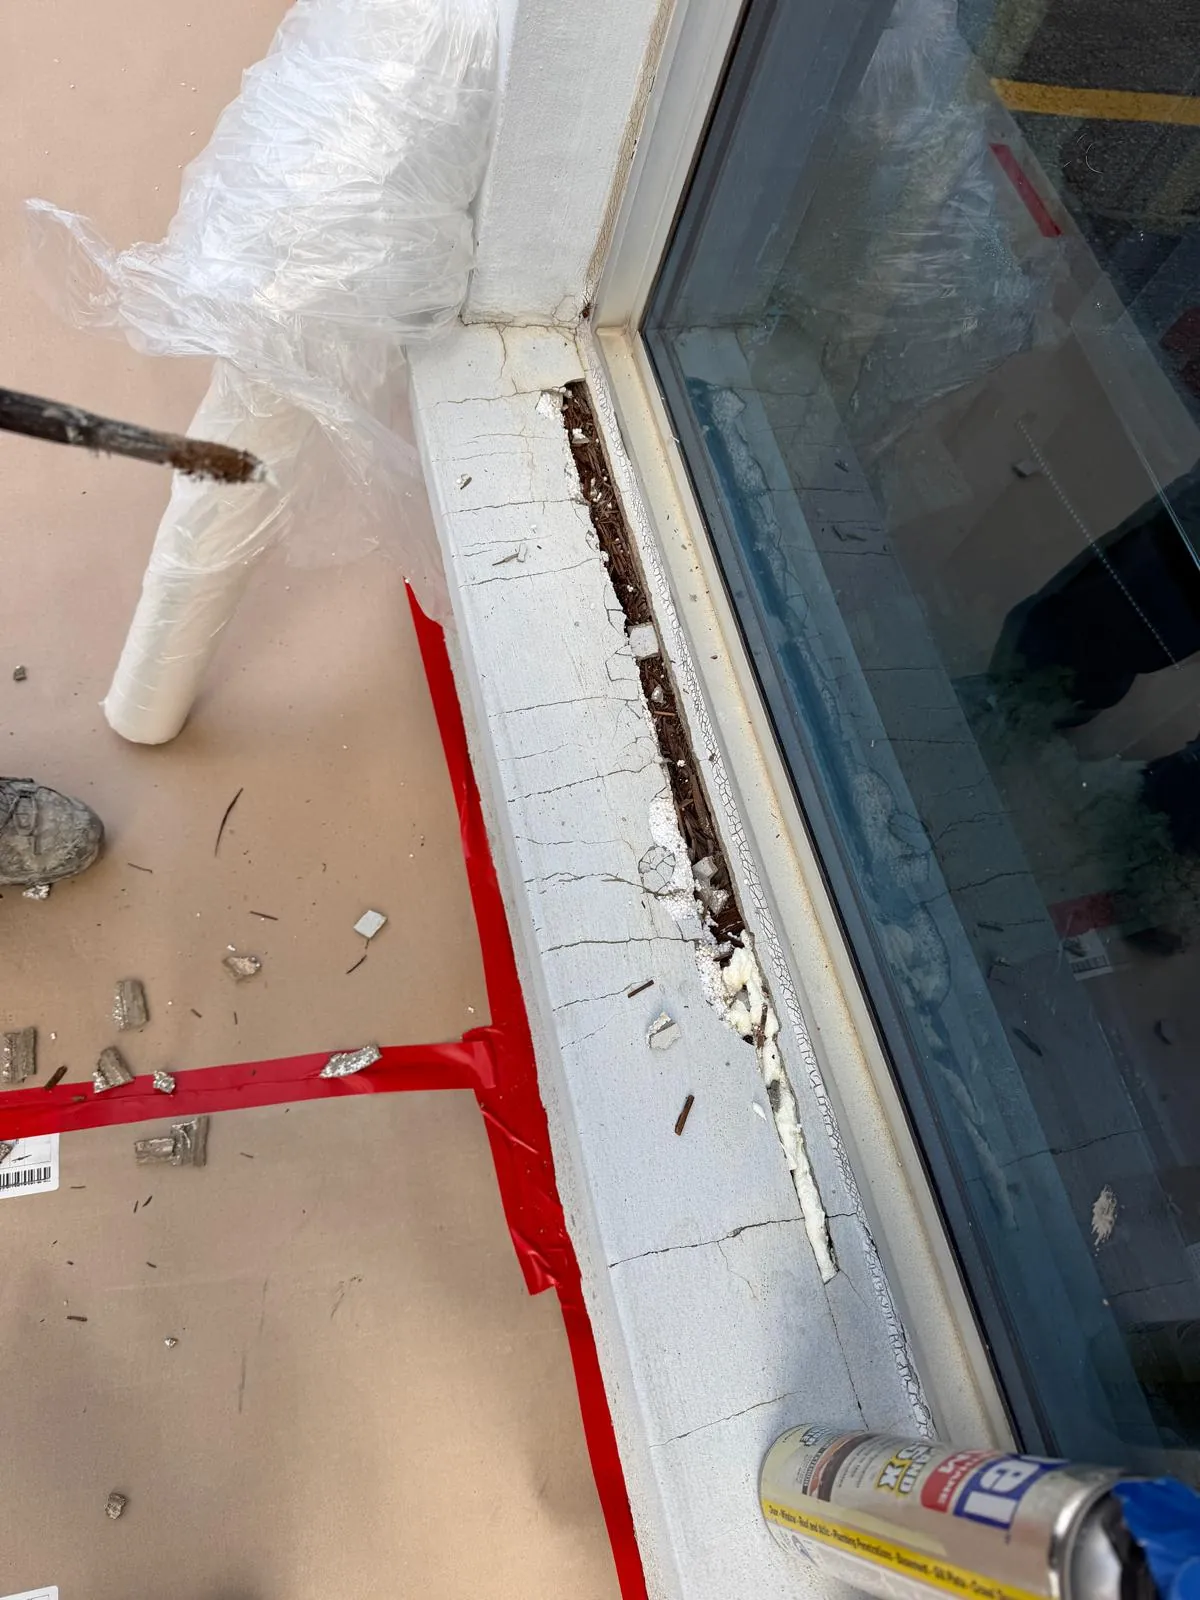
Window caulking fails in two ways, and both mean it has to come out. If the bead has pulled cleanly away from the frame or the wall, it has lost its bond (adhesive failure). That is usually poor surface prep, the wrong sealant for the materials, or a joint with no backer rod. If the bead has split down the middle, the sealant itself has given out (cohesive failure), usually from age, UV, or a joint too thin or too wide for the movement it takes. Either way, running new caulk over the old bead does not work, because new sealant cannot bond to failed sealant. The fix is to cut the old caulking out completely, clean back to sound surfaces, set a backer rod where the joint needs one, and run a new joint sized for the movement.
Signs the caulking has failed
Exterior caulking is a working joint, not decoration. It seals the gap between the window frame and the wall so water sheds past the opening instead of into it. When it fails, the first signs are usually small:
What you can see
- A visible gap between the bead and the frame, or the bead and the wall
- Cracking, crazing or splitting along the bead
- Caulking that has gone hard and brittle instead of staying flexible when you press it
- Shrunk, thin or missing sections, especially along the sill and at the corners
- Caulking painted over so many times it has cracked with the paint
What it causes
- Staining or streaks below the window on the outside wall
- White efflorescence under the sill on brick or stucco
- Drafts around the frame on a windy day
- Water staining at the window head or sill inside, or paint lifting on the inside wall after wind-driven rain
- Cracked stucco running off the window corners
Read how it failed: adhesive or cohesive
Look closely at where the bead has let go. It is the most useful thing you can learn about a failed joint, because it tells you what went wrong the first time.
Pulled away or split down the middle?
Adhesive failure: the sealant has come away cleanly from one side of the joint, the frame or the wall, and the bead itself is still intact. It never properly bonded. The usual causes are dust, old sealant or loose paint left on the surface, a damp surface at application, a sealant not suited to one of the two materials, or no primer where the product needs one.
Cohesive failure: the sealant is still stuck to both sides but has torn through its own middle. The sealant itself has given out, from age and UV exposure, a product not rated for the movement at that joint, or a bead too thin to stretch.
Both happen more on the elevations that get the most sun and weather, and on the sill, which takes standing water. That is why failure often shows first on one side of the building and at the bottom of the window.
Why caulking fails early
- It was run over old caulking. New sealant laid on top of failed sealant has nothing sound to bond to. It fails along the same line, usually within a season or two.
- Three-sided adhesion. A deep joint filled solid with sealant sticks to both sides and the back. When the building moves, the bead cannot stretch, so it tears. A backer rod (or bond-breaker tape in a shallow joint) lets the bead bond to the two sides only, so it can flex.
- The wrong joint shape. A thin smear over a gap has no body to stretch. A joint needs enough width and the right depth for the movement it takes.
- The wrong product. Sealants are made for different jobs. One made for interior trim will not last on an exterior joint between a window frame and masonry or stucco, in full sun, through an Ontario winter.
- No surface prep. Dust, efflorescence, loose paint, old sealant residue and damp surfaces all stop a bead from bonding.
What should never be caulked
Well-meant caulking causes its own leaks. Some gaps around a window and in a wall are meant to let water out, and sealing them traps it inside.
- Weep holes in brick veneer and weep slots at the bottom of window frames
- The bottom edge of a window's drainage path, where the installation is designed to let water drain out rather than seal it in
- Drainage gaps and terminations in EIFS designed to let water out of the system
If you already have stains inside, read water stains under a window: leak or condensation first. If you are not sure whether a gap is a leak or a drain, ask before anyone fills it. A contractor who seals everything shut is creating the next problem.
What a proper re-caulking job looks like
01Cut the old caulking out completely
Every bit of the old bead comes out, back to the frame and the wall on both sides. This is the slow part, and it decides whether the new joint holds.
02Clean back to sound surfaces
Remove residue, dust, loose paint and efflorescence. Surfaces need to be clean and dry, with primer where the sealant manufacturer calls for it.
03Size the joint and set a backer rod
A backer rod in deeper joints controls the depth and stops three-sided adhesion. A shallow joint gets bond-breaker tape instead.
04Run and tool the new joint
A sealant suited to the two materials and the exposure, tooled so it is pressed into full contact with both sides and shaped to shed water.
05Fix what the old leak damaged
Cracked stucco at the window corners, efflorescence and staining below, and anything soft behind the finish, before the wall is painted.
How often should exterior caulking be redone?
There is no single number. Sealant life depends on the product, how well the joint was designed and prepared, how much sun and water that elevation gets, and how much the joint moves. The honest answer is to inspect it every year, usually in spring after the freeze–thaw season, and redo joints when they show the signs above. Always redo them before repainting the building: painting over failed caulking locks the problem in under a fresh finish.
Where FAIME fits
Joint sealants and window caulking are a self-performed FAIME scope, alongside stucco and brick repair and exterior painting, across Toronto, North York, Scarborough, Vaughan, Richmond Hill, Markham, Mississauga, Brampton and the wider GTA.
On our Vaughan commercial envelope project, every existing joint sealant and window caulking line was cut out and redone before a single coat of paint went on, on an occupied building finished in 7–10 working days. Our Willowdale roof leak and window refinishing project shows what happens when a leak has already been running behind the finish.
- $2M general liability · Active WSIB (Class G5) · 2-year workmanship warranty
- Written scope before work starts, including which joints are replaced and which are left open to drain
If you want your windows looked at, see our flashing and caulking service or book a free site visit.