A Willowdale roof opened up during a leak repair, with shingles cut back around a new plywood deck section and a FAIME crew member working alongside it
Home/Projects/Roof Leak Repair & Window Refinishing
Flashing, Caulking & Sealant

A Roof Leak, Traced Past
the Hole We Could See

Parkview Avenue, Willowdale September 2026 3 Days On Site Completed ✓
Location
Willowdale, North York
Date
September 2026
Category
Flashing & Caulking
Scope
Deck · Sto Tape · Membrane · 12 Windows
Status
Completed ✓
What We Found

The Hole Was Real.
It Was Also the Small Part.

FAIME Construction repaired a roof leak on a detached home on Parkview Avenue in Willowdale, North York. Daylight was visible through the roof at one location, but once the shingles were lifted back the water track ran well past it and the plywood deck was rotted through, with an open seam beside it. The opening and the seam were sealed and taped with Sto tape, self-adhering membrane underlayment was bedded over the repair, shingle courses were reset and re-fixed, the packed gutter line was cleared and re-pitched, and all 12 upstairs windows were repaired, caulked and repainted — brought back close to new. The work was hose-tested before the access came down and has since been through real rainfall with no recurrence. Three days on site, all waste removed.Flashing, caulking & envelope repair · Willowdale, North York & the GTA · Established 2021, crews since 2009 · WSIB Active · $2M CGL · 2-year workmanship warranty

What the Homeowner Saw

The homeowner reported a leak. On the site visit there was daylight coming through the roof at one point, and water damage to the wood at an upstairs window below it — enough to price the work honestly, and enough to know the two were connected.

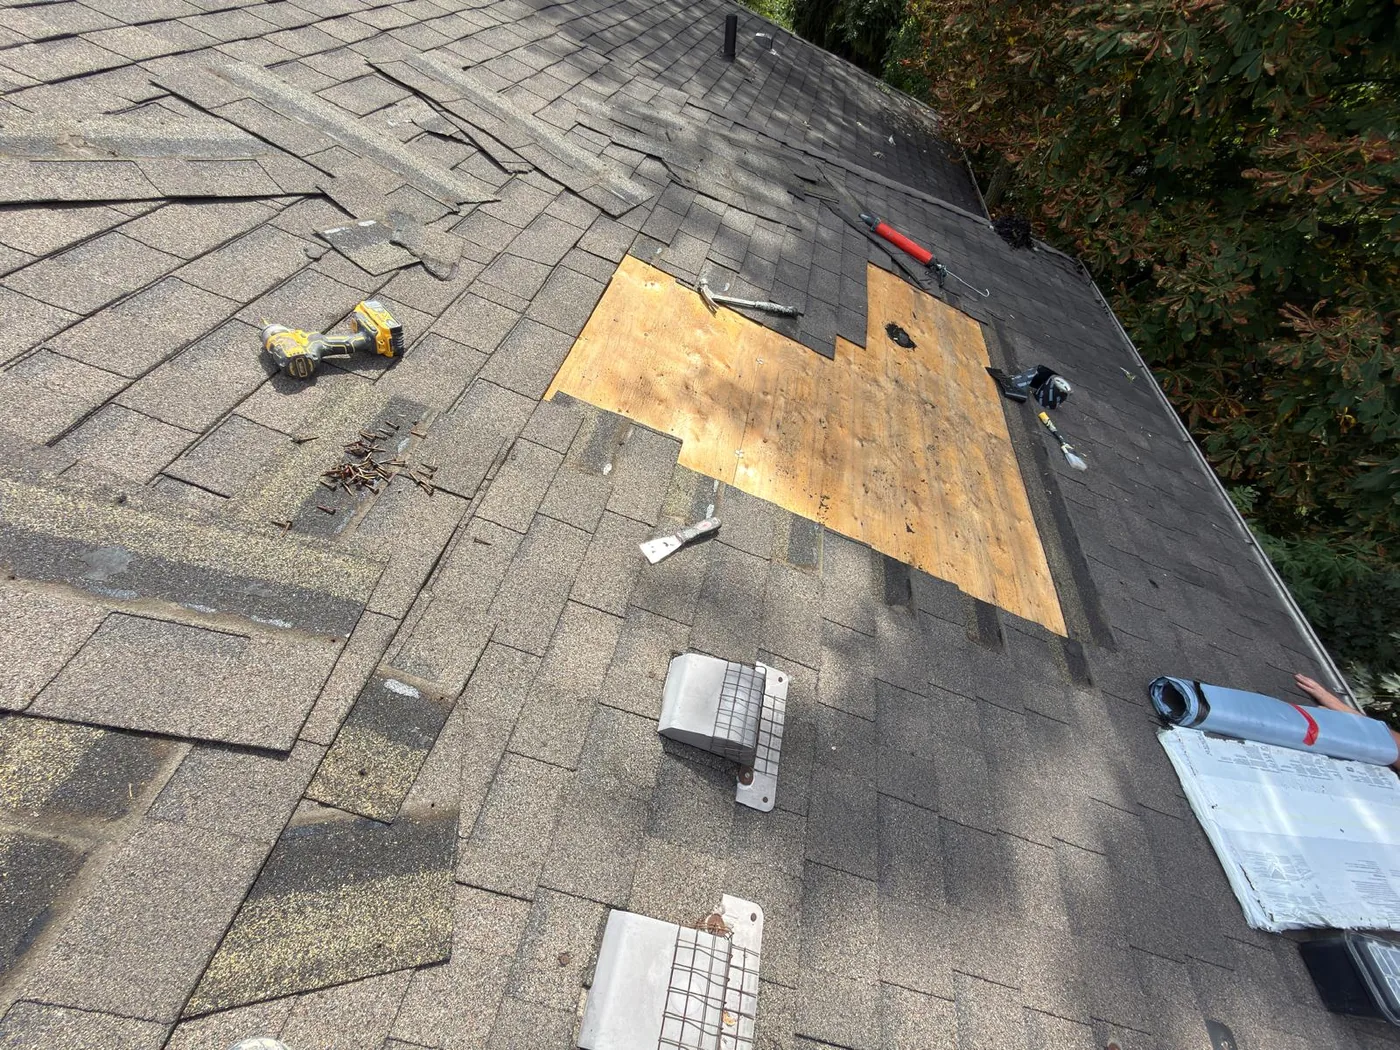
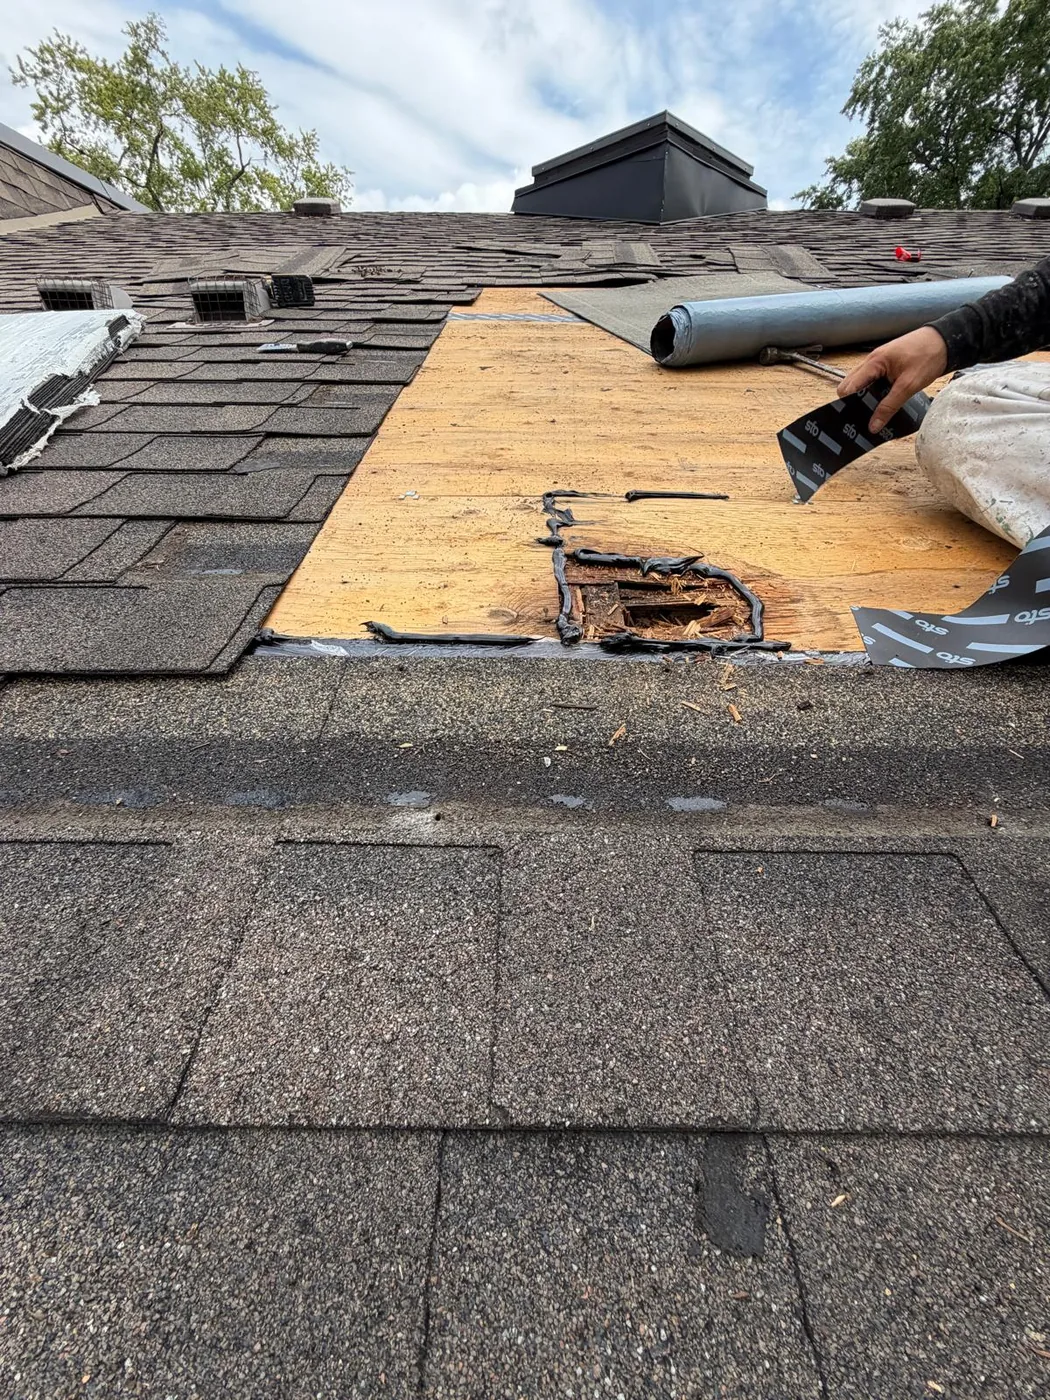
What the assessment could not tell us was how far it had travelled. Water enters at one point and runs along the underside of the deck before it shows itself, so the wet spot inside is almost never under the hole. When the shingles came back, the plywood carried a dark bloom that spread well beyond the opening, and a seam between two sheets sat right in its path.

That changes what the repair has to be. Patching over a visible hole and re-laying the shingles would have looked finished on the day and failed at the seam in the first sustained rain. So the rot was cut back to sound material, small voids were filled with foam from inside and the weakened section reinforced, and then both the opening and the full seam line were sealed and taped.

Sealed, Taped, Then Covered

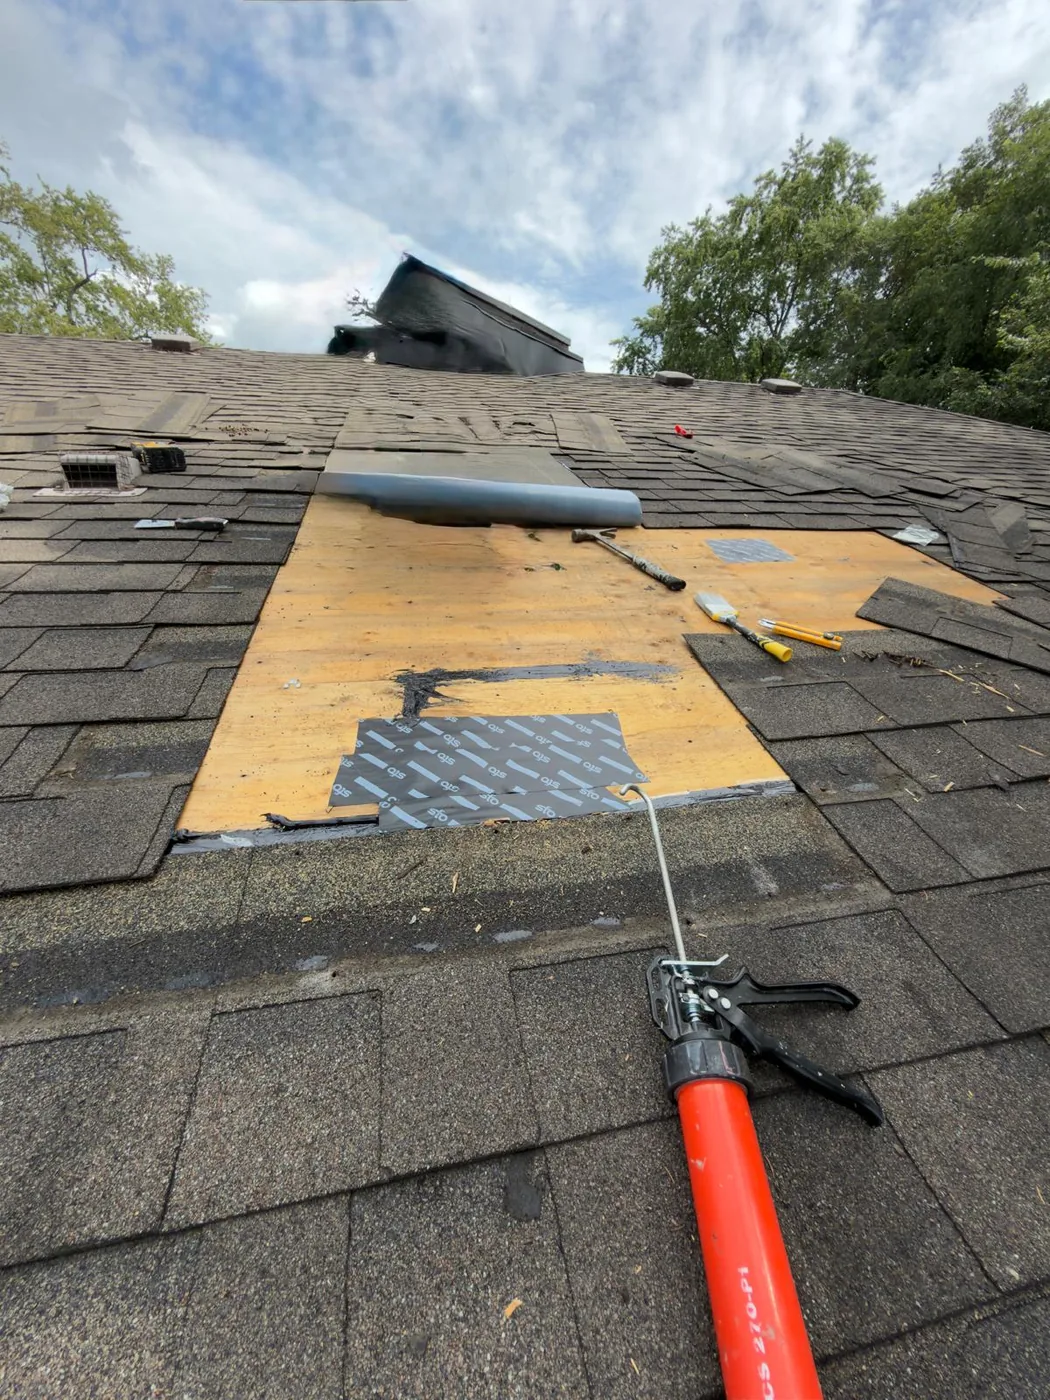
Sealant was worked into the opening and along the seam, and Sto tape was set over both. Self-adhering membrane underlayment went down over the whole repaired area — bedded, not just laid — so the repair sits under a continuous sheet rather than a series of joints.

New shingles were bedded in sealant and fixed with additional nailing through the courses over the repair. Sound existing shingles were kept so the slope still reads as one roof; torn and lifted ones were taken off and replaced. On the underside, membrane was bedded so that if water ever does find its way in again, it is carried out to the gutter line instead of sitting on timber.

The Gutter Was Doing the Opposite of Its Job

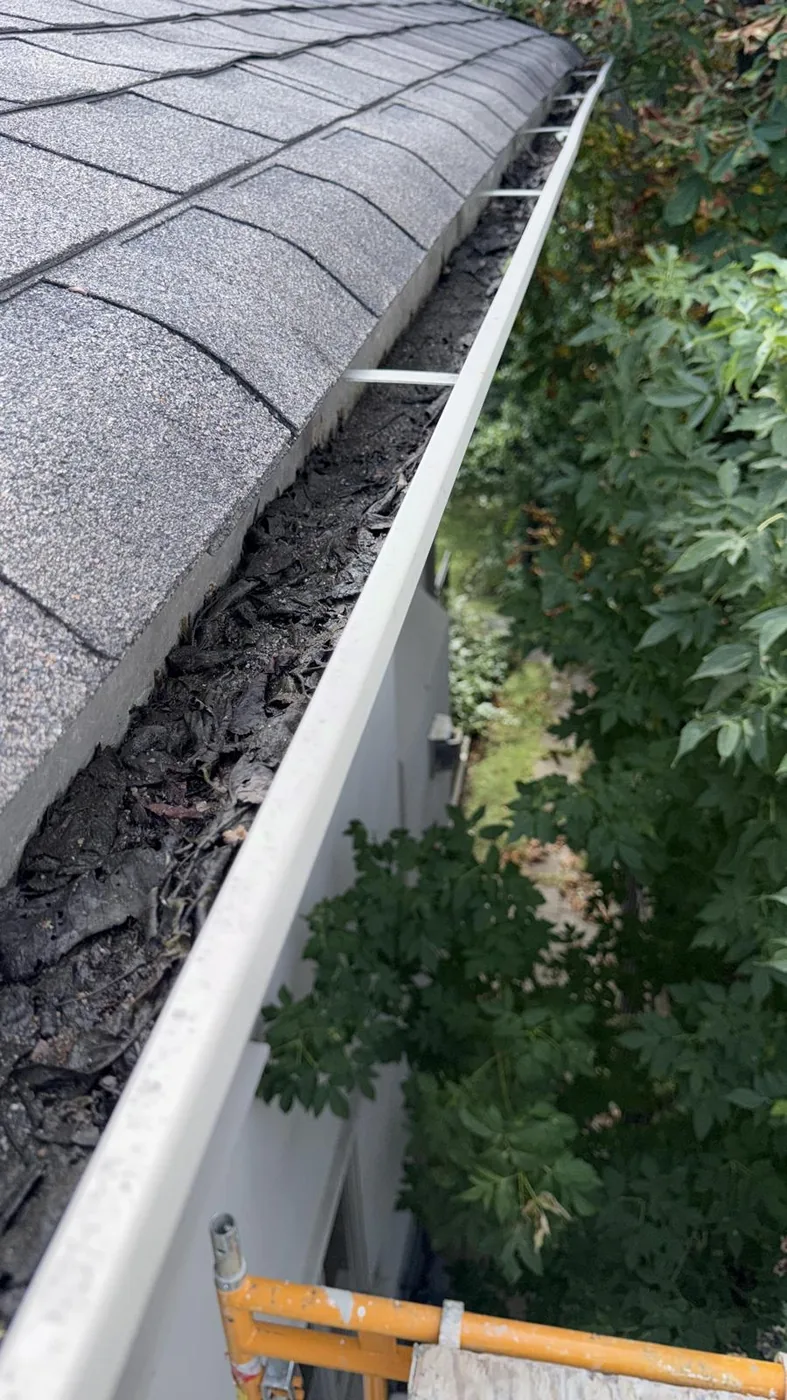
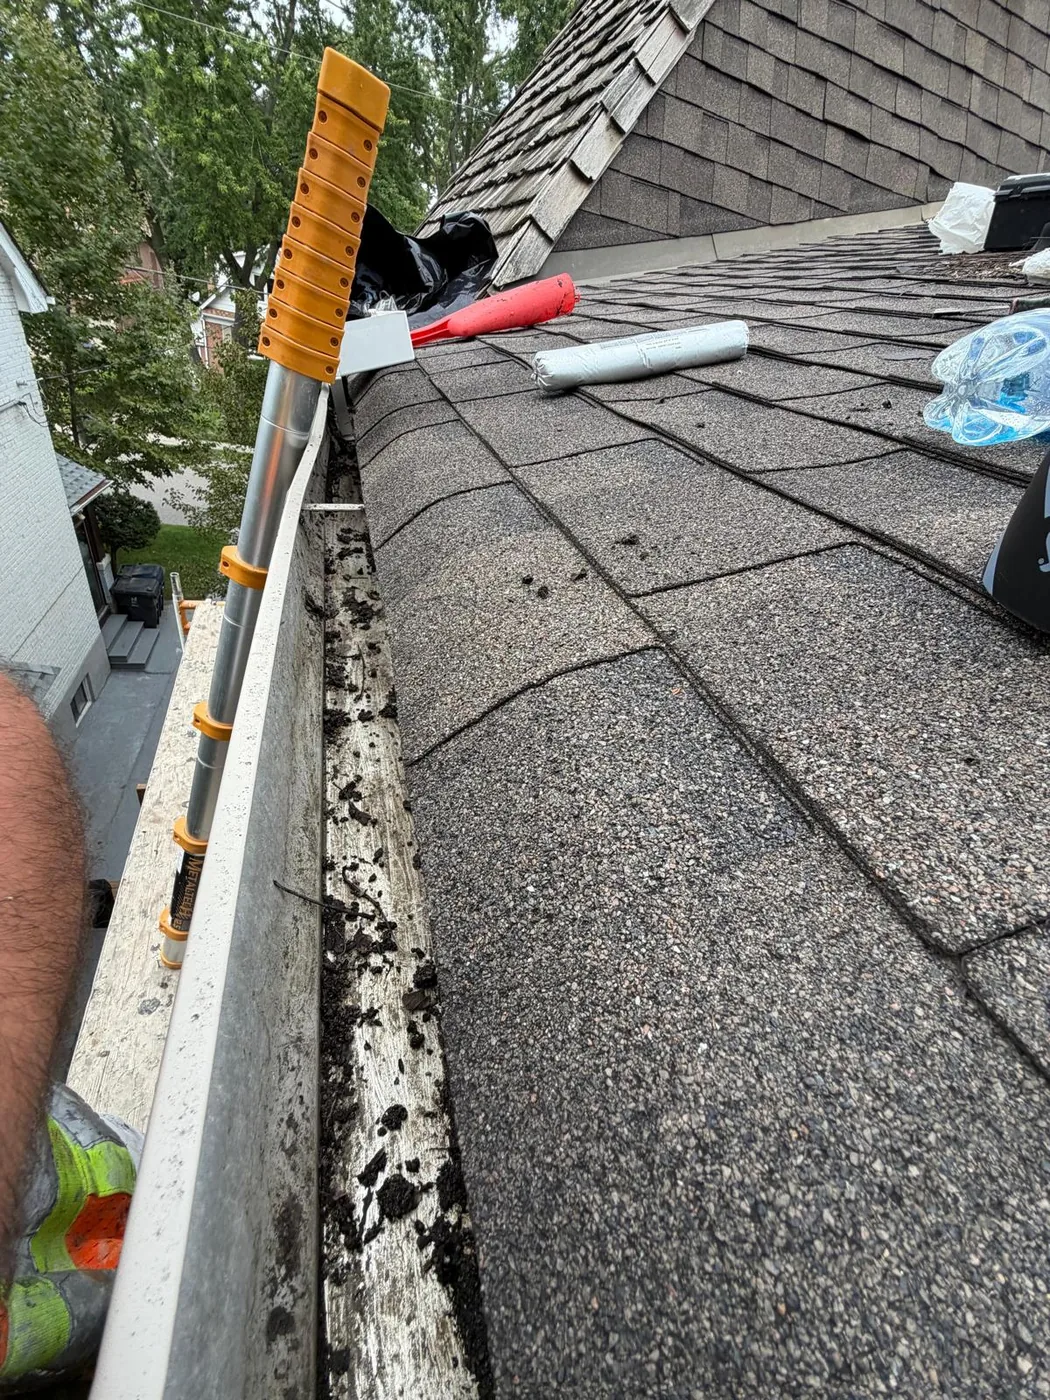
The gutter along that elevation was packed solid with rotted leaf debris for its whole length. A gutter in that condition holds water against the fascia and pushes it back under the shingle edge, which is a slow way to manufacture exactly the damage we had just repaired. It was cleared out and re-pitched so the run actually falls.

Twelve Windows, While the Access Was Up

The water-damaged wood at the affected upstairs window was removed and made good. With scaffolding already standing on that elevation, it made no sense to come back for the rest — all 12 upstairs windows were repaired where they needed it, sanded, prepped and cleaned, caulked right around the perimeter to close the joint against both water and air, and repainted in a colour matched to a sample taken from the existing window.

They came back close to brand new. One set-up, one access cost, one visit — and a whole elevation of windows that now shed water and hold heat instead of leaking both.

Tested Before the Scaffold Came Down

The repair was run with a hose and worked deliberately — not a quick pass, which almost anything will survive. It came up dry. It has since been through real rainfall with no recurrence. Testing while the access is still standing is standard on our work, because the alternative is the homeowner discovering the problem in February.

Then the site was cleaned out — scaffold down, every bag of stripped shingle and rotted timber off the property, nothing left in the garden for the homeowner to deal with. The workmanship carries a 2-year warranty, and the homeowner has since said so publicly.
Stage By Stage

Open Up — Seal — Tape — Cover — Finish

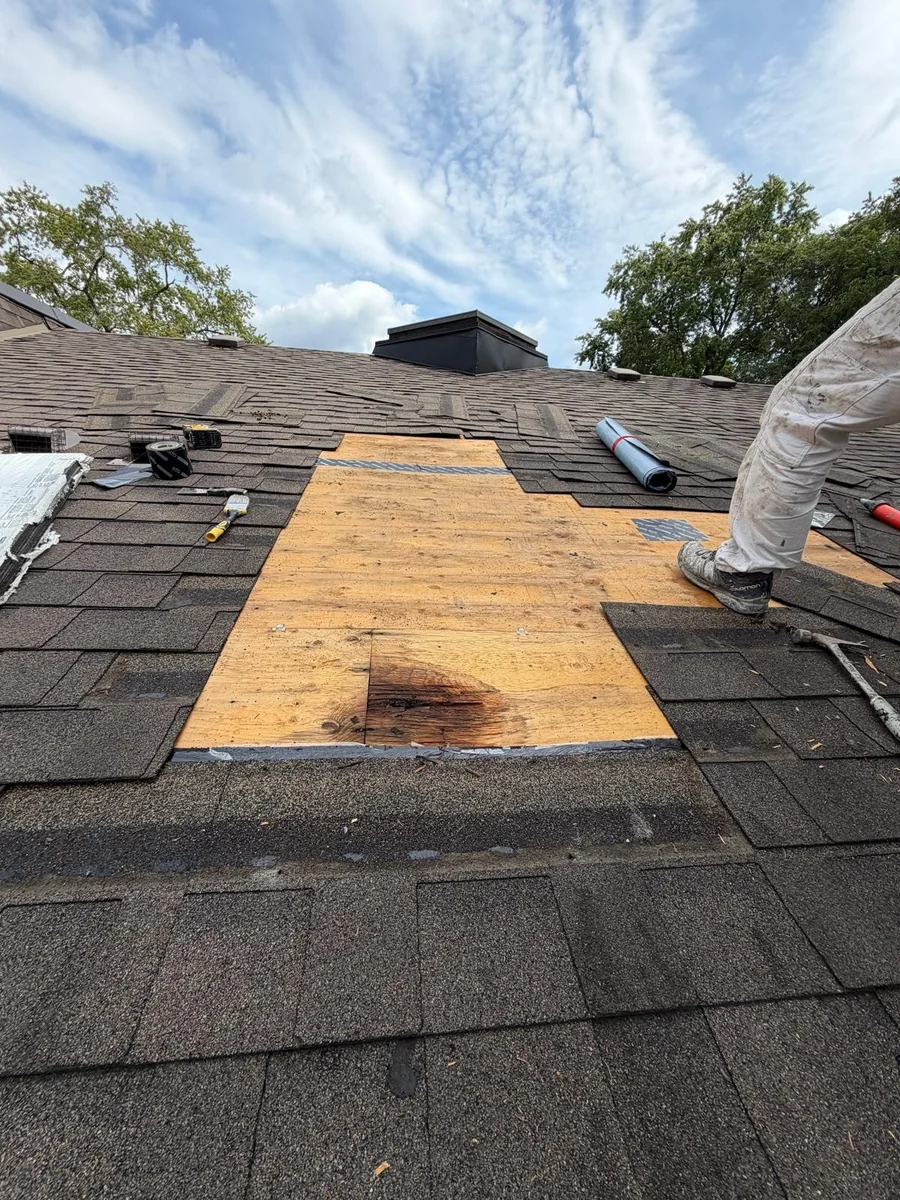
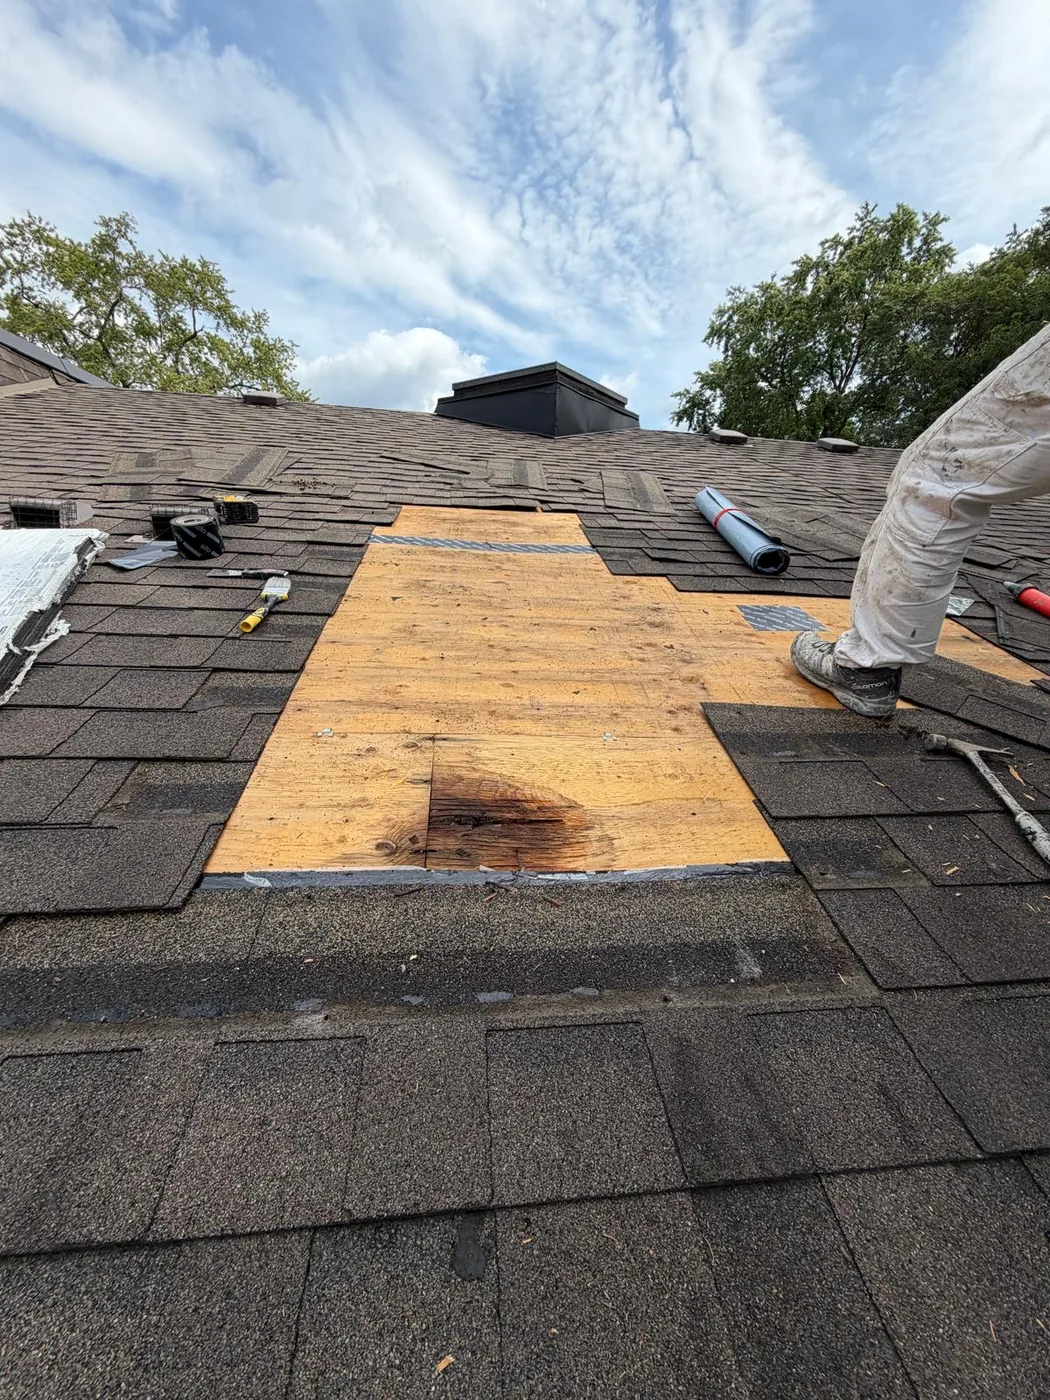
Shingles lifted back and the deck opened up. The dark bloom in the plywood is the water track, and it runs well past the hole that was visible from the ground.
Opened up — the water track in the deck, wider than the hole suggested
A rotted opening in the roof deck with splintered edges, with Sto tape being rolled down over the repaired area.
What we found — rot straight through the deck, and the tape going on over it
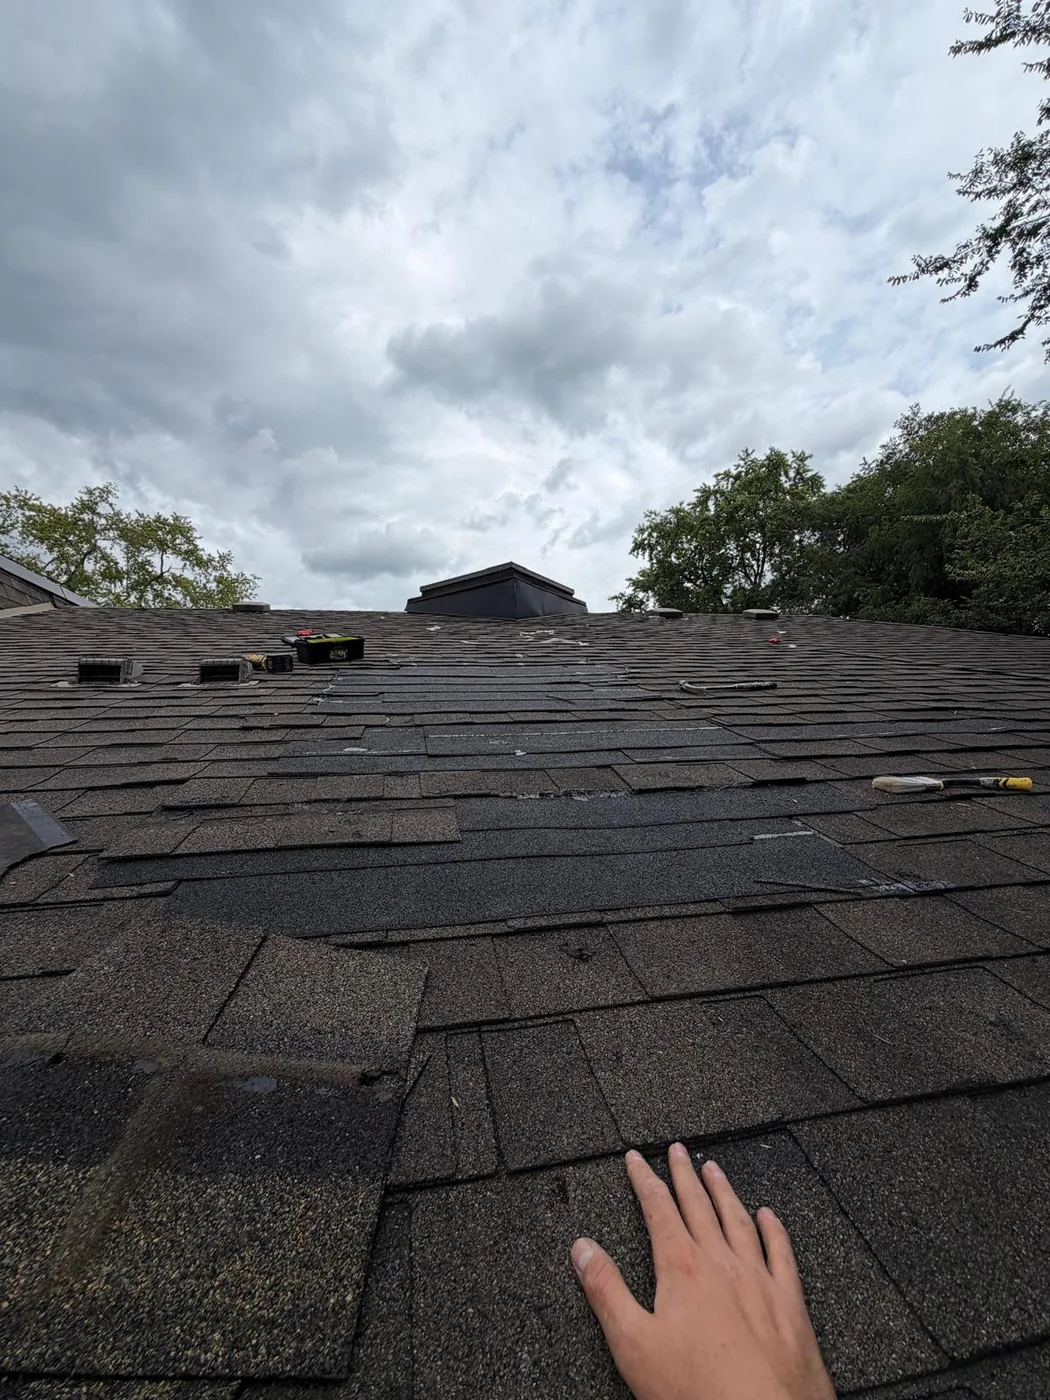
A hand resting on lifted and torn asphalt shingles on the roof slope above the leak.
Shingle condition — lifted and torn courses above the failure
A roof gutter packed solid along its length with black rotted leaf debris.
The gutter — packed solid, so water had nowhere to go but backwards
New plywood sheathing let into the roof deck with shingles cut back around it and tools laid out.
Deck repair — sound new sheathing let in and fixed down
The repaired deck area with underlayment being set and a sealant gun in the foreground.
Sealant and tape — the opening and the seam sealed before anything covers them
Self-adhering membrane underlayment run up the roof slope towards the ridge.
Underlayment — self-adhering membrane bedded over the whole repair
The same gutter line cleared out and running clean, with a ladder set against the fascia.
Gutters — cleared out and re-pitched so the run actually falls
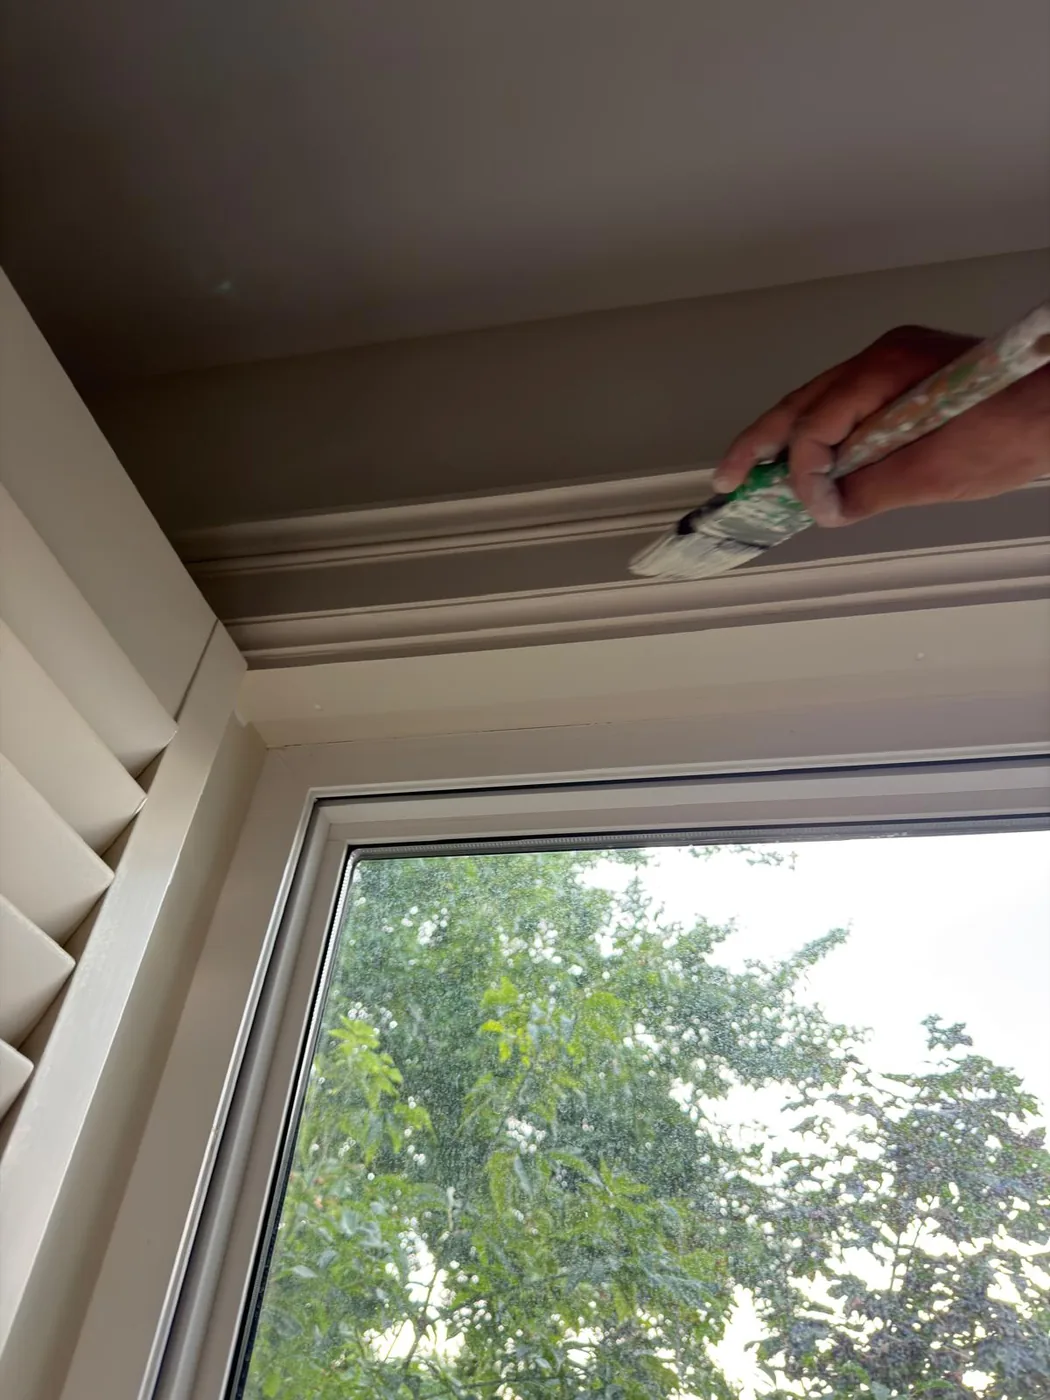
A brush cutting in fresh paint along the head casing of an upstairs window.
Windows — cutting in the head casing after prep and caulking
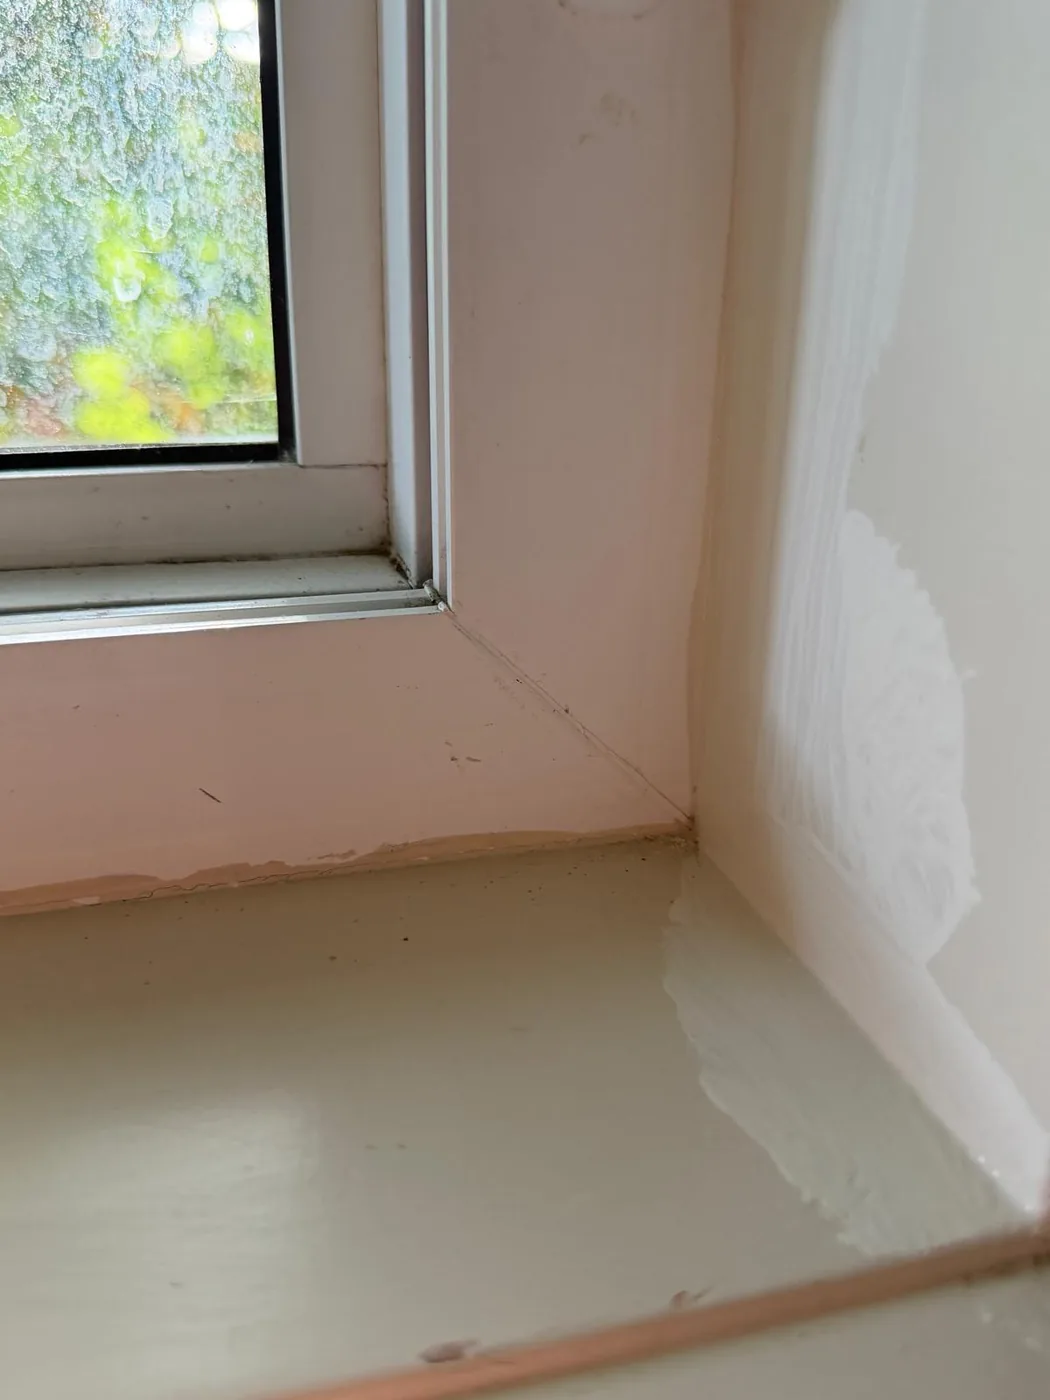
A fresh bead of caulk and paint worked into the corner of an upstairs window sill.
Perimeter caulking — the joint closed against water and air
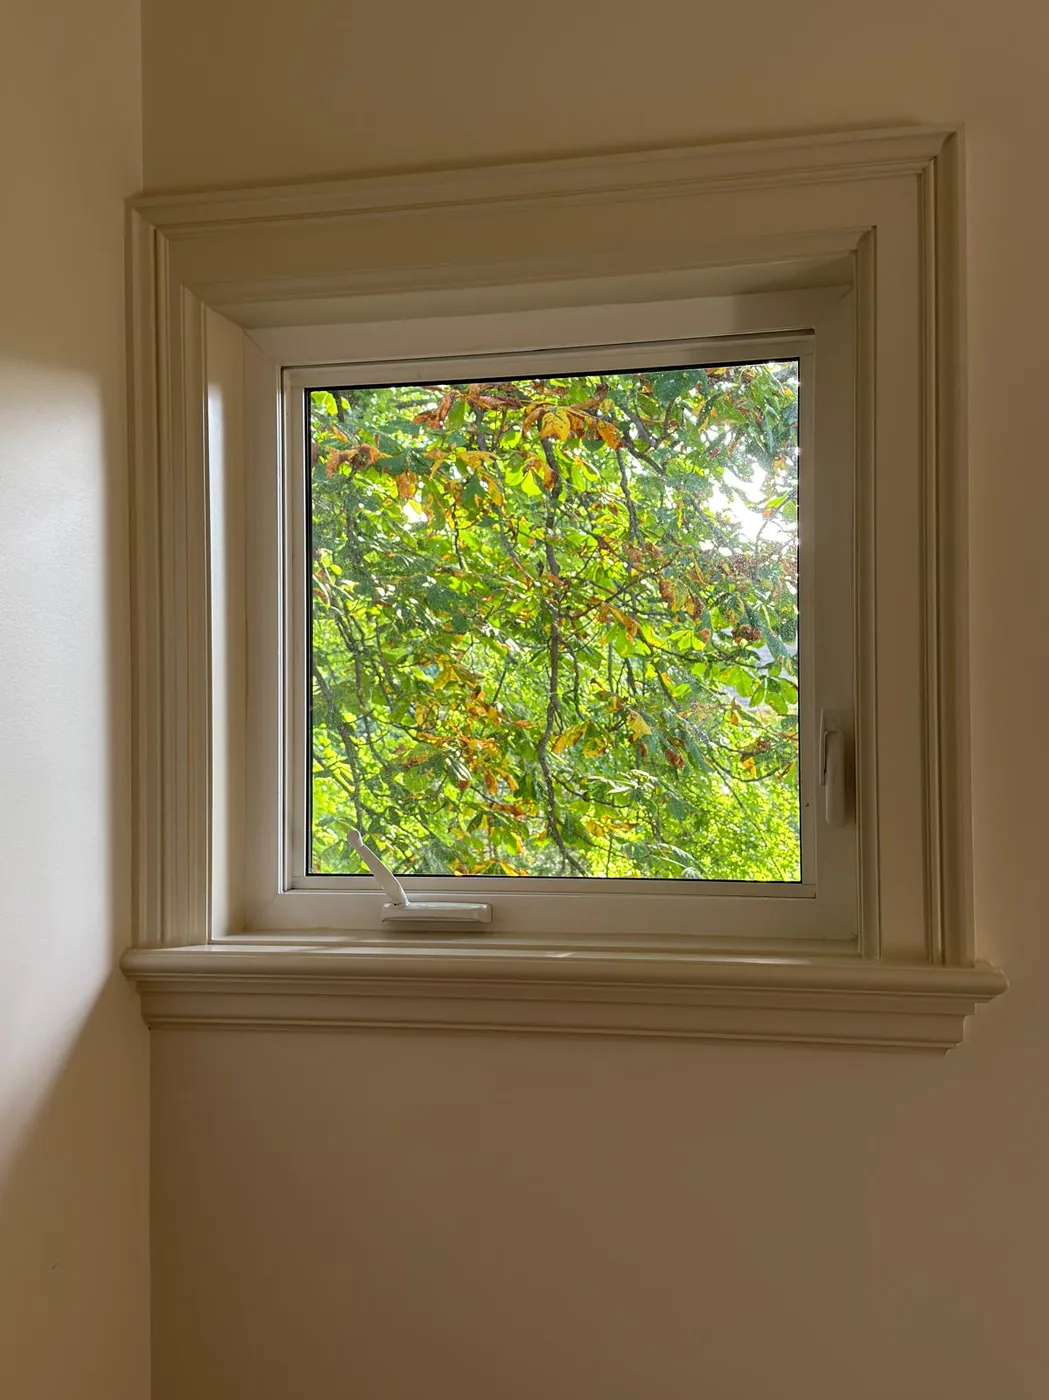
A finished upstairs window with crisp painted casing and sill, autumn leaves outside the glass.
Finished — casing and sill sharp, joint closed, colour matched
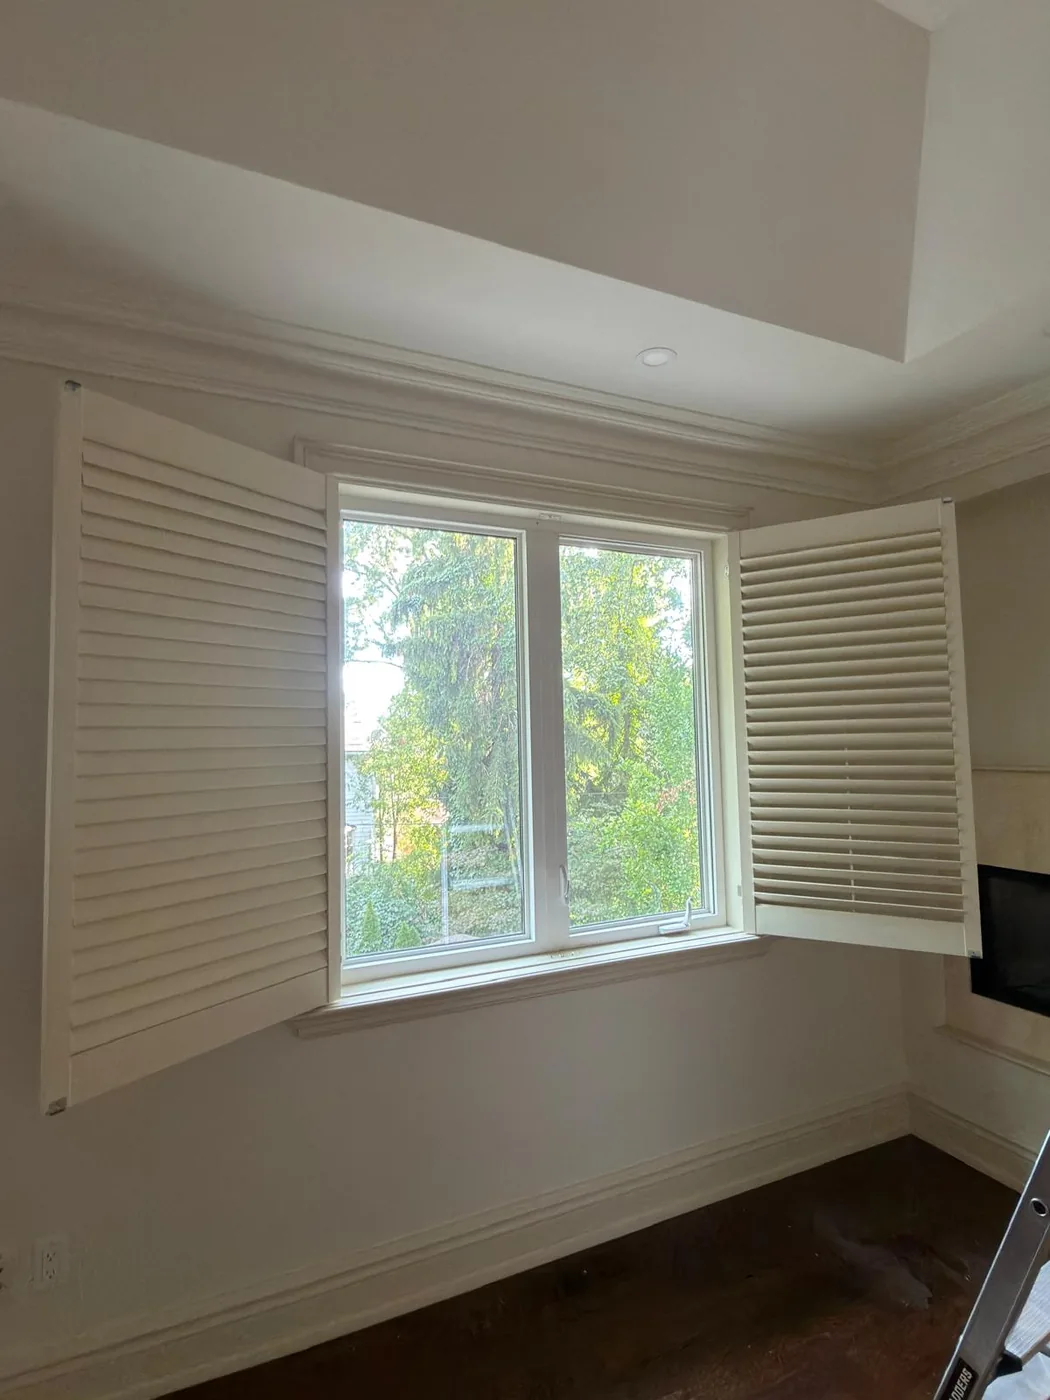
A finished upstairs window flanked by white plantation shutters after refinishing.
Finished — back behind the shutters, as if nothing had happened
Drag to Reveal

The Same Slope, Opened and Closed

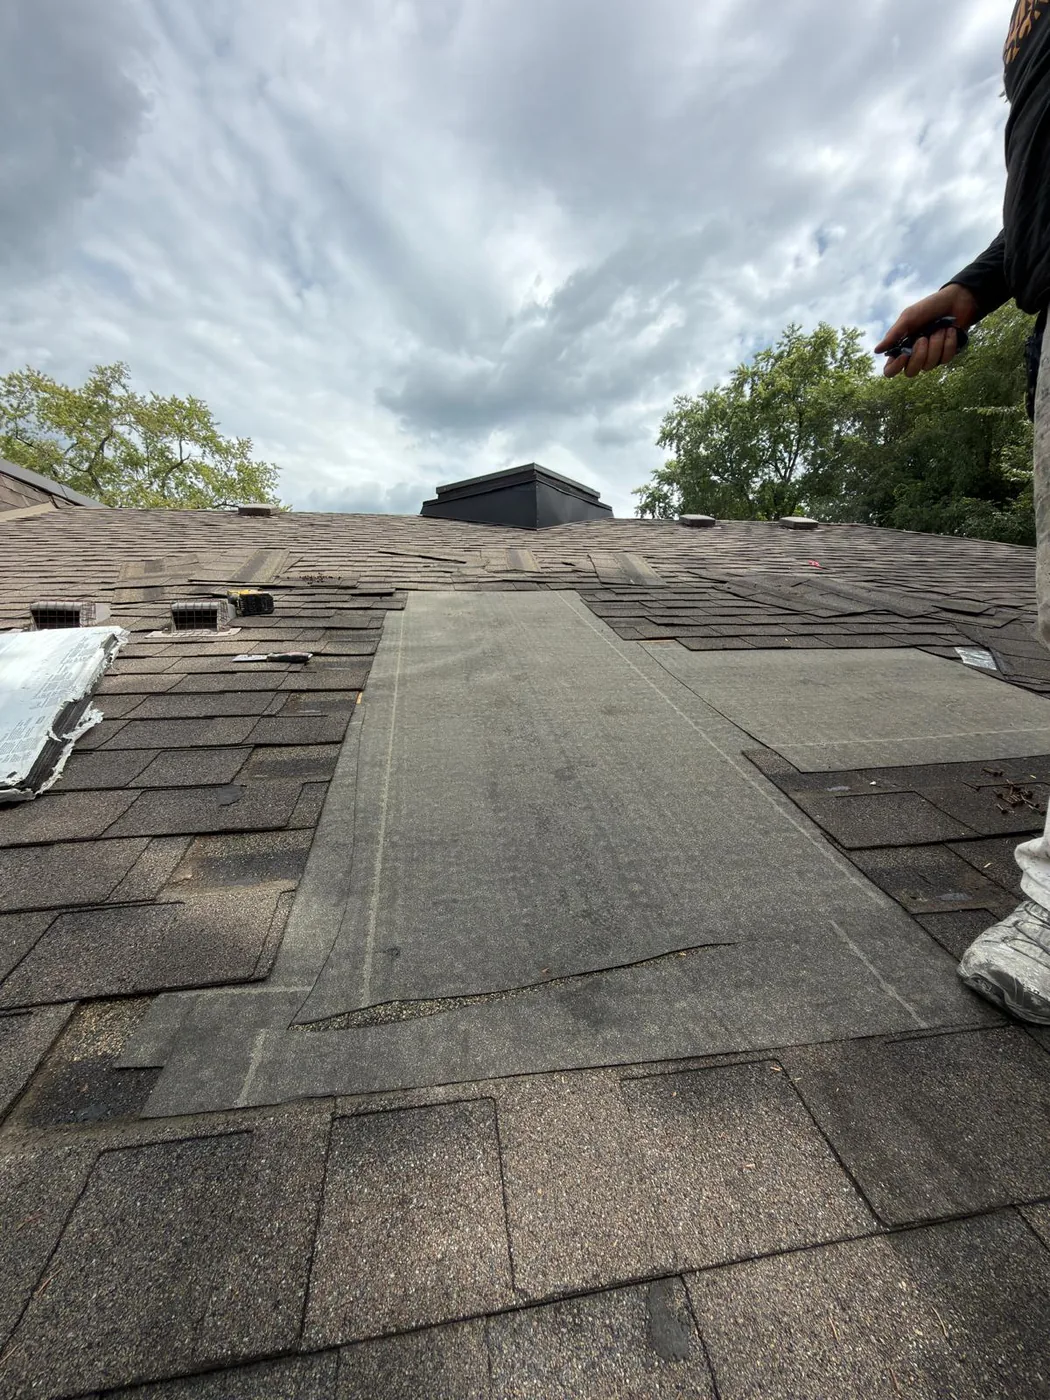
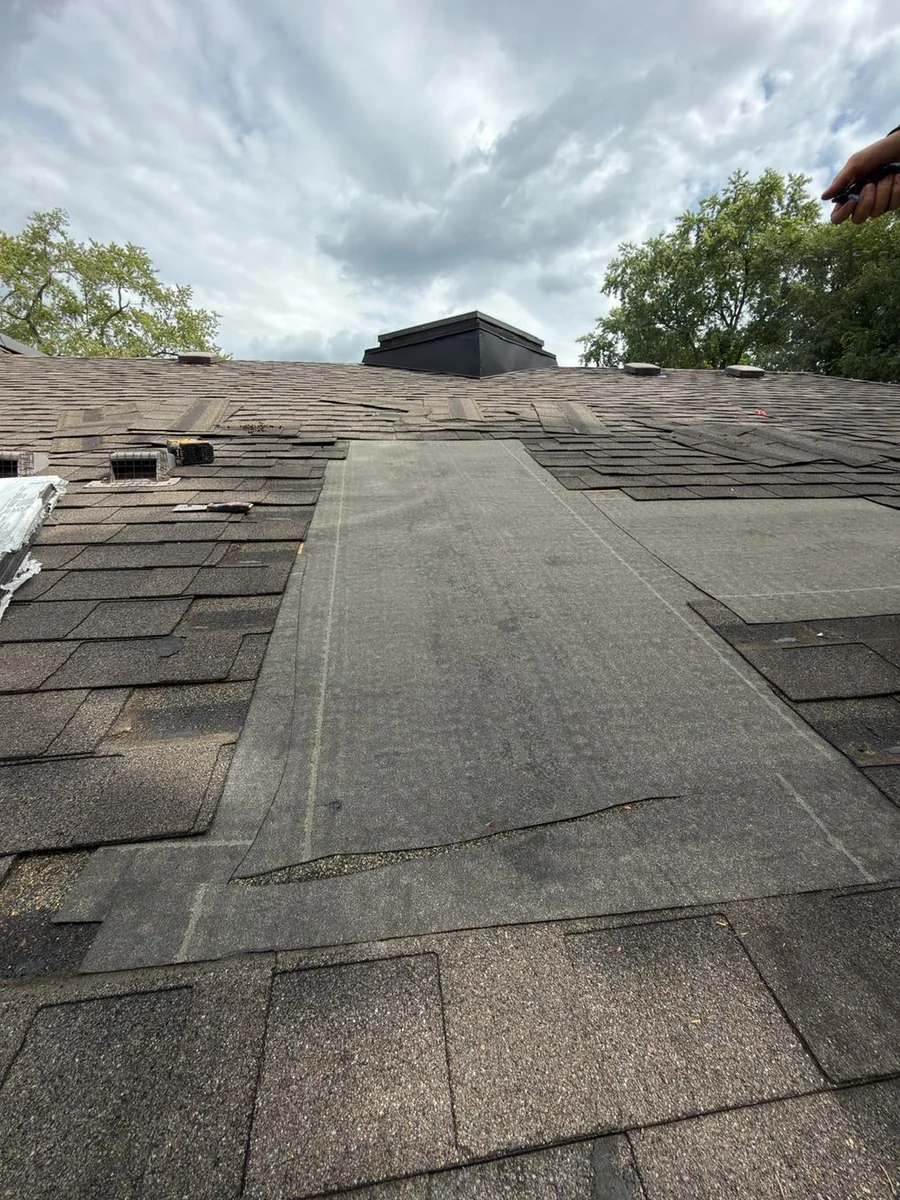
Both frames are shot up the same roof slope from the same spot — same ridge, same vent box, same tree line. Drag the slider to take the repair from open deck back to a sealed roof. Real job photos from this Willowdale property — nothing staged.

Roof Deck — Rot Exposed to Sealed and Covered

The same Willowdale roof slope after repair, the opened area sealed and covered with self-adhering membrane underlayment running up to the ridge The Willowdale roof slope opened up, shingles cut back to expose the plywood deck with the dark water stain and rot visible Before After

Before: shingles cut back, the plywood deck open and the dark water track running well past the hole that was visible from the ground. After: the opening and the seam sealed and taped, and the whole repaired area bedded under self-adhering membrane before the shingles went back on.

On The Roof

Running the Bead

Sealant worked into the seam before anything covers it. The joint is sealed first, taped second, and only then does the membrane go over the top.
What Was Done

Scope Breakdown

01

Access & Protection

  • Engineered scaffolding and fall protection set before work started
  • Ground and landscape protected, adjacent finishes masked
  • Set-up and take-down carried in the scope, not added after
02

Find the Damage

  • Roof opened up beyond the visible hole to the extent of the water track
  • Rotted deck section cut back to sound material
  • Small voids filled with foam from inside and the weak section reinforced
03

Seal, Tape & Cover

  • Sealant worked into the opening and along the seam in the sheathing
  • Sto tape set over the repaired opening and the full seam line
  • Self-adhering membrane underlayment bedded over the whole repair
04

Shingles & Drainage

  • New shingles bedded in sealant; sound existing courses retained, torn ones removed
  • Additional fixings through the shingle courses over the repair
  • Interior membrane bedded to carry any future water out to the gutter line
  • Gutters cleared of packed debris and re-pitched to fall properly
05

Windows & Close-Out

  • Water-damaged wood at the affected window removed and made good
  • All 12 upstairs windows repaired, sanded, prepped and cleaned
  • Full perimeter caulking against water entry and air infiltration
  • Repainted in a colour matched to a sample from the existing window
  • Hose-tested, verified after real rainfall
  • Whole site cleaned out and every bag of waste removed
  • Handed back complete — homeowner satisfied
From The Homeowner

What Tony Said Afterwards

“Had a good experience with Faime for a roof leak repair. The owner was very responsive throughout and communication was always clear and thorough. He took the time to explain what they found, what needed to be done, and kept me updated during the work.”

“The roof repair guy was especially experienced and clearly knew what he was doing. The work was completed professionally and the area was properly tested afterwards.”

Tony Homeowner · verified Google review

Read every review we have →

Good to Know

Roof Leaks, Seams & Sealant

How do you find where a roof is actually leaking?

You follow the water, not the stain. Water enters at one point and travels along the underside of the deck before it shows up inside, so the wet ceiling is almost never under the hole. On this Willowdale house daylight was visible through the roof at one location during the site assessment, which gave a starting point — but once the shingles came back the water track in the plywood ran well past it. FAIME opens up to the extent of the damage that is found, not to the size of the hole that was visible from the ground.

Is a roof leak always a roofing job?

No. A large share of what people call roof leaks are failures at the interruptions — flashing, seams, penetrations and sealant joints — rather than failures of the roof field itself. That is envelope work. On this project the repair was a flashing, sealant and deck scope: the opening and the seam in the sheathing were sealed and taped, self-adhering membrane was bedded over the repair, and the shingle courses above it were reset. FAIME is a building envelope and finishing contractor and does not sell roof replacement.

Why tape and seal the seam as well as the hole?

Because the hole is the symptom and the seam is often the path. There was a line running across the plywood where two sheets met, and a joint like that will move, open and take water long after a patch over the hole alone would have looked finished. Sealant was worked into the opening and along the line, Sto tape was set over both, and only then was the membrane bedded over the top. Sealing the visible hole and ignoring the seam is how a repair comes back in the first hard rain.

Why were the windows caulked and painted during a roof repair?

Because that is where the water ended up. The water that came through the deck damaged the wood at an upstairs window, so making that good was part of the same scope. Once the crew was already set up on that elevation, all 12 upstairs windows were repaired, sanded, prepped, cleaned, caulked right around the perimeter to close the joint against water and air, and repainted in a colour matched to a sample taken from the existing window. One set-up, one access cost, one visit.

How do you know the leak is actually fixed before you leave?

You test it while the access is still standing. The repaired area was run with a hose and worked deliberately, not sprayed briefly, because a joint that passes a quick pass will still fail under sustained water. The area was checked afterwards and came up dry. It has since been through real rainfall with no recurrence. FAIME would rather find a problem while the scaffold is still up than have the homeowner find it in February.

Does FAIME work in Willowdale and North York?

Yes. FAIME Construction works across North York — Willowdale, Newtonbrook, Bayview Village, Don Mills — and the wider Greater Toronto Area. FAIME was established in 2021 with crews on the tools since 2009, is WSIB Active under Class G5, carries $2M general liability insurance, and backs its workmanship with a 2-year warranty. Book a free on-site visit and get an itemized written quote.

Keep Exploring

More Projects

Got a Leak You Cannot Place?

We open up to the damage, not to the stain. Free on-site visit, an itemized written quote, and a 2-year workmanship warranty — across the Greater Toronto Area.

Google Reviews

Happy With Our Work?
Tell Google.

Reviews help GTA homeowners and contractors find a trusted specialty team. If we earned your confidence, we'd be grateful for 60 seconds of your time.

Leave Us a Google Review

Takes 60 seconds — helps us more than you know

Call Now WhatsApp