Home foundation refinished in tinted stucco colour-matched to the brick — FAIME exterior foundation project
Home/Projects/Exterior Foundation Refinishing
Foundation Refinishing

Exterior Foundation Refinishing

Toronto, Ontario 2026 Full House Perimeter Completed ✓
Location
Toronto, ON
Year
2026
Category
Foundation Refinish
Scope
Full Perimeter
Status
Completed ✓
Project Scope

Old Stone Veneer Out,
A Clean Stucco Wrap In

FAIME Construction refinished this Toronto home's exterior foundation by stripping dated stone veneer and re-skinning the walls in a mesh-reinforced cementitious stucco system, finished in a client-selected tinted colour matched to the brick. The full perimeter was masked and protected first, so the finish lands crisp and dead-straight at the brick line. Free GTA site visit and written quote within 48 hours.Exterior foundation refinishing · Toronto & the GTA · 15+ years' trade experience · WSIB Active · $2M CGL

Project Overview

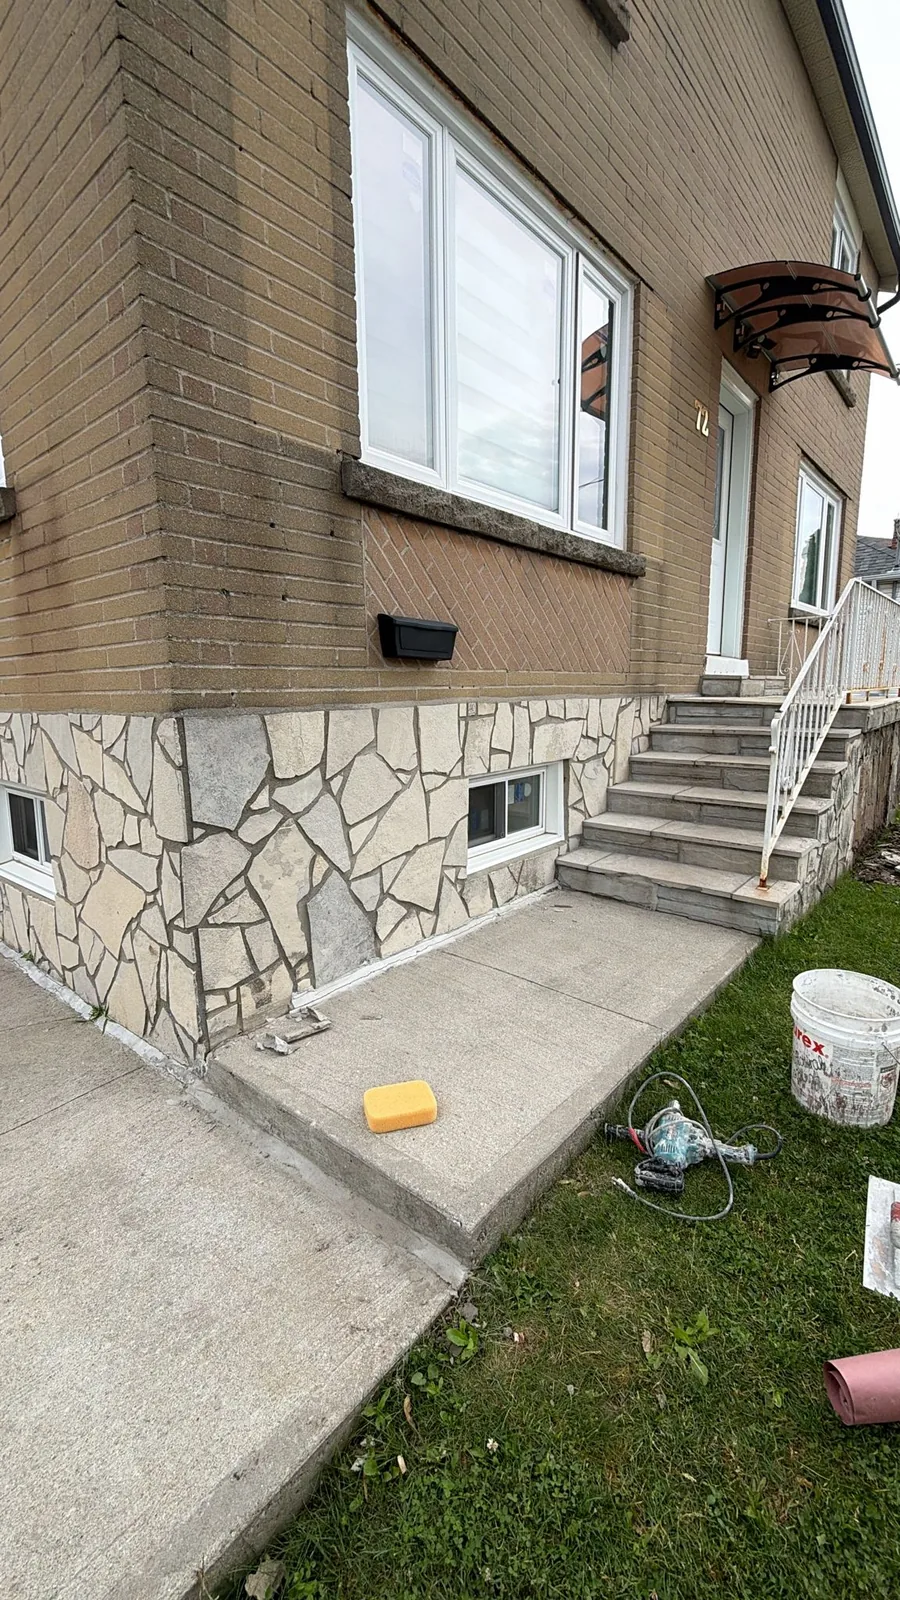
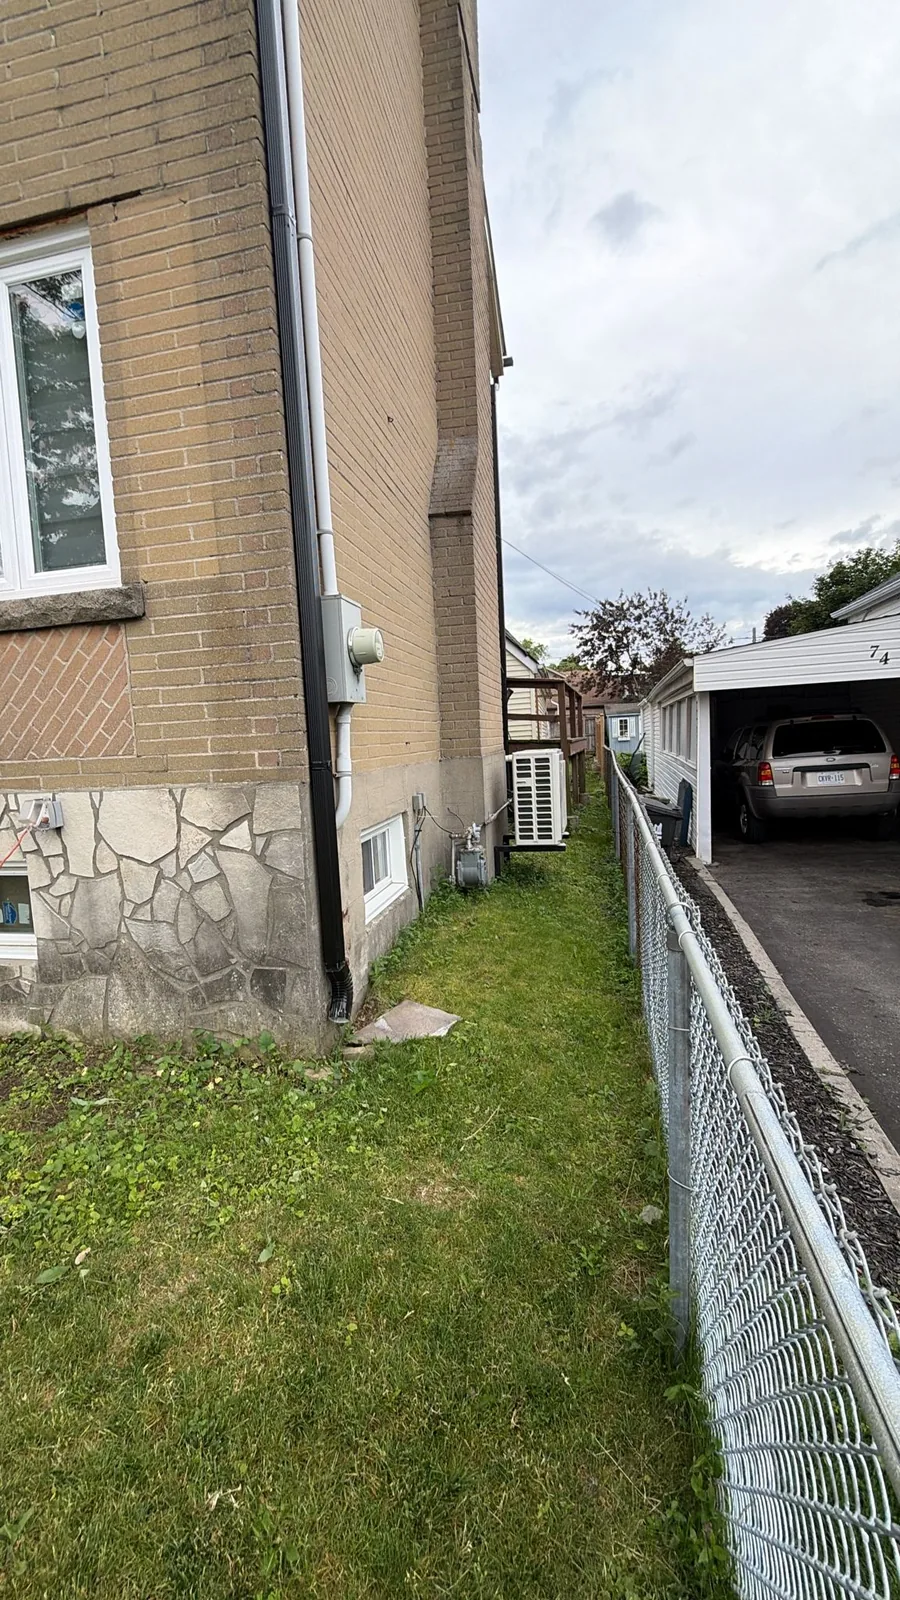
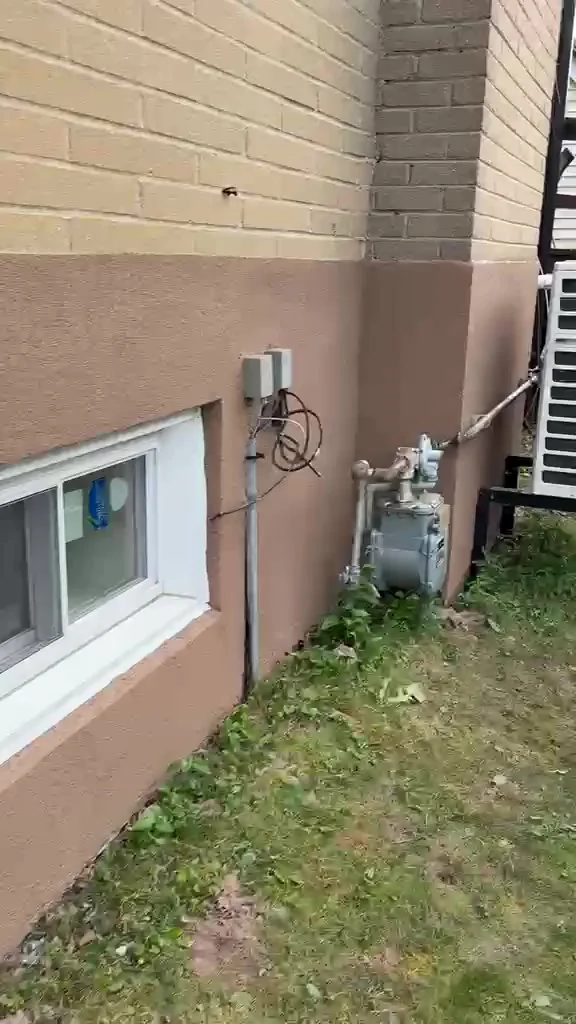
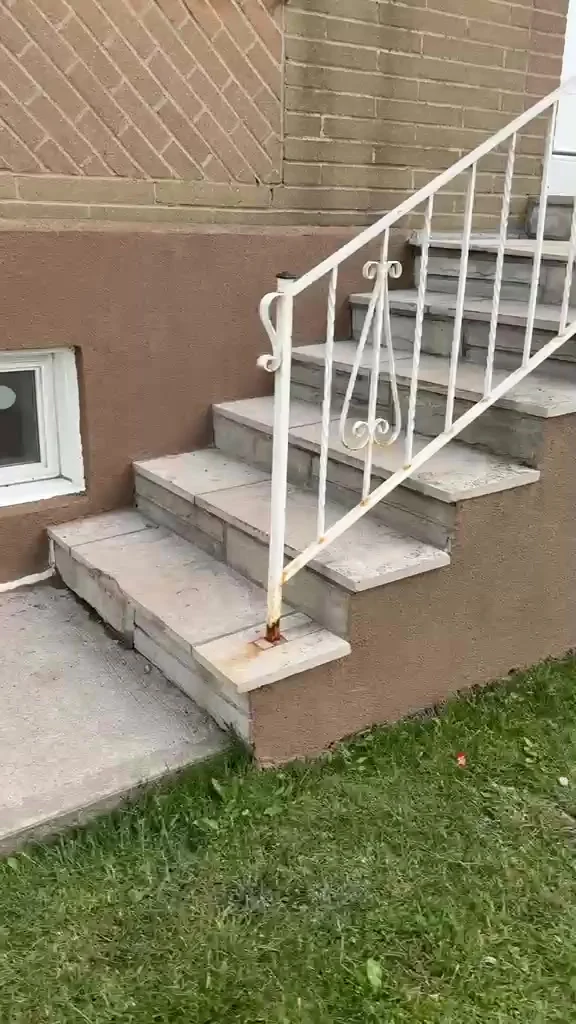
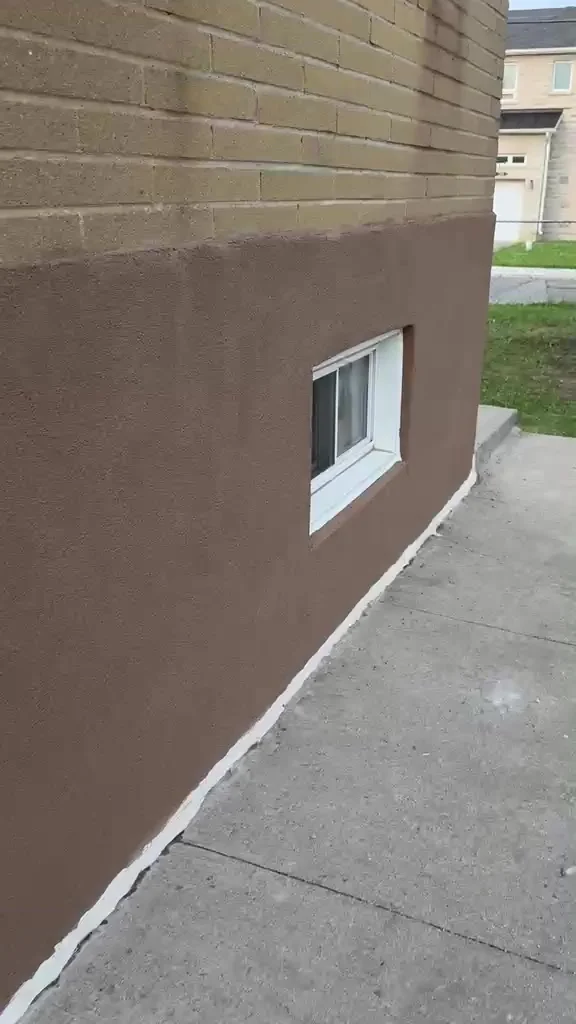
This home's foundation walls were clad in dated stone veneer with cracking and previous patch failures in the parging behind it. FAIME started by masking and protecting the whole work area, then stripped the old veneer back to a sound substrate, repaired the cracks, reinforced the walls with mesh and a cementitious base coat, and finished the full perimeter — front, sides, and around every basement window — in a tinted stucco the homeowner chose to match the brick above. The result reads as part of the house, not a patch. Every stage is documented below with photos from this exact job.

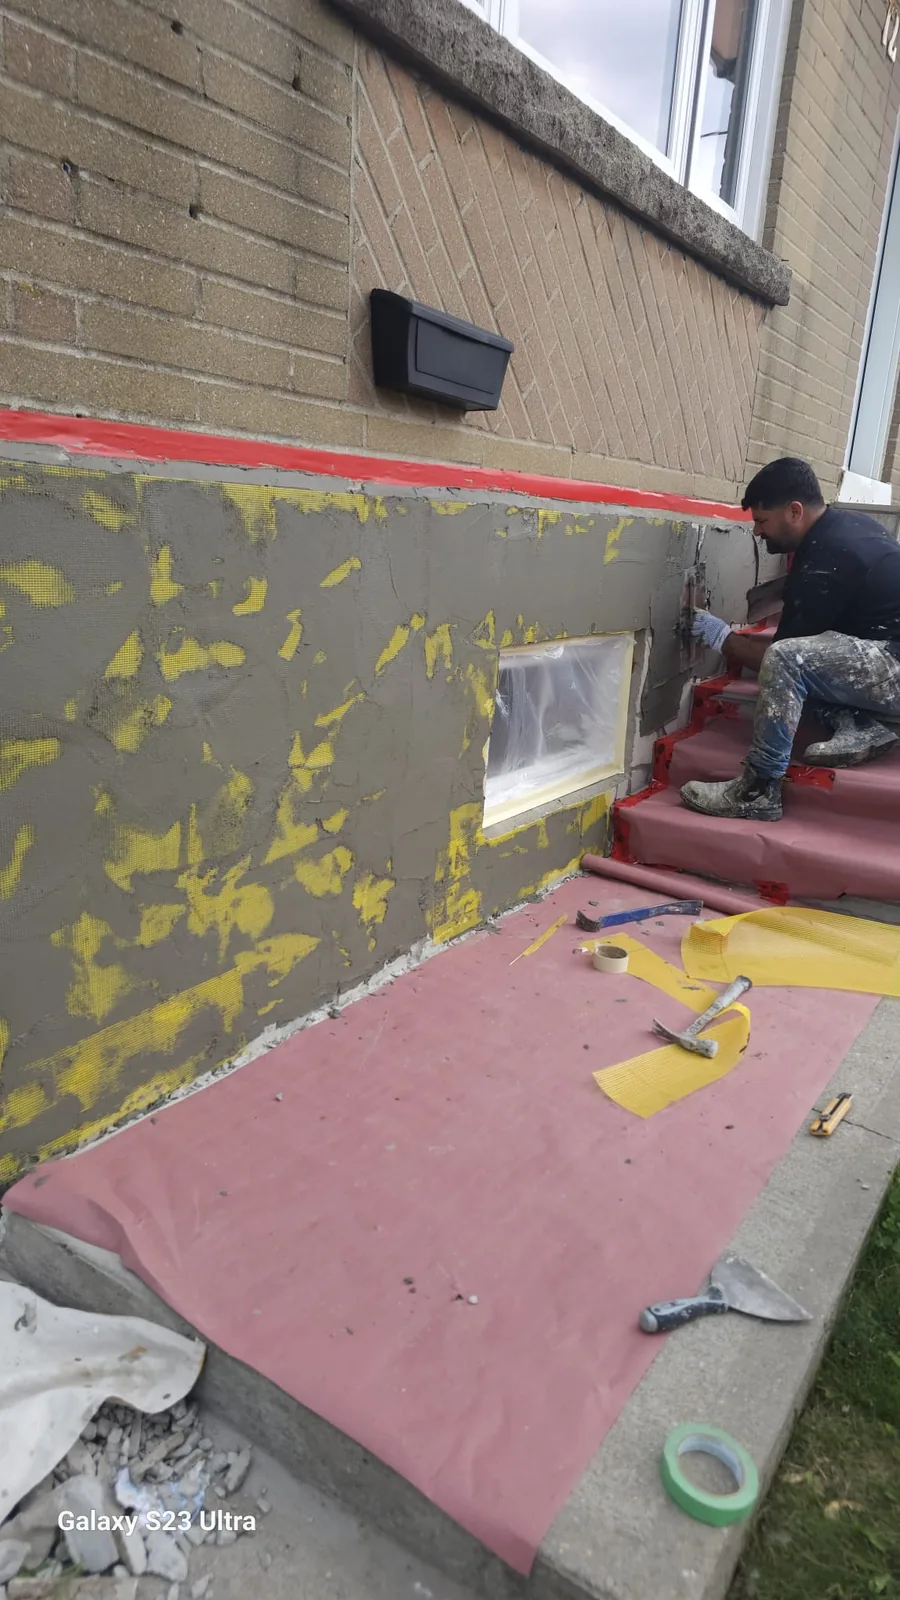
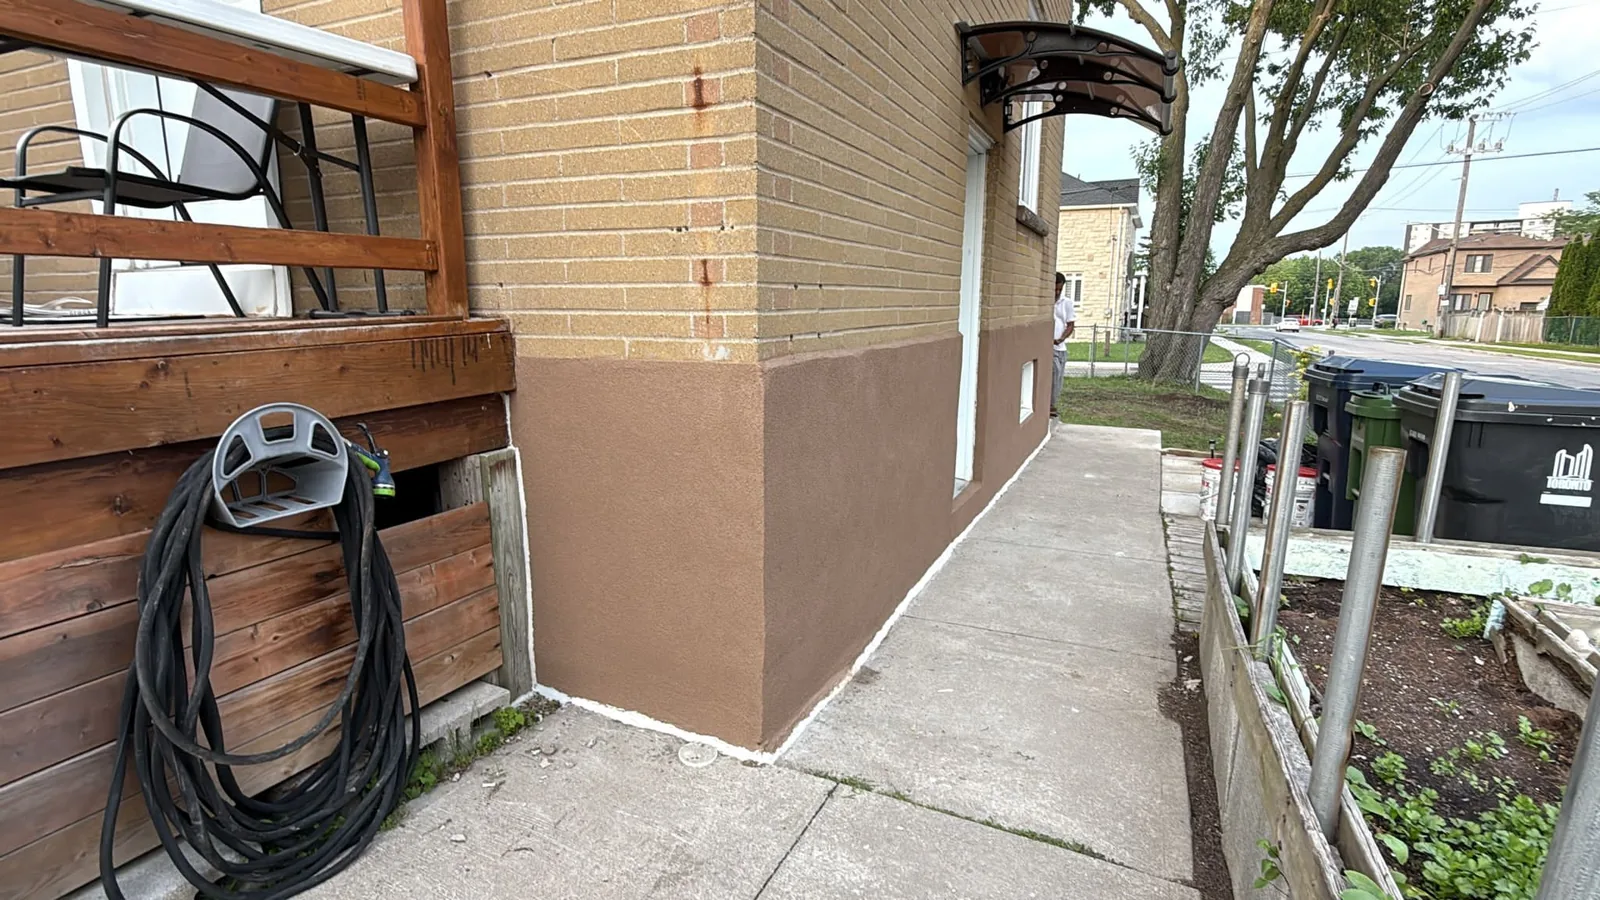
Stage 1 — Masking & Protection

Before any material was touched, the windows, walkways, porch steps, and the brick above the work line were masked off, with drop sheets and protection laid over the sidewalk, steps, and garden beds. Setting this up first keeps the whole property clean through the messy stripping that follows — and it is the reason the finished foundation stops crisp and dead-straight at the brick line, with zero finish on the glass or the concrete.

Stage 2 — Stripping & Crack Repair

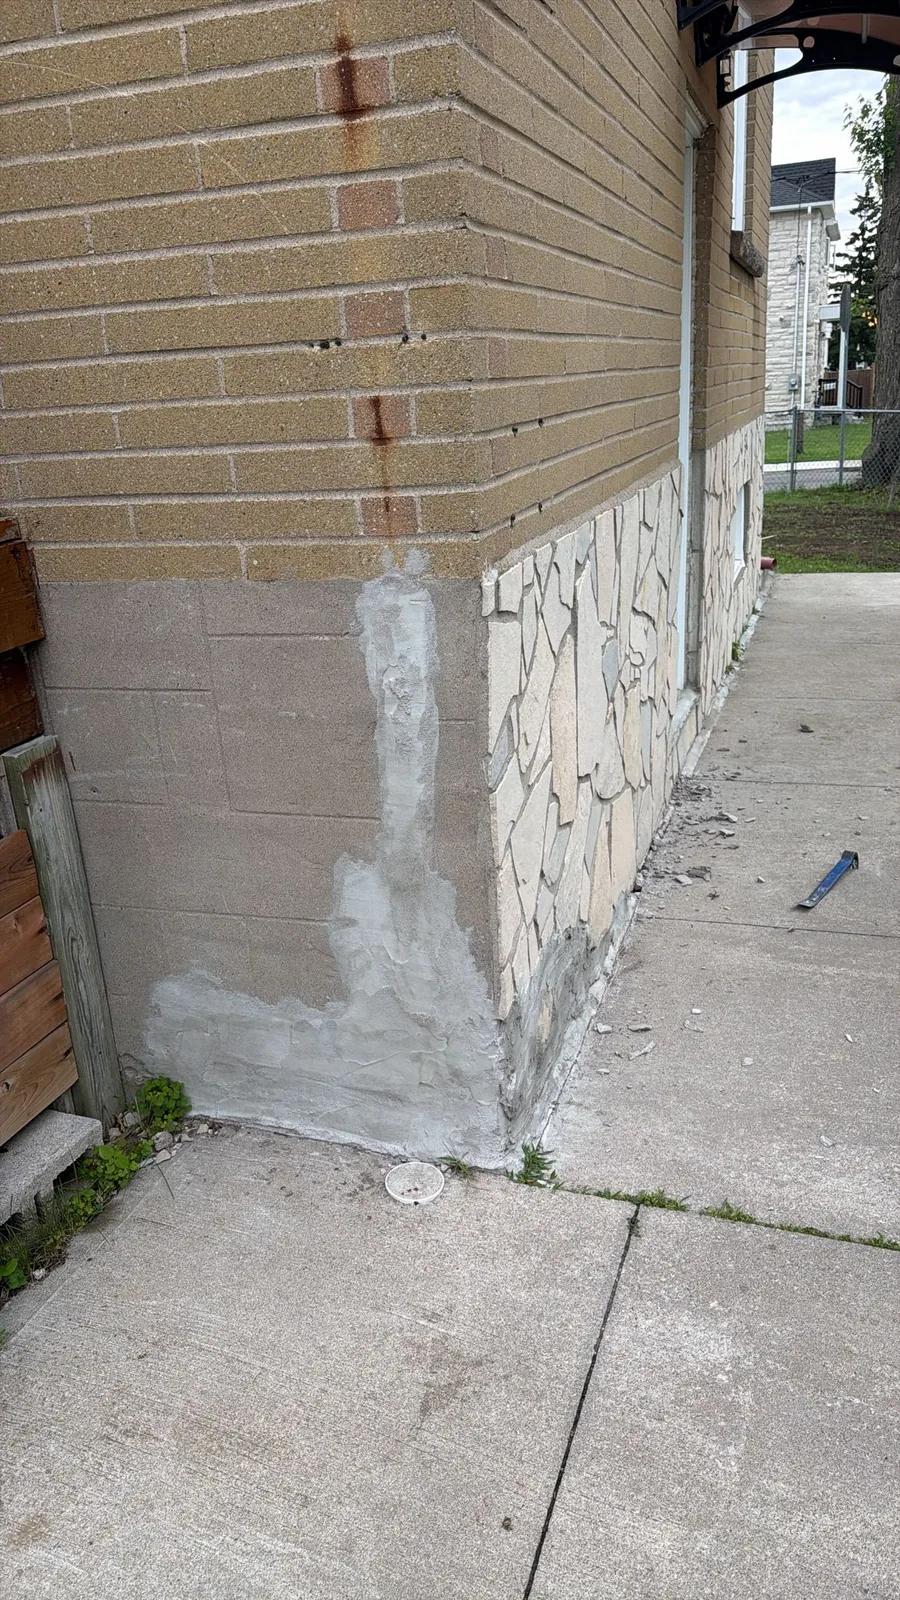
With everything protected, the aging stone veneer came off the foundation and the exposed block was cleaned down to a sound surface. Cracks and old patch failures were cut out, filled, and parged so the new system would bond to solid material instead of hiding problems underneath. Nothing went over a surface that wasn't ready for it.

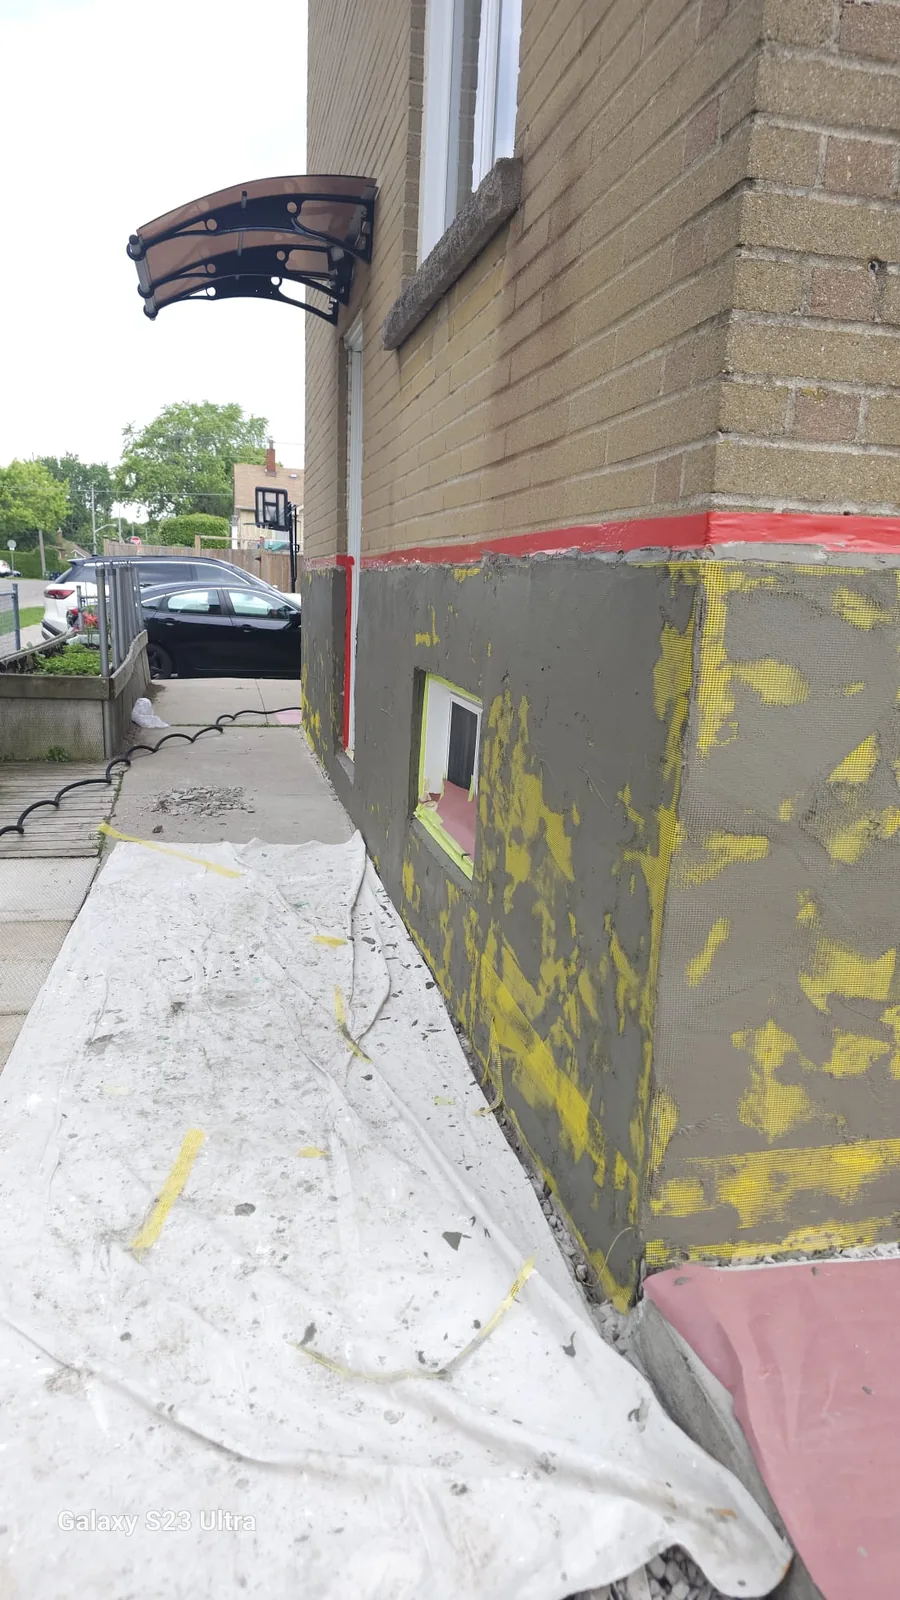
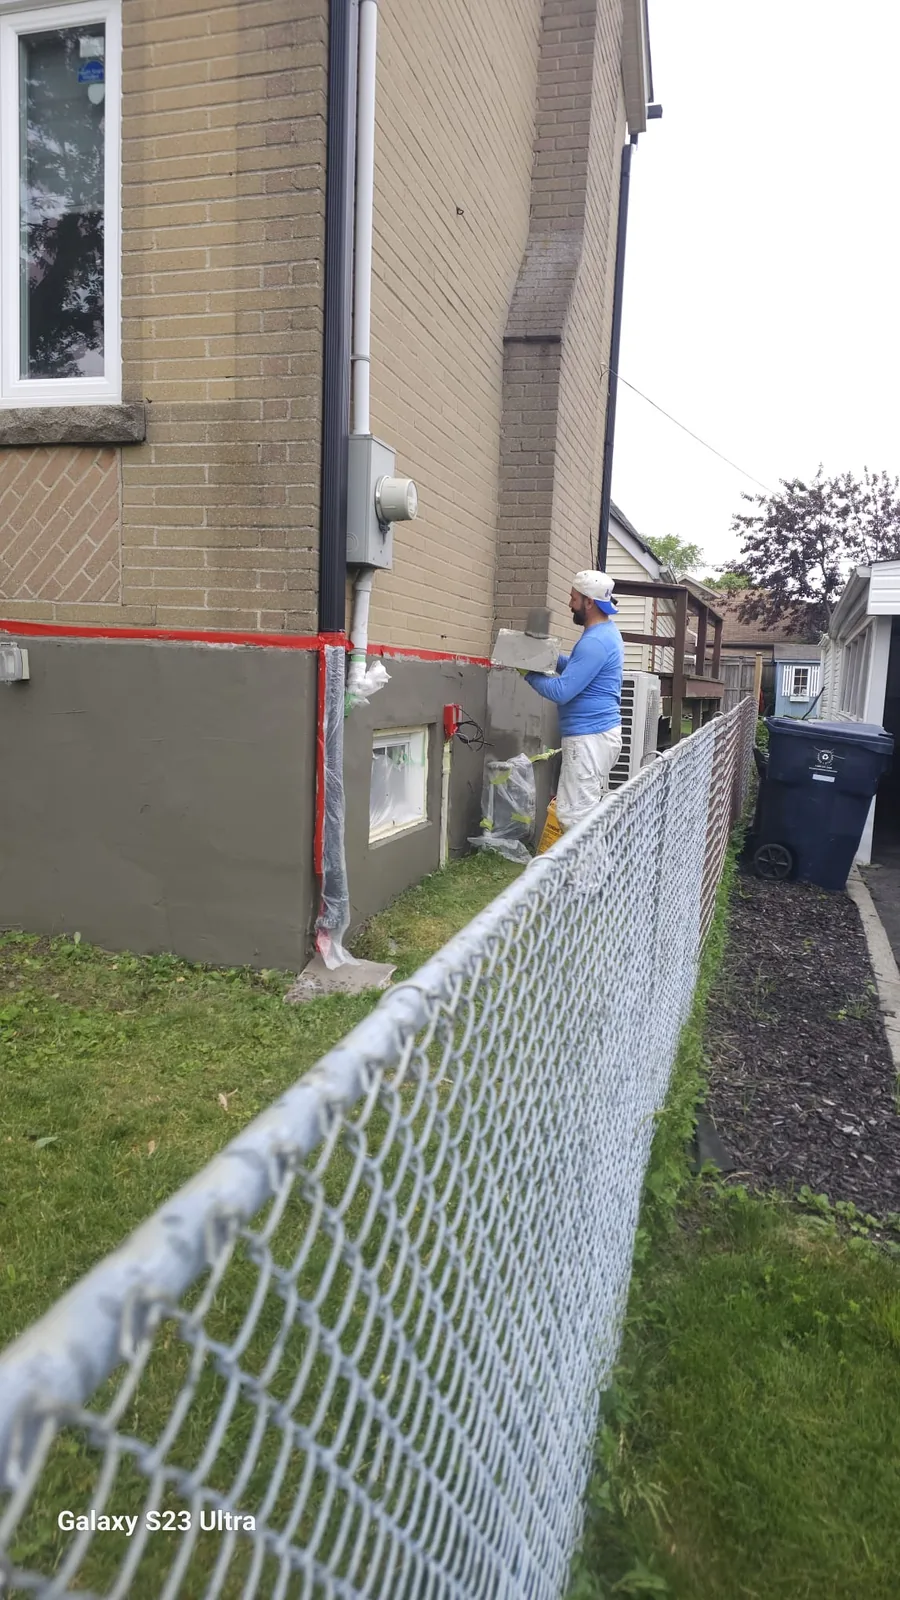
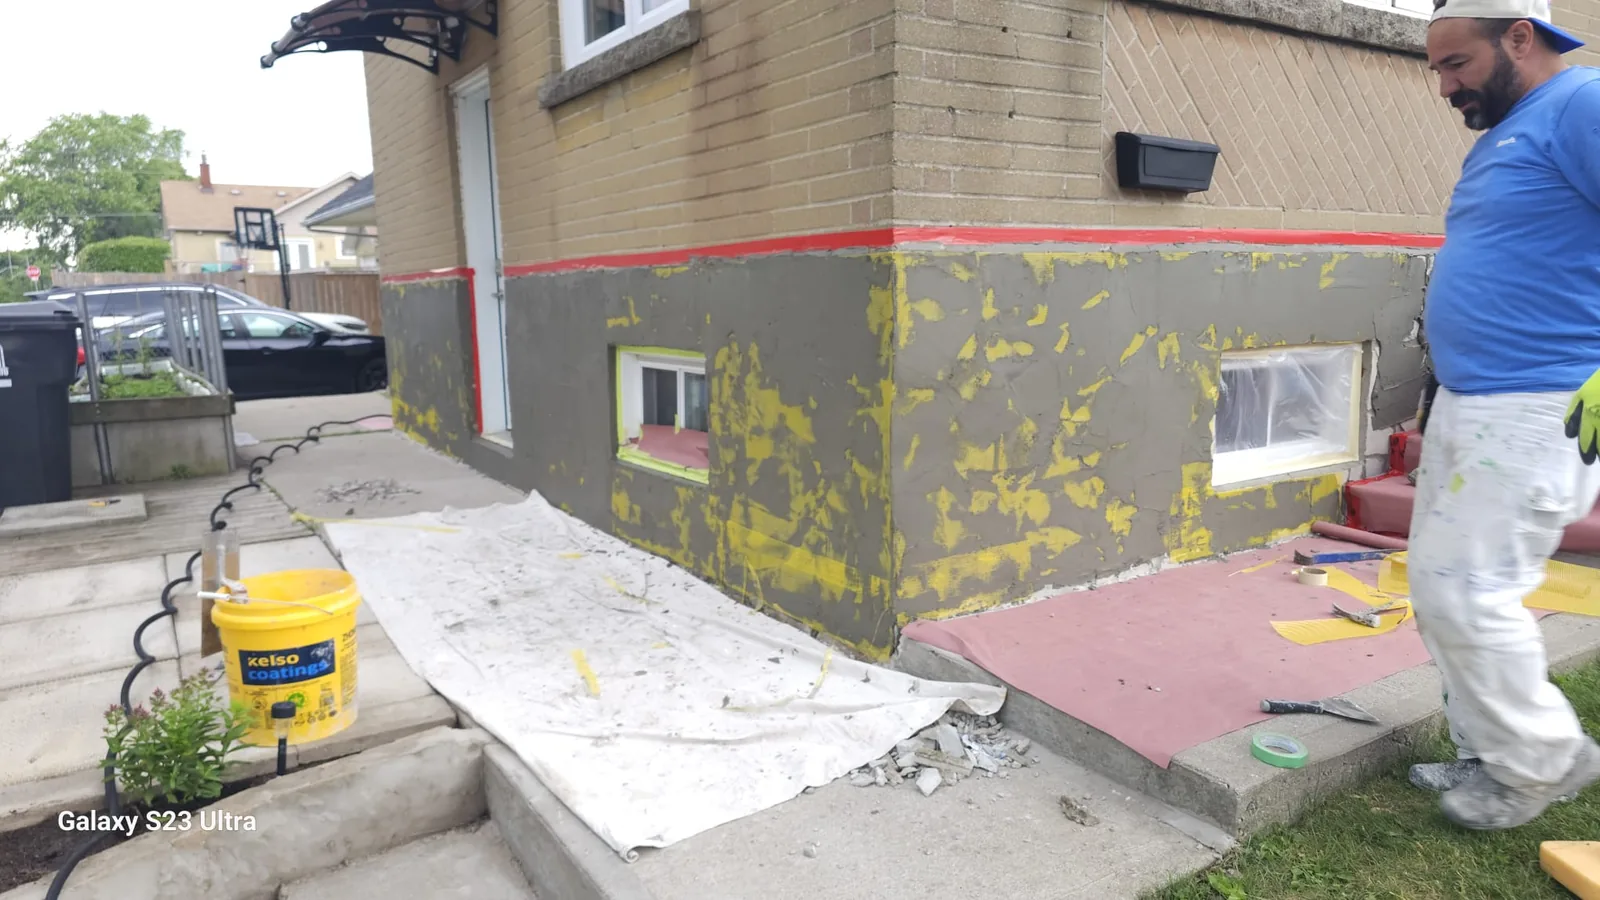
Stage 3 — Mesh & Base Coat

Fibreglass reinforcing mesh was embedded into a cementitious base coat across the full perimeter, wrapping corners and window returns in one continuous layer rather than a series of patches. A guide line kept the top edge dead straight against the brick course, and every window was framed square before the coat went on.

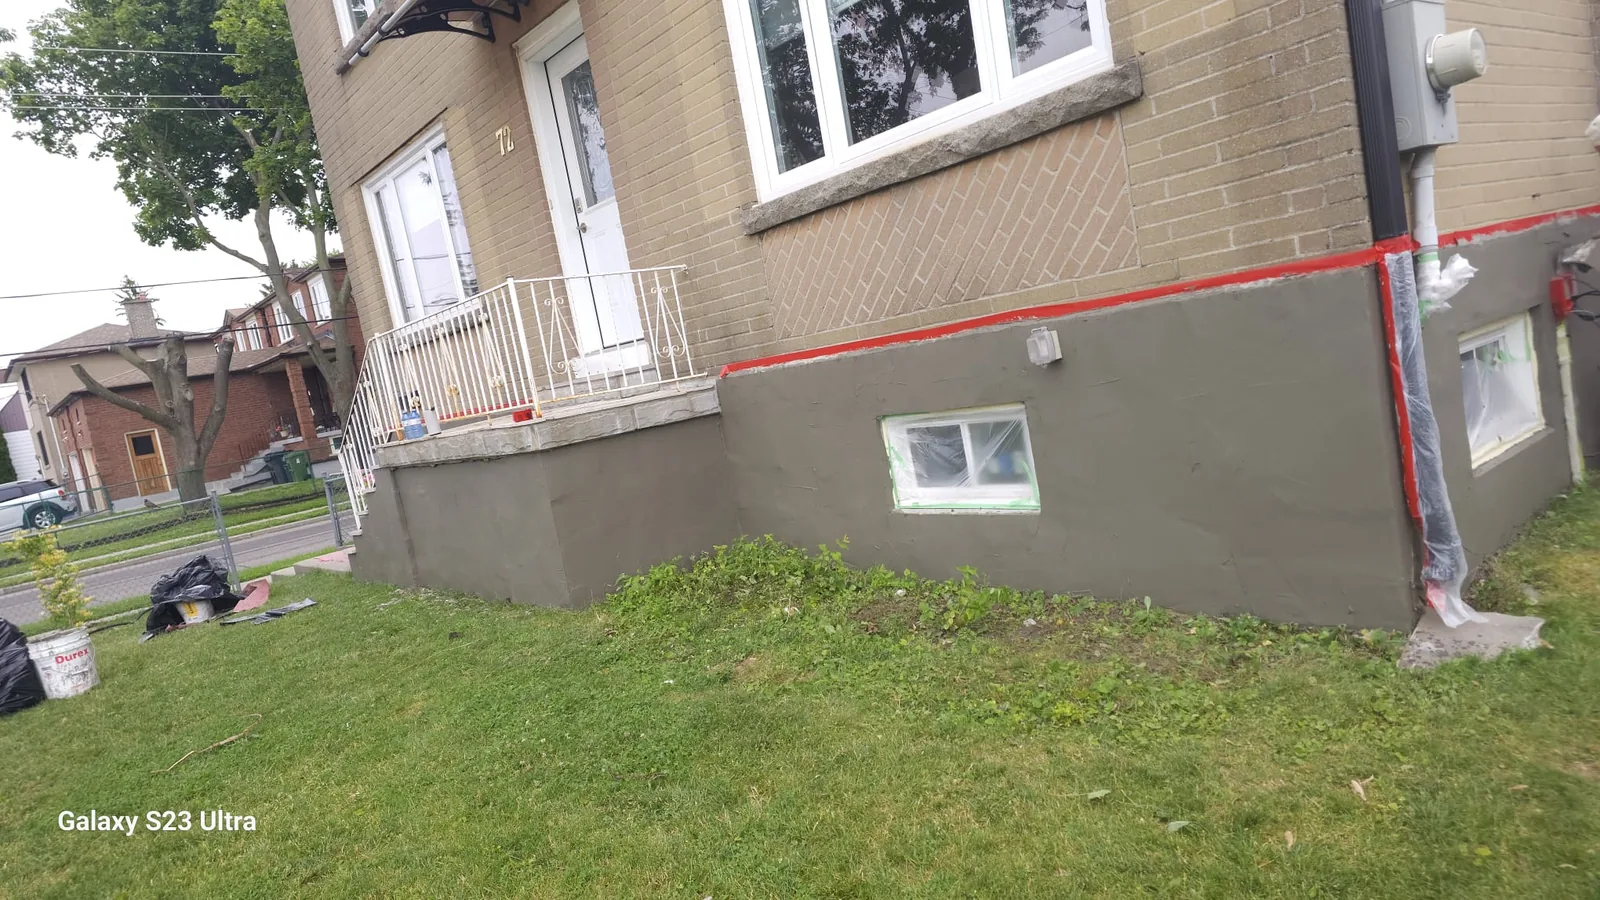
Stage 4 — Tinted Finish Coat

The final coat was a tinted stucco finish in a colour the homeowner selected, troweled to an even texture and matched to the home's brick so the new foundation blends in instead of standing out. A clean caulk line was run where the wall meets the sidewalk, masking was pulled, and the site was cleaned before the final walkthrough.

Stage By Stage

Protect — Strip — Base Coat — Finish

Home front foundation clad in dated stone veneer before refinishing
Before — dated stone veneer on the front foundation
Front entrance and steps with old stone veneer foundation before work
Before — front entrance and steps
Side wall foundation with old stone veneer and an AC unit before refinishing
Before — side wall, old veneer to be removed
Failing parging and crack repair behind the old stone veneer at the corner
Before — failing parging and cracks, patched at the corner
Fibreglass reinforcing mesh embedded in the cementitious base coat at the corner
Base coat — fibreglass mesh embedded at the corner
FAIME tradesperson hand-troweling the grey cementitious base coat onto the foundation
Base coat — troweled on by hand, edges kept straight
Base coat being worked around a masked basement window with the brick line taped off
Masking — windows and brick line protected before finish
Foundation wrapped in grey base coat around the corner with the top line kept straight against the brick
Base coat — full perimeter wrapped, top line straight
Front foundation in grey base coat with basement windows framed square
Base coat — front foundation, windows framed square
Finished foundation in tinted stucco colour-matched to the brick, crisp at the brick line
Finished — tinted stucco, colour-matched to the brick
Finished side wall foundation in tinted stucco with the AC unit and a clean caulk line
Finished — side wall, caulked tight at the base
Finished front entrance with the white railing and steps, porch foundation in tinted stucco
Finished — front entrance, steps and railing
Finished foundation wall with a dead-straight brick line and a clean caulked edge along the walkway
Finished — dead-straight brick line, caulked edge
Drag to Reveal

See the Transformation

Grab the slider and drag it side to side to compare this home's foundation before and after FAIME refinished it. Real job photos — nothing staged.

Front Foundation — Stone Veneer to Tinted Stucco

Finished front foundation in tinted stucco colour-matched to the brick Front foundation clad in dated stone veneer before refinishing Before After

The same home's front foundation — dated stone veneer stripped off and re-skinned in a tinted stucco finish matched to the brick.

Side Wall — Stone Veneer to Tinted Stucco

Finished side wall foundation in tinted stucco with a clean caulk line at the base Side wall foundation in old stone veneer before refinishing, with the AC unit and basement window Before After

The side wall by the AC unit and basement window — old stone veneer and bare block wrapped in a clean tinted finish, caulked tight at the base.

What Was Done

Scope Breakdown

01

Masking & Protection

  • Windows, steps and brick line fully masked off first
  • Sidewalk and garden beds covered with drop sheets
  • Whole work area protected before any demolition
02

Stripping & Crack Repair

  • Dated stone veneer removed from the foundation walls
  • Cracks and old patch failures cut out, filled and parged
  • Substrate cleaned to a sound surface before coating
03

Mesh & Base Coat

  • Fibreglass reinforcing mesh embedded in the base coat
  • Full perimeter wrapped — corners and window returns
  • Top line kept straight against the brick course
04

Tinted Finish & Close-Out

  • Client-selected tinted stucco colour matched to the brick
  • Clean caulk line where the wall meets the sidewalk
  • Masking removed, site cleaned, full walkthrough
Good to Know

Foundation Refinishing FAQ

Can FAIME cover or refinish an old stone-veneer foundation?

Yes. FAIME strips dated or failing stone veneer off the foundation, repairs the cracks and parging underneath, then re-skins the walls in a mesh-reinforced cementitious stucco system. The finish coat is a tinted colour the homeowner chooses to match the brick, so the foundation reads as part of the house.

What are the steps to refinish an exterior foundation?

FAIME follows four stages: (1) mask and protect the windows, walkways, steps and brick; (2) strip the old veneer and repair cracks and parging down to a sound surface; (3) embed fibreglass mesh in a cementitious base coat around the full perimeter; (4) trowel on a client-selected tinted finish, caulk the base, and clean up.

Can the stucco finish be colour-matched to my brick?

Yes. The tinted finish coat is customized — the homeowner selects the colour and FAIME matches it to the existing brick so the refinished foundation blends in instead of standing out.

Where does FAIME do exterior foundation refinishing?

FAIME Construction provides exterior foundation refinishing, EIFS, parging and stucco work in Toronto and across the Greater Toronto Area, including Vaughan, Richmond Hill, Markham, Mississauga and Brampton. Established 2021 with 15+ years of trade experience, WSIB Active and $2M general liability insurance.

How do I get a quote for foundation refinishing?

Book a free on-site visit. FAIME assesses the foundation in person, then sends a written, no-obligation quote within 48 hours. Owner Talha Karaboga is on every job from the first site visit to the final walkthrough.

Keep Exploring

More Projects

Have a Similar Project in Mind?

Let's talk. Tell us what you're picturing and we'll put together a clear, written estimate — no obligation.

Google Reviews

Happy With Our Work?
Tell Google.

Reviews help GTA homeowners and contractors find a trusted specialty team. If we earned your confidence, we'd be grateful for 60 seconds of your time.

Leave Us a Google Review

Takes 60 seconds — helps us more than you know