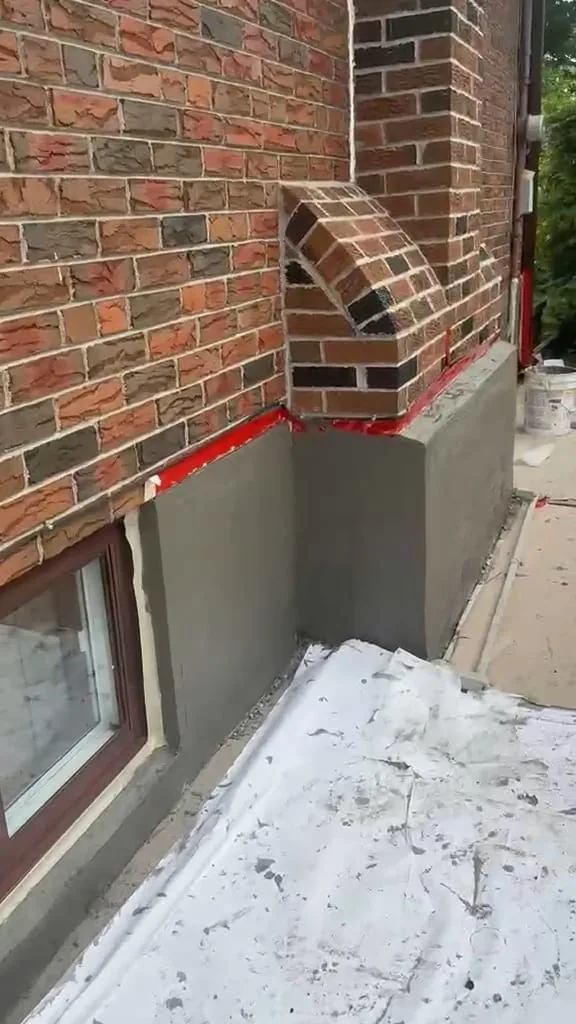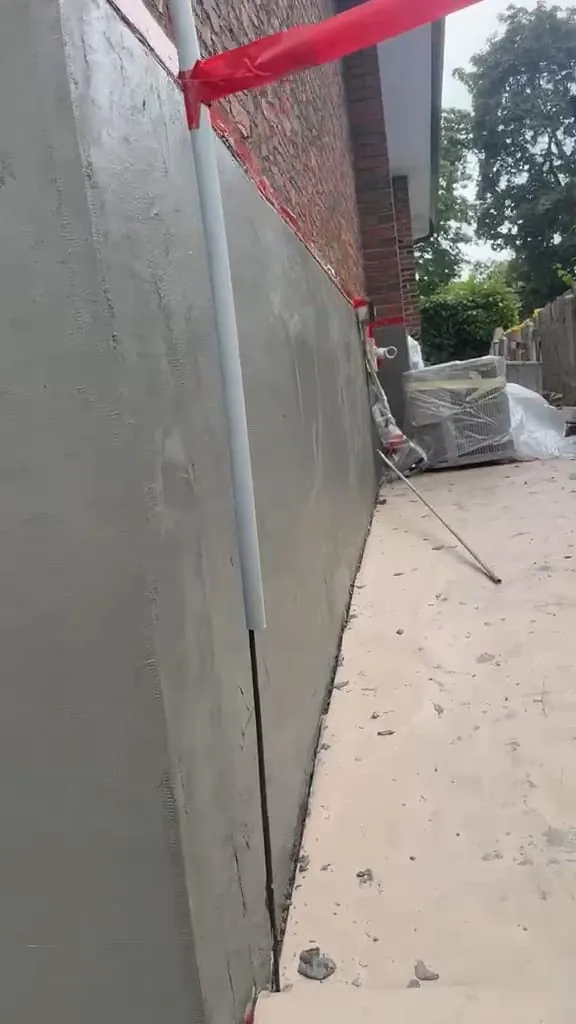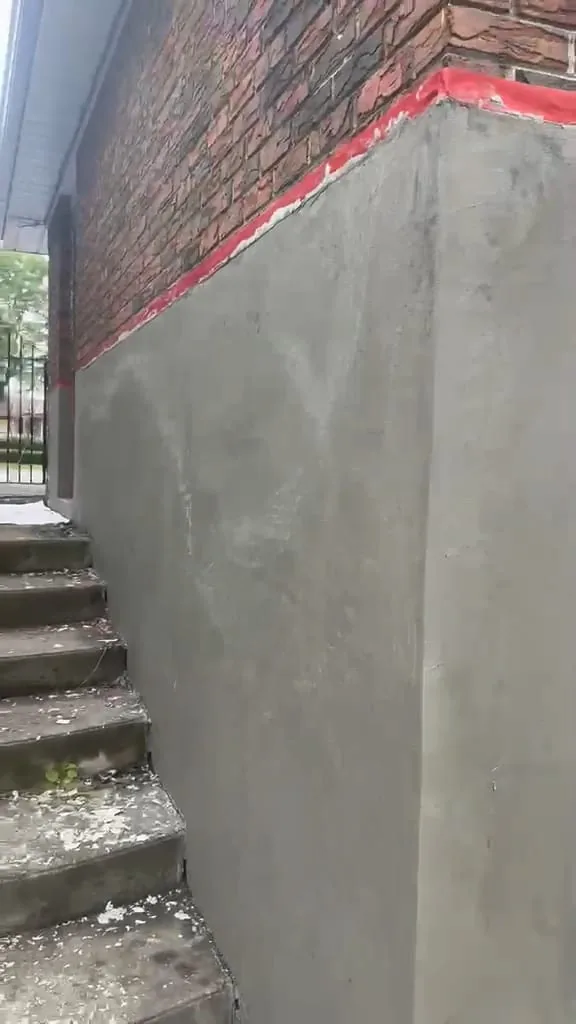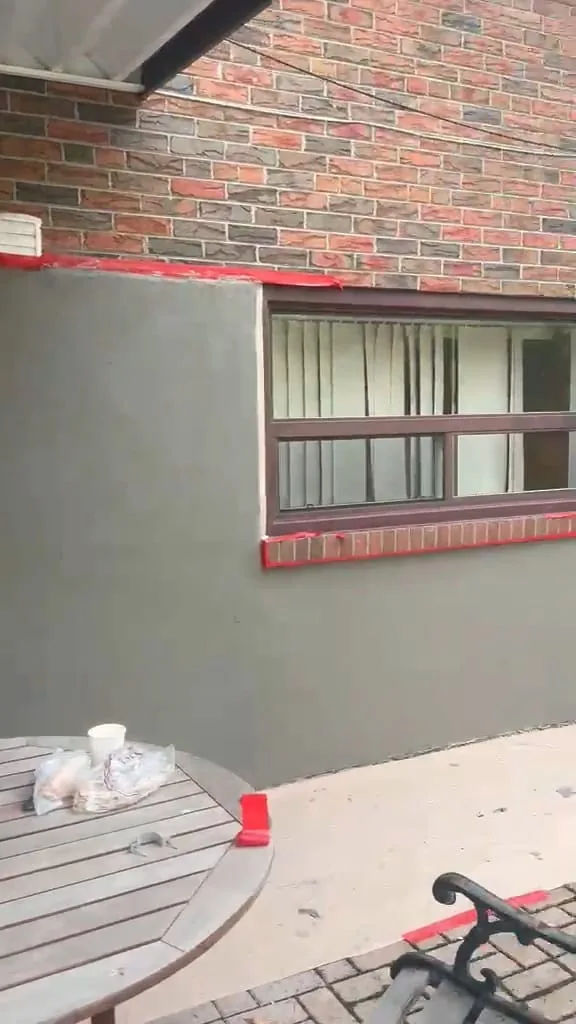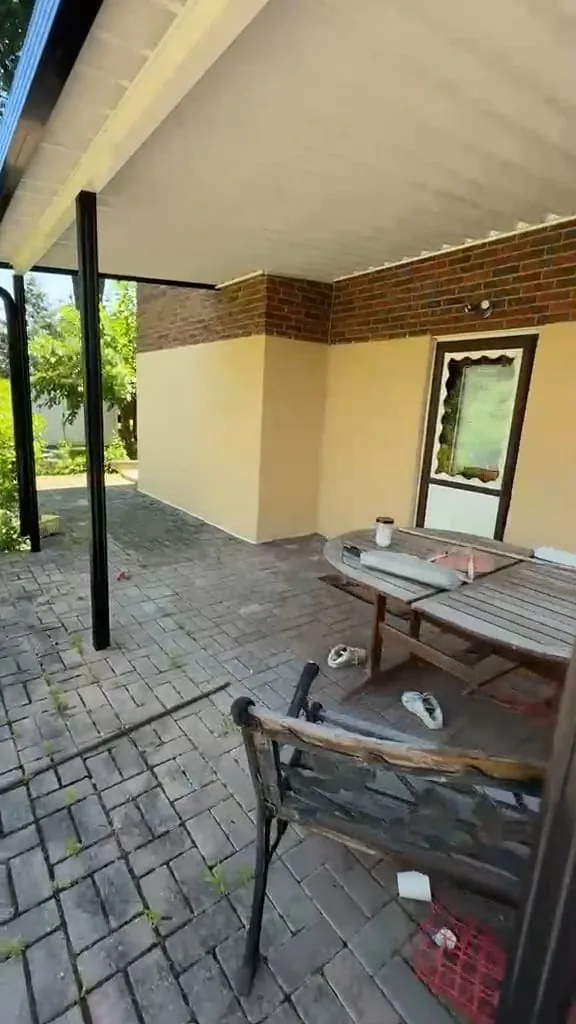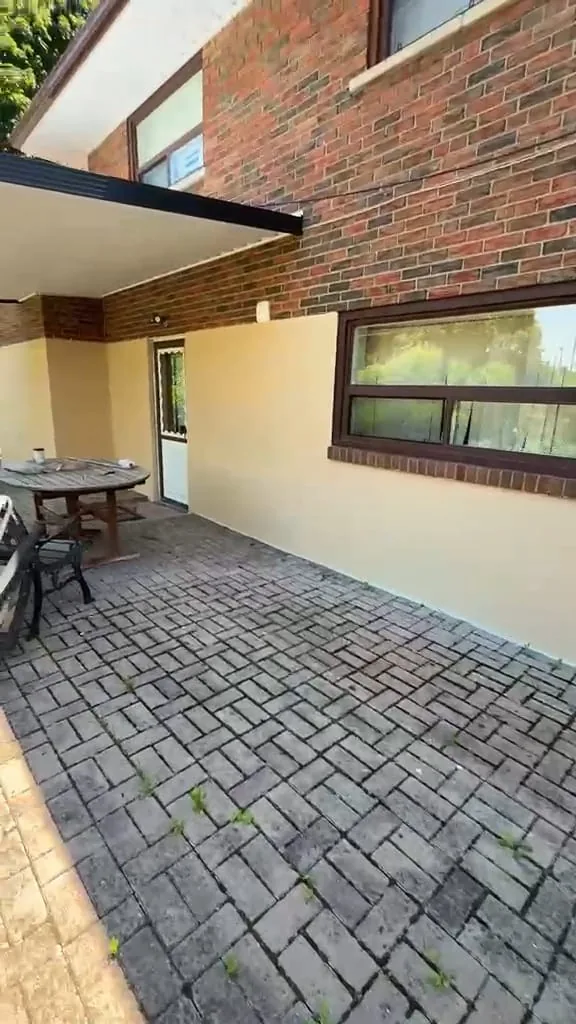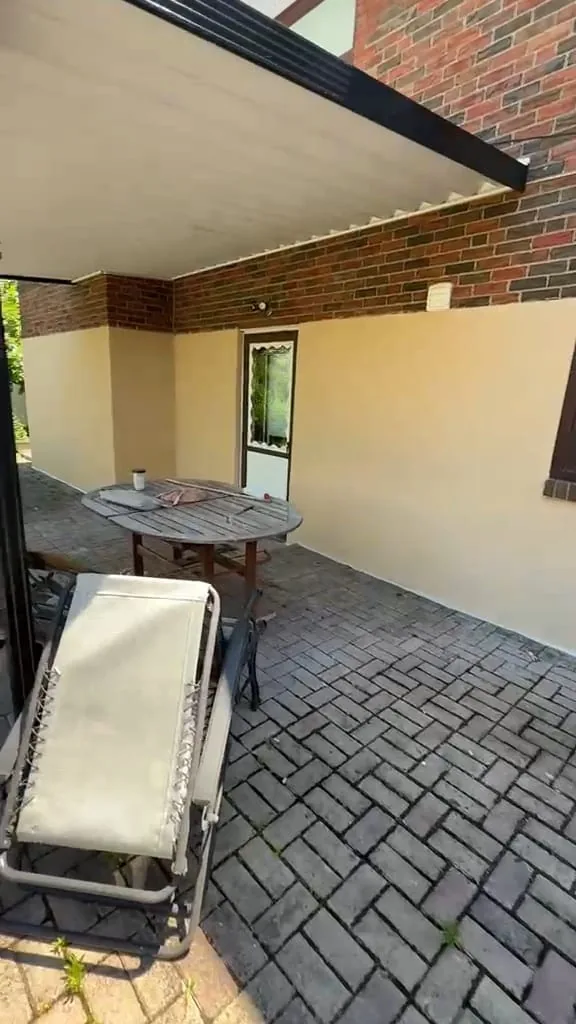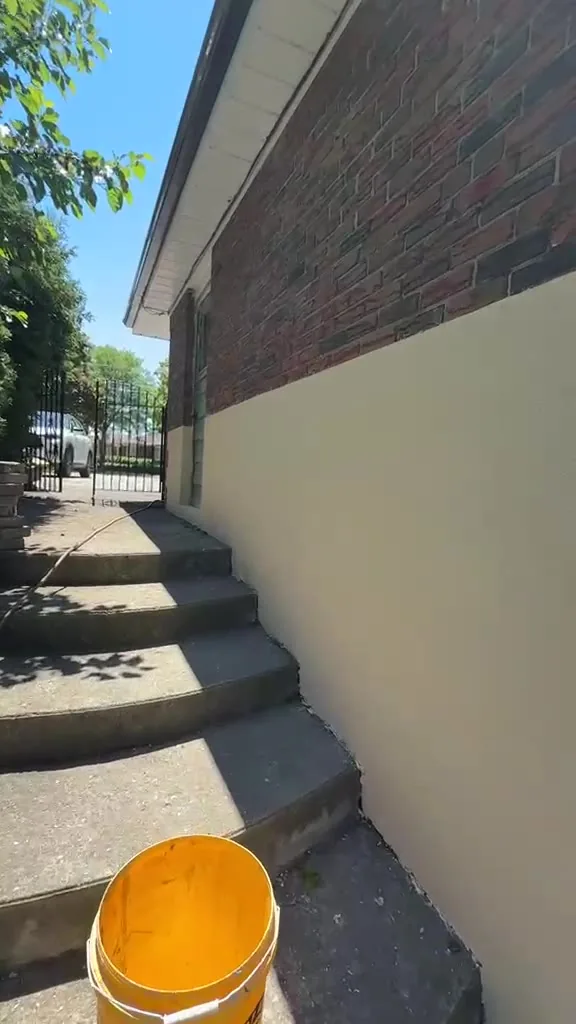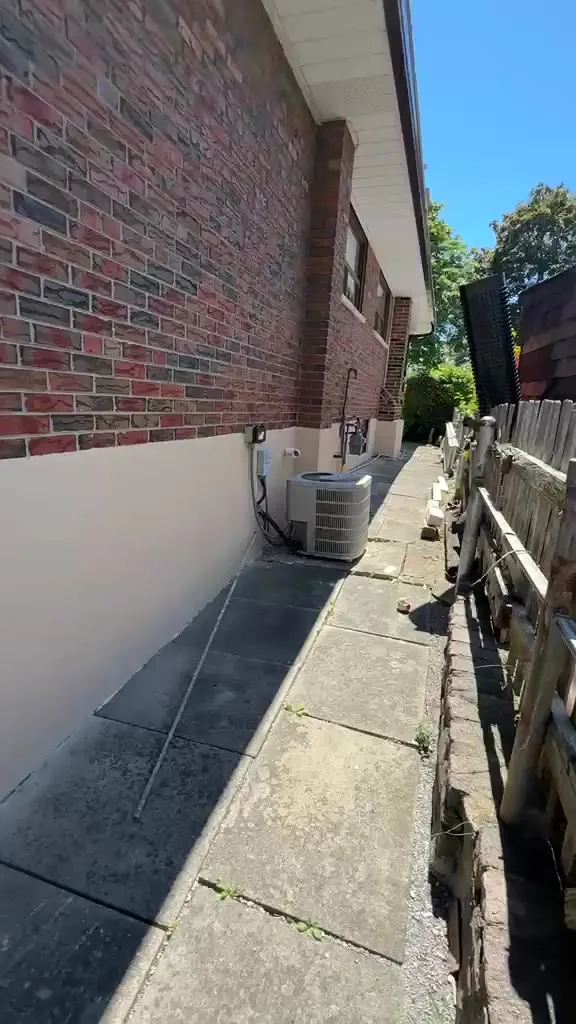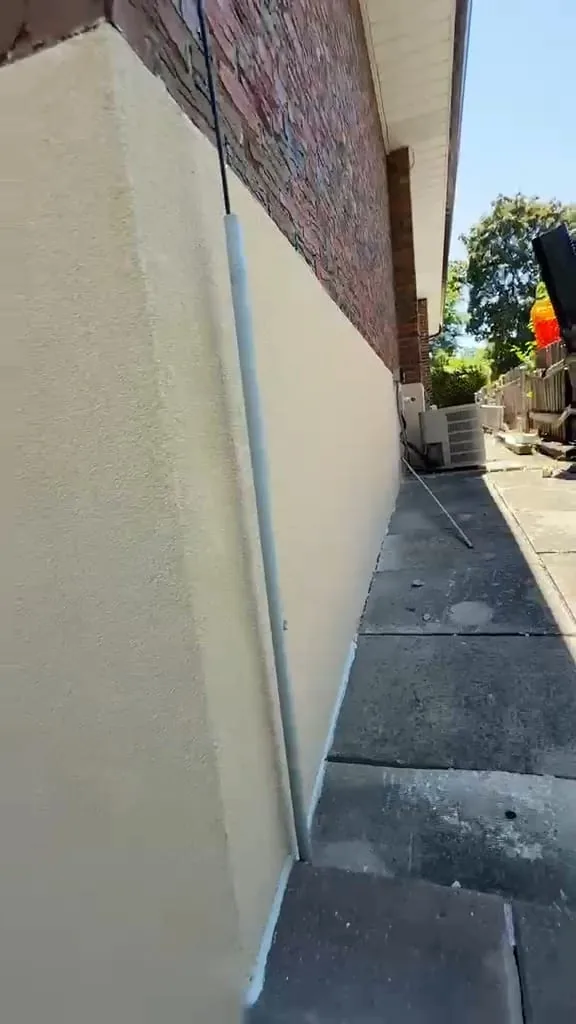
Finished exterior stucco in a warm tinted finish along the side steps of a Scarborough home, crisp against the brick above — FAIME stucco refinishing project
Home/Projects/Scarborough Stucco Refinishing
Stucco Refinishing

Exterior Stucco Refinishing

Scarborough, Ontario 2026 Ground, Meshed & Refinished Completed ✓
Location
Scarborough, ON
Year
2026
Category
Stucco Refinishing
Scope
Grind · Mesh Base · Finish
Status
Completed ✓
Project Scope

Ground Down to a Sound Base,
Built Back Up to a Sharp Finish

FAIME Construction refinished the exterior stucco band of this Scarborough home by grinding the old failing coating down to a sound base, rebuilding it with a mesh-reinforced cementitious base coat levelled dead-flat, and troweling on FAIME's signature tinted finish stucco. Steps and surfaces were covered before any grinding started, and the job closed out with bold, clean caulk lines along the base of the building. Free GTA site visit and written quote within 48 hours.Exterior stucco refinishing · Scarborough & the GTA · 15+ years' trade experience · WSIB Active · $2M CGL

Project Overview

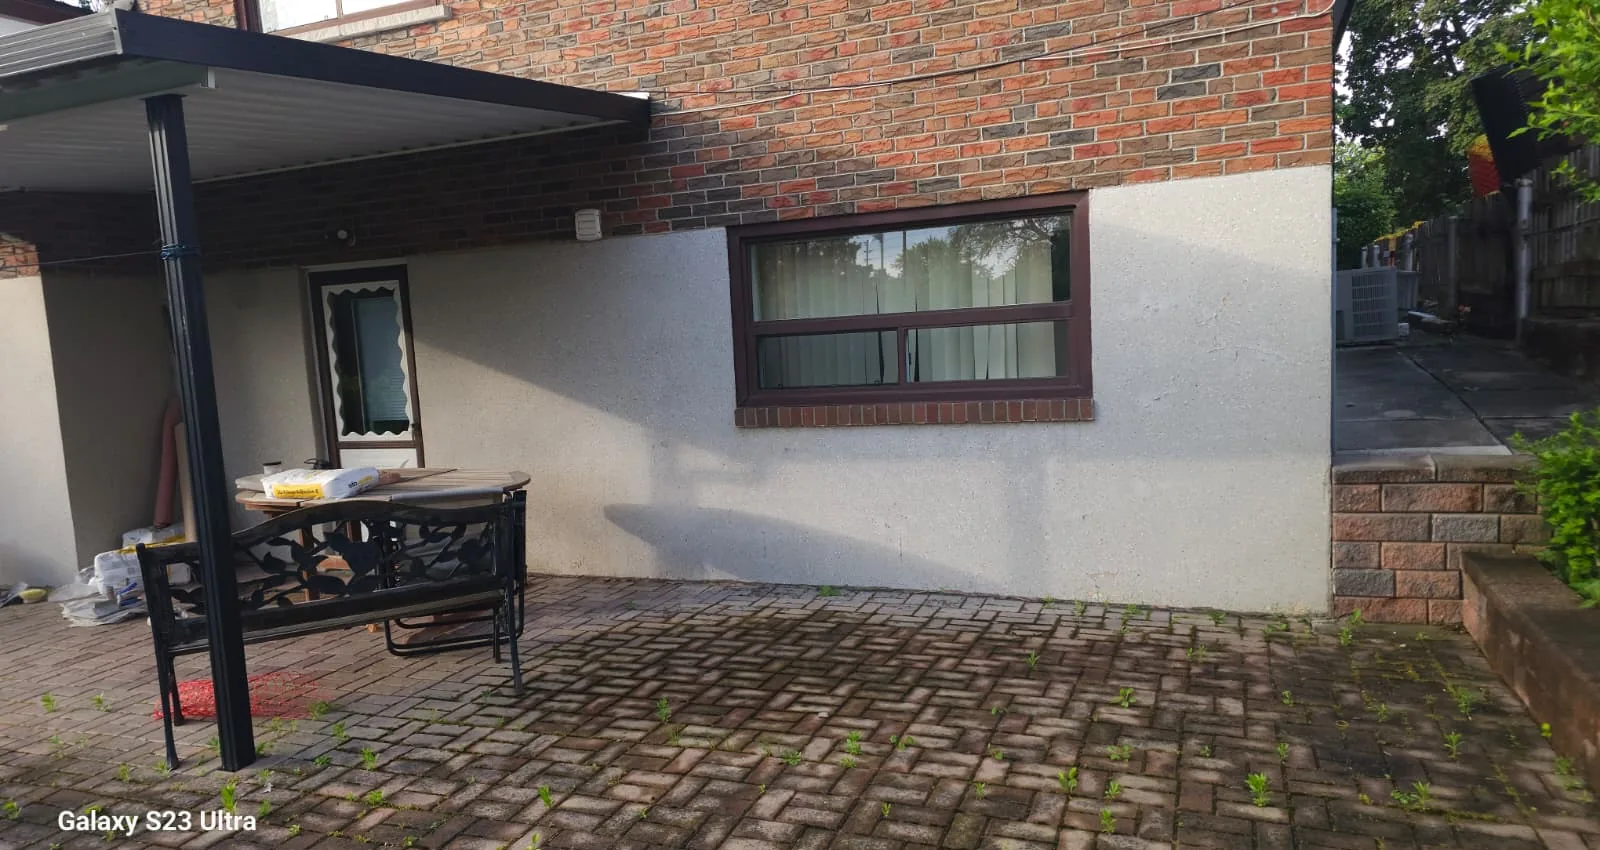
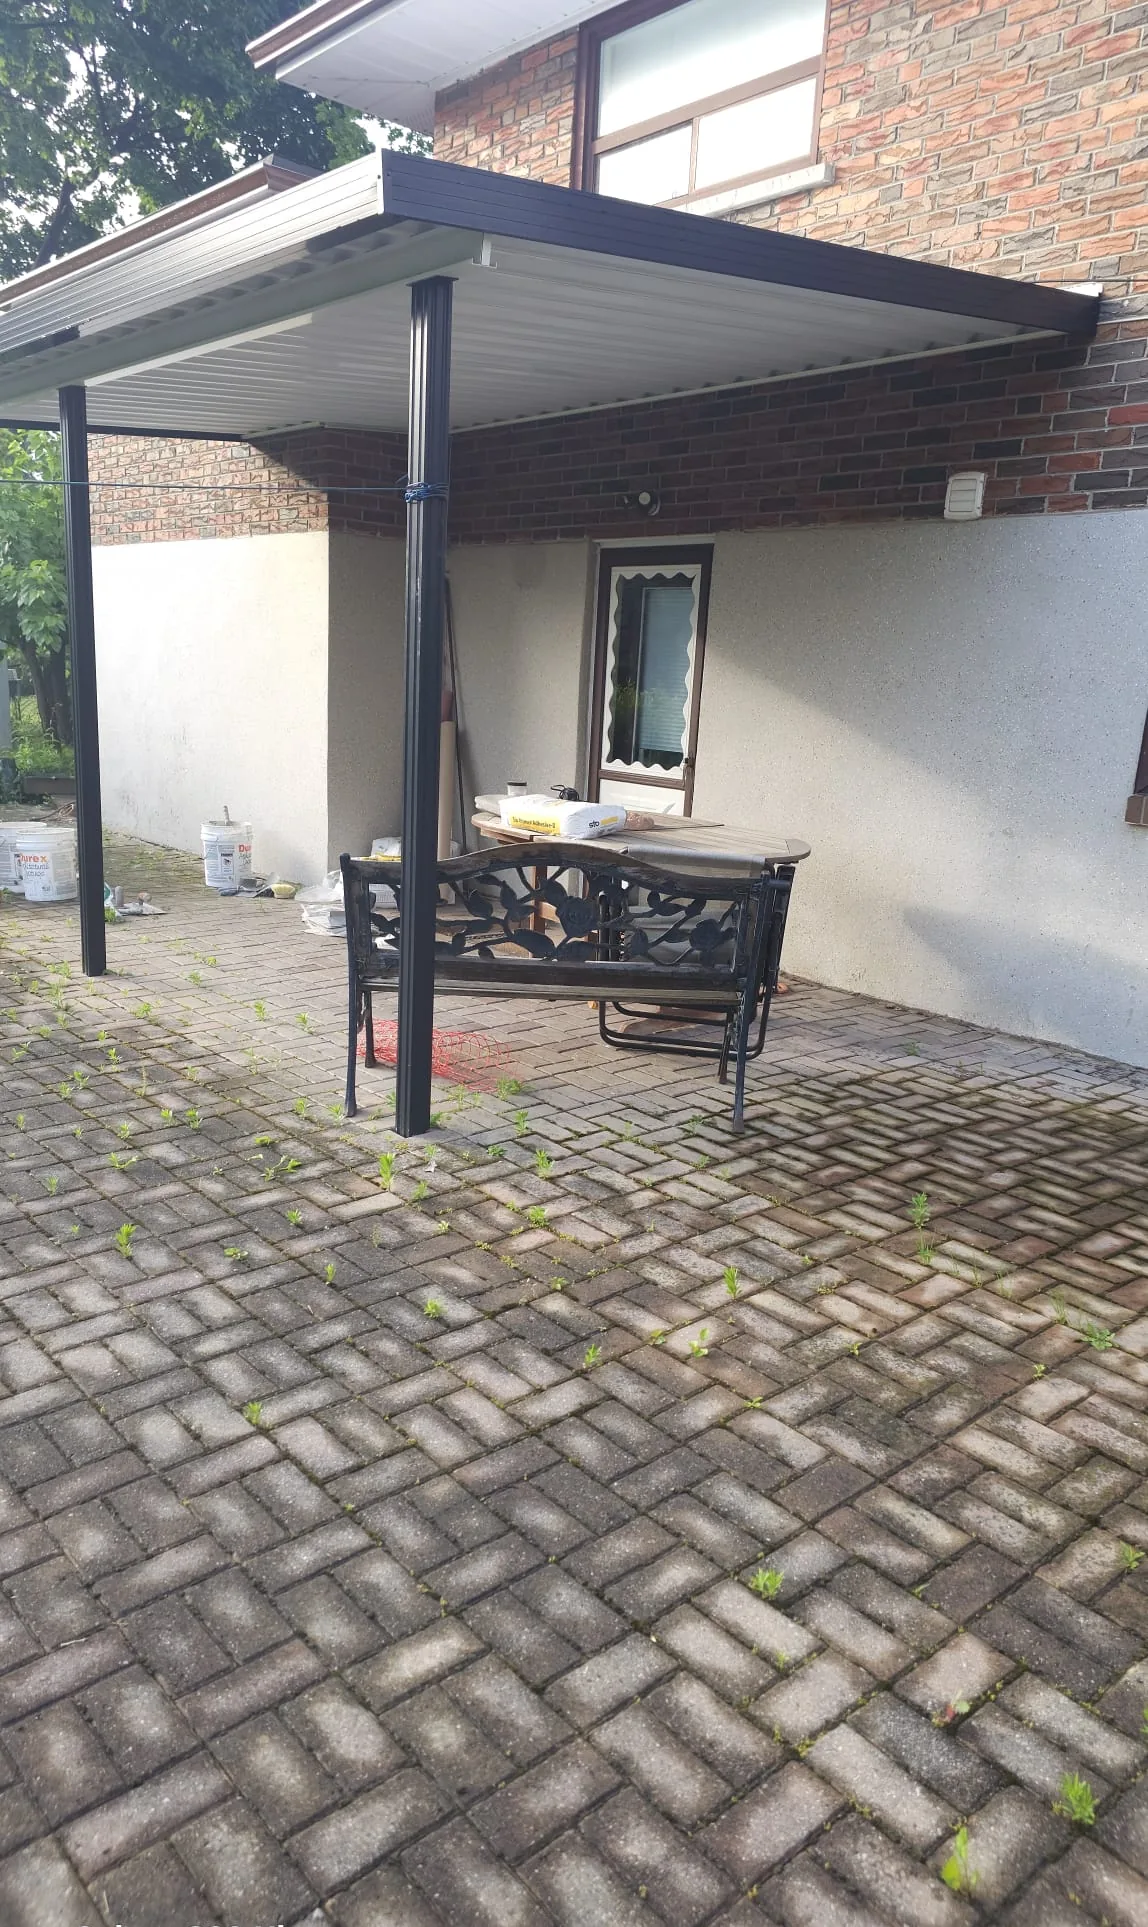
The stucco band wrapping this Scarborough home — the patio walls, the side steps, and the walkways around the house — had an old coating that was dull, patchy, and flaking away from the wall. Instead of skimming over a failing surface, FAIME ground it off, rebuilt the walls with a mesh-reinforced base coat, levelled everything flat, and finished in a warm tinted stucco that sits crisp against the brick above. Every stage is documented below with photos and video from this exact job.

Stage 1 — Cover & Protect

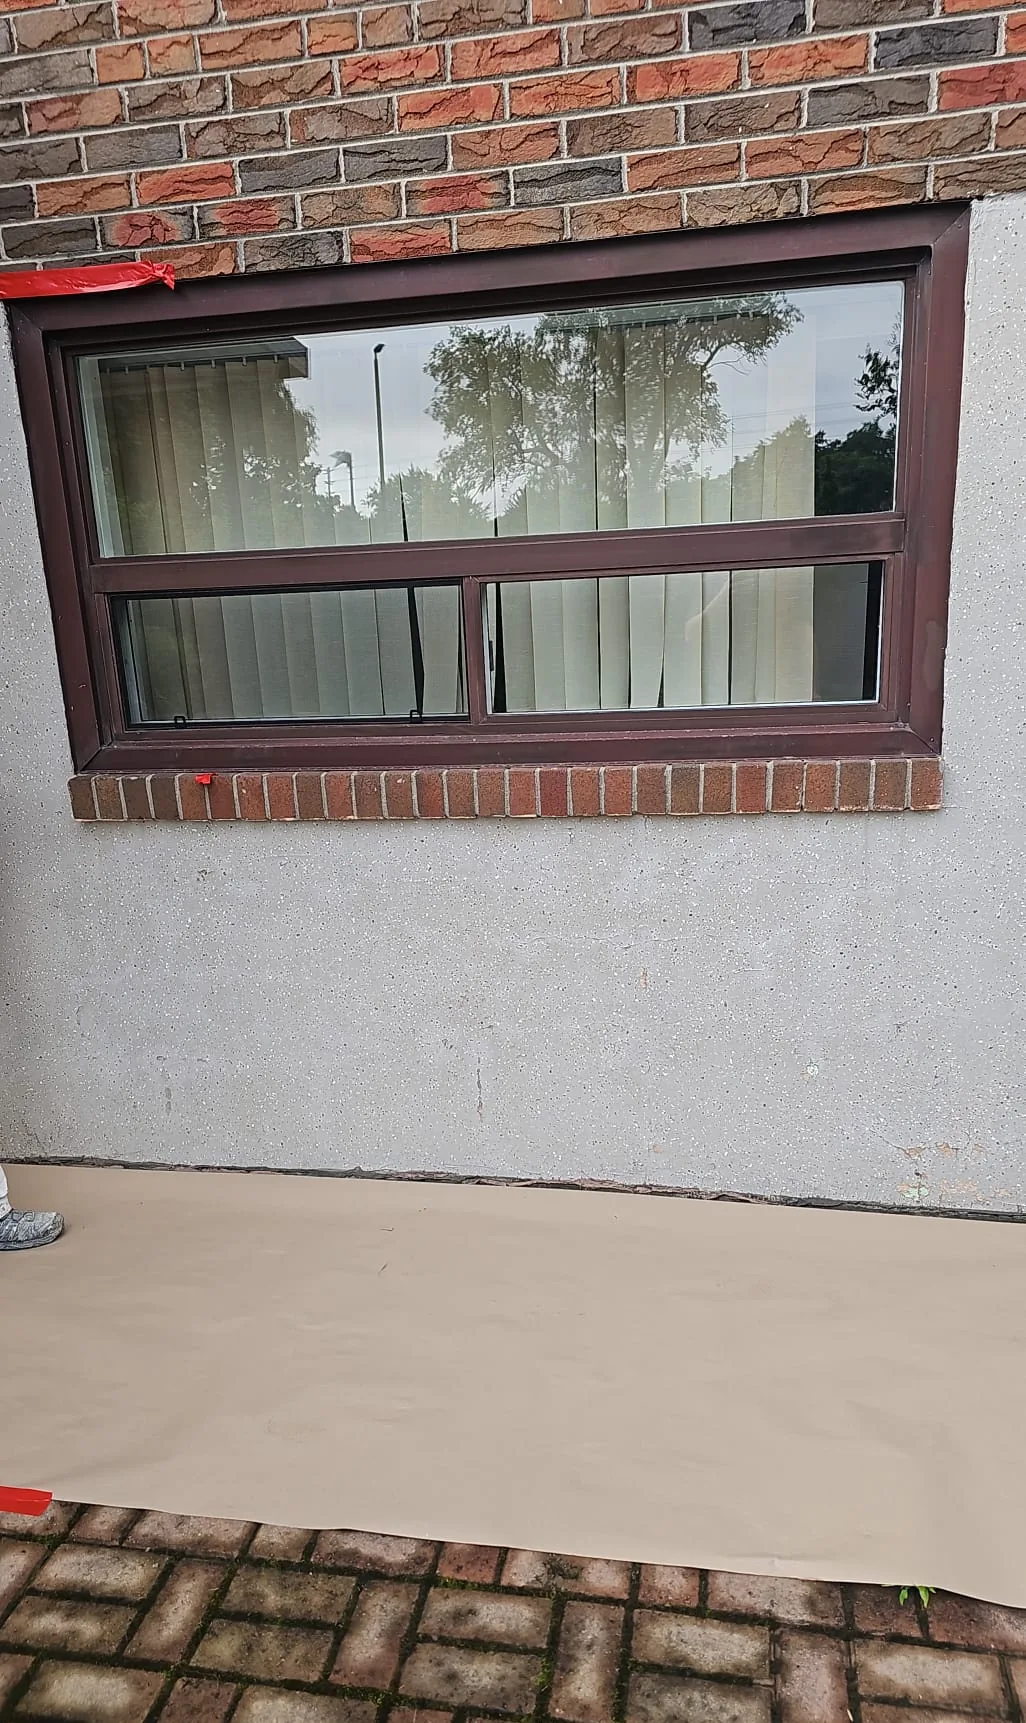
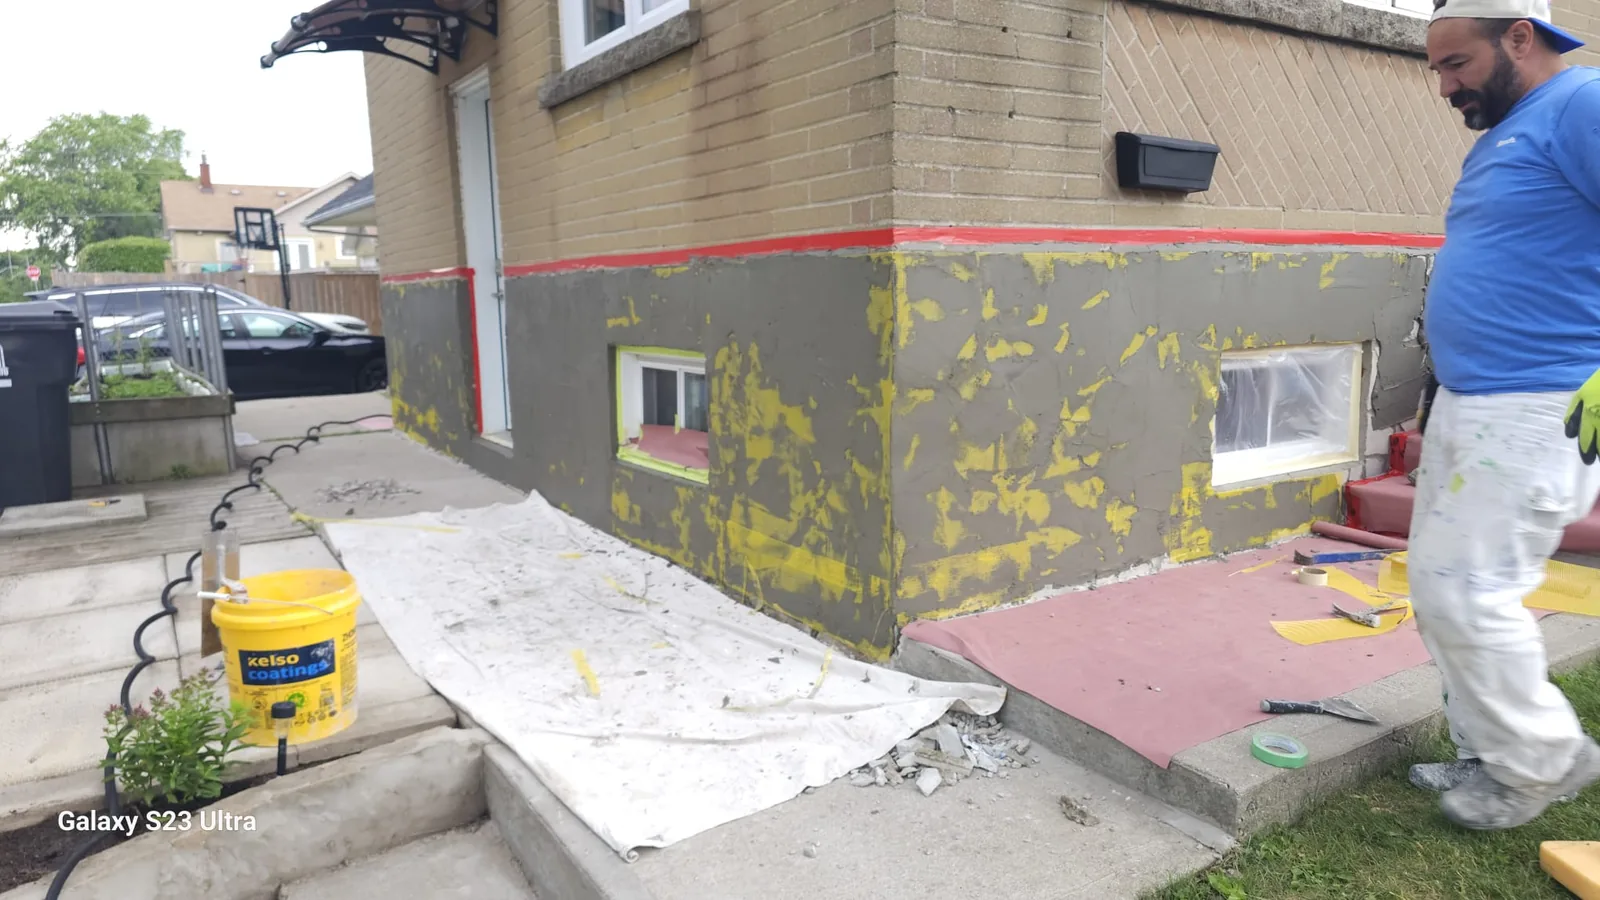
Before a single grinder was switched on, the steps, patio, and walkways were covered and the windows, doors, and brick line were masked off. Grinding is the messiest stage of a stucco refinish — setting the protection up first is what keeps the rest of the property clean, and the taped brick line is the reason the finished wall stops dead-straight where the stucco meets the brick.

Stage 2 — Surface Grinding

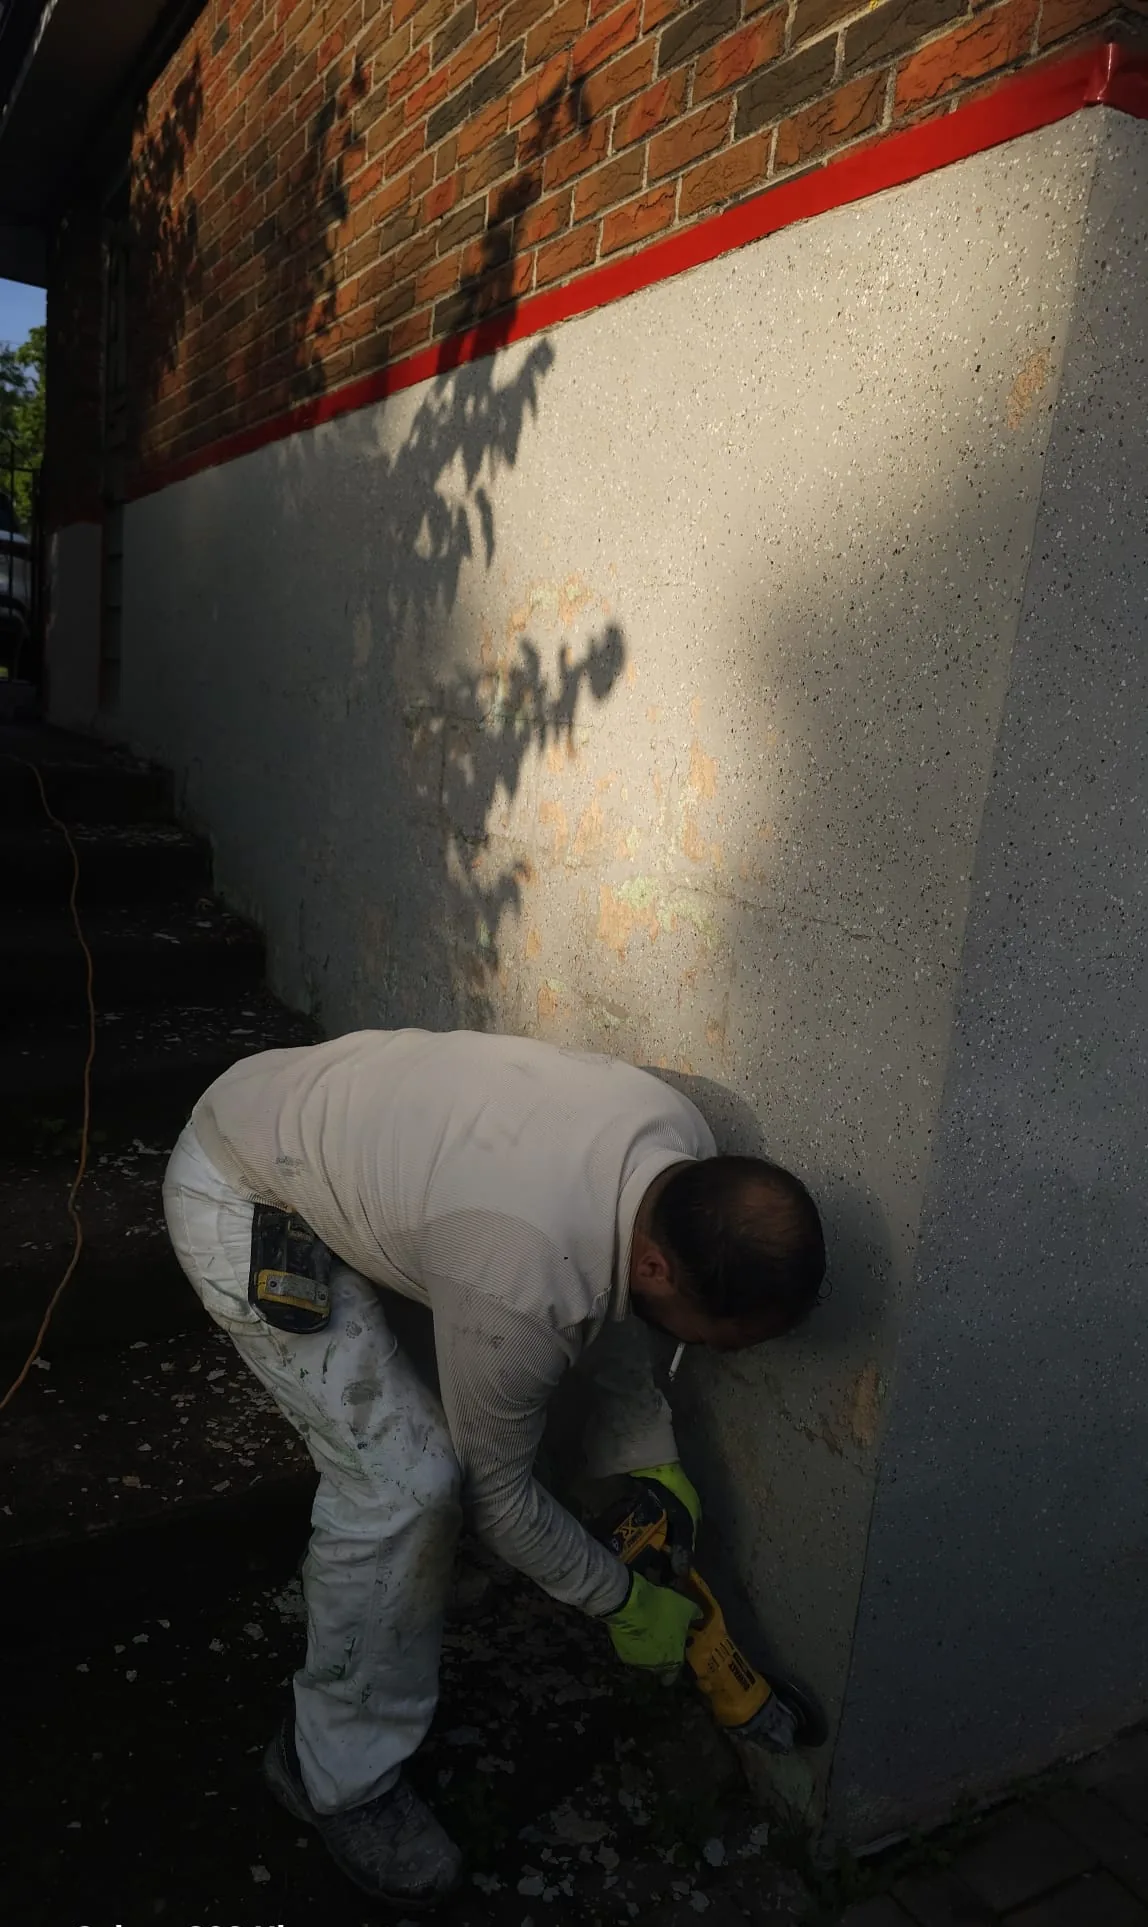
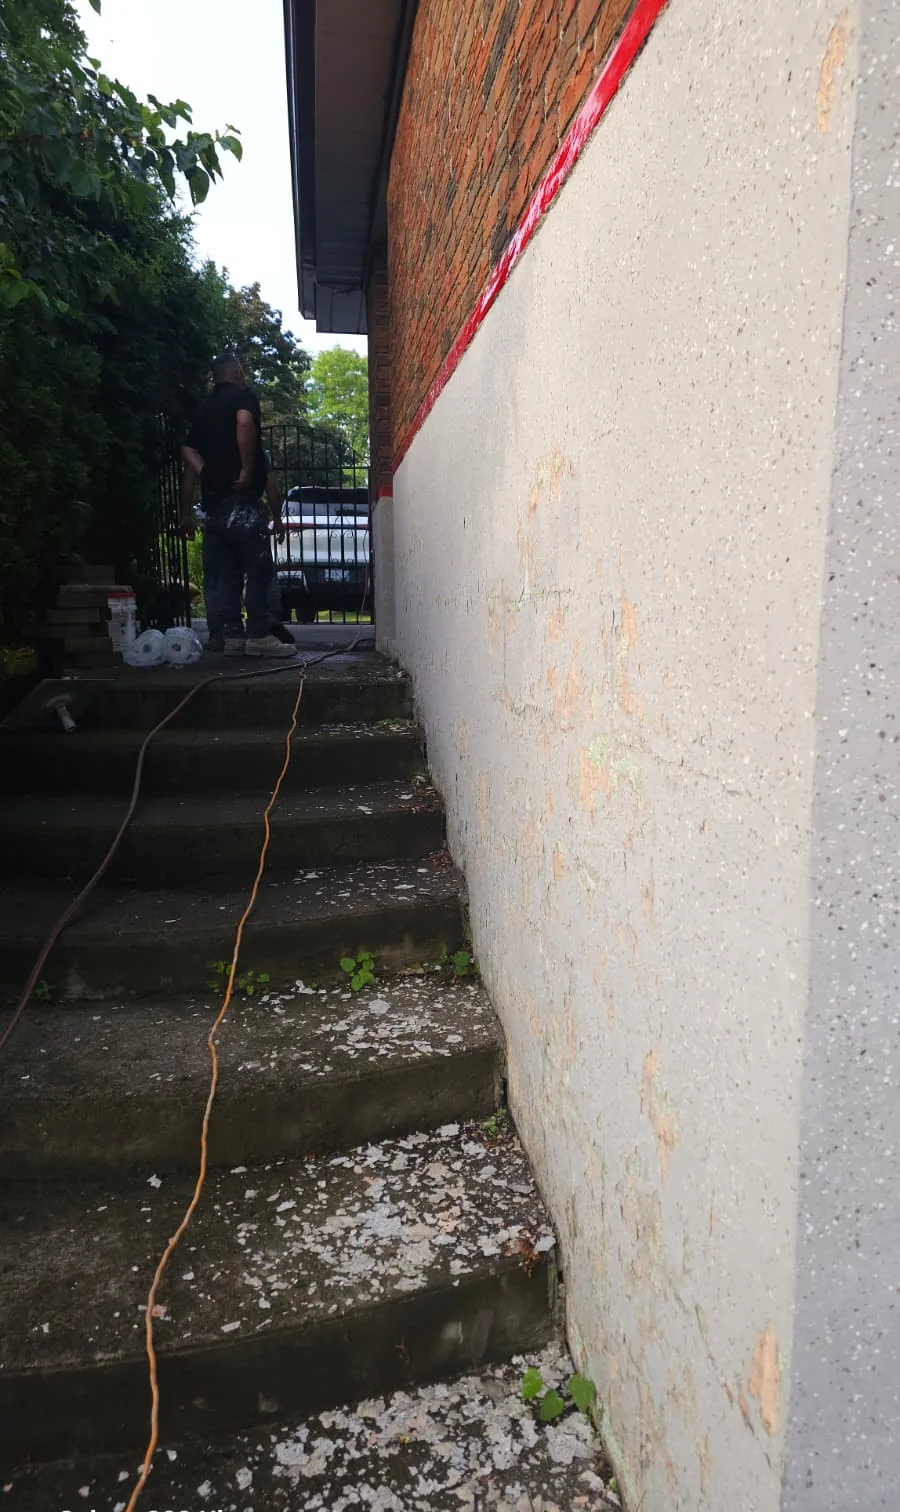
The old coating was ground off with grinding machines, wall by wall and into every corner, until the surface underneath was sound. This is the step most shortcuts skip — a new coat bonded to a flaking old one fails with it. Grinding takes the wall back to material the new system can actually grip.

Stage 3 — Base Coat, Mesh & a Dead-Flat Wall

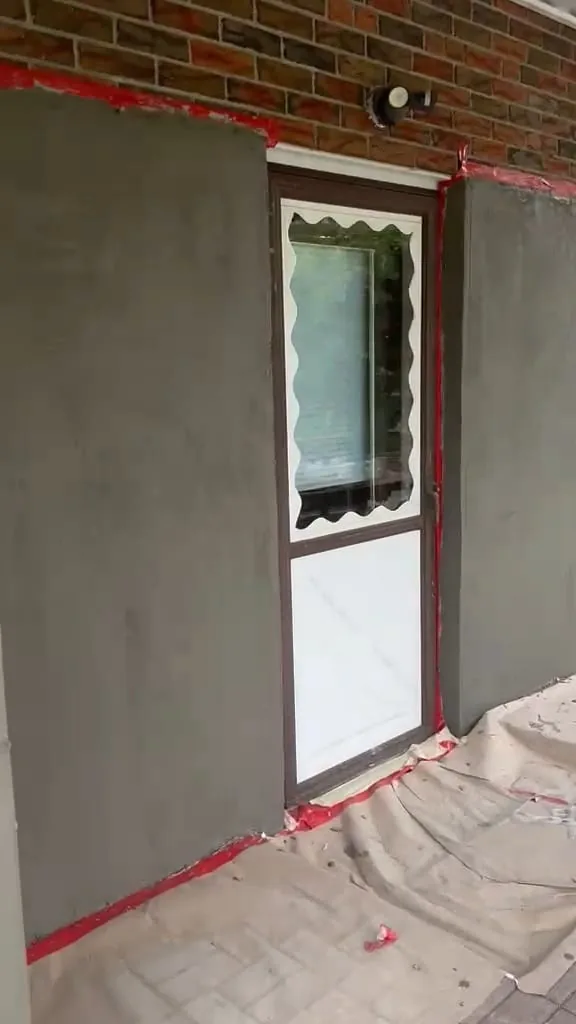
A first cementitious base coat went onto the ground surface, fibreglass reinforcing mesh was embedded into it, and the mesh was covered with base coat and left to set — a few hours, depending on the weather. Then came the step that decides how the whole job looks: the base was worked and levelled until the walls sat dead-flat and sharp. A finish coat is only as good as the base underneath it — if the base isn't flat, the finish shows every wave and the wall looks bad forever.

Stage 4 — Signature Finish Coat

With the base flat and cured, FAIME's finish stucco — the same finish coat we bring to every stucco client — was troweled on in a warm tint that works with the home's brick, then left to dry for a few hours based on the weather. The texture reads even across every wall, corner, and window return because of the flat base under it.

Stage 5 — Caulking & Close-Out

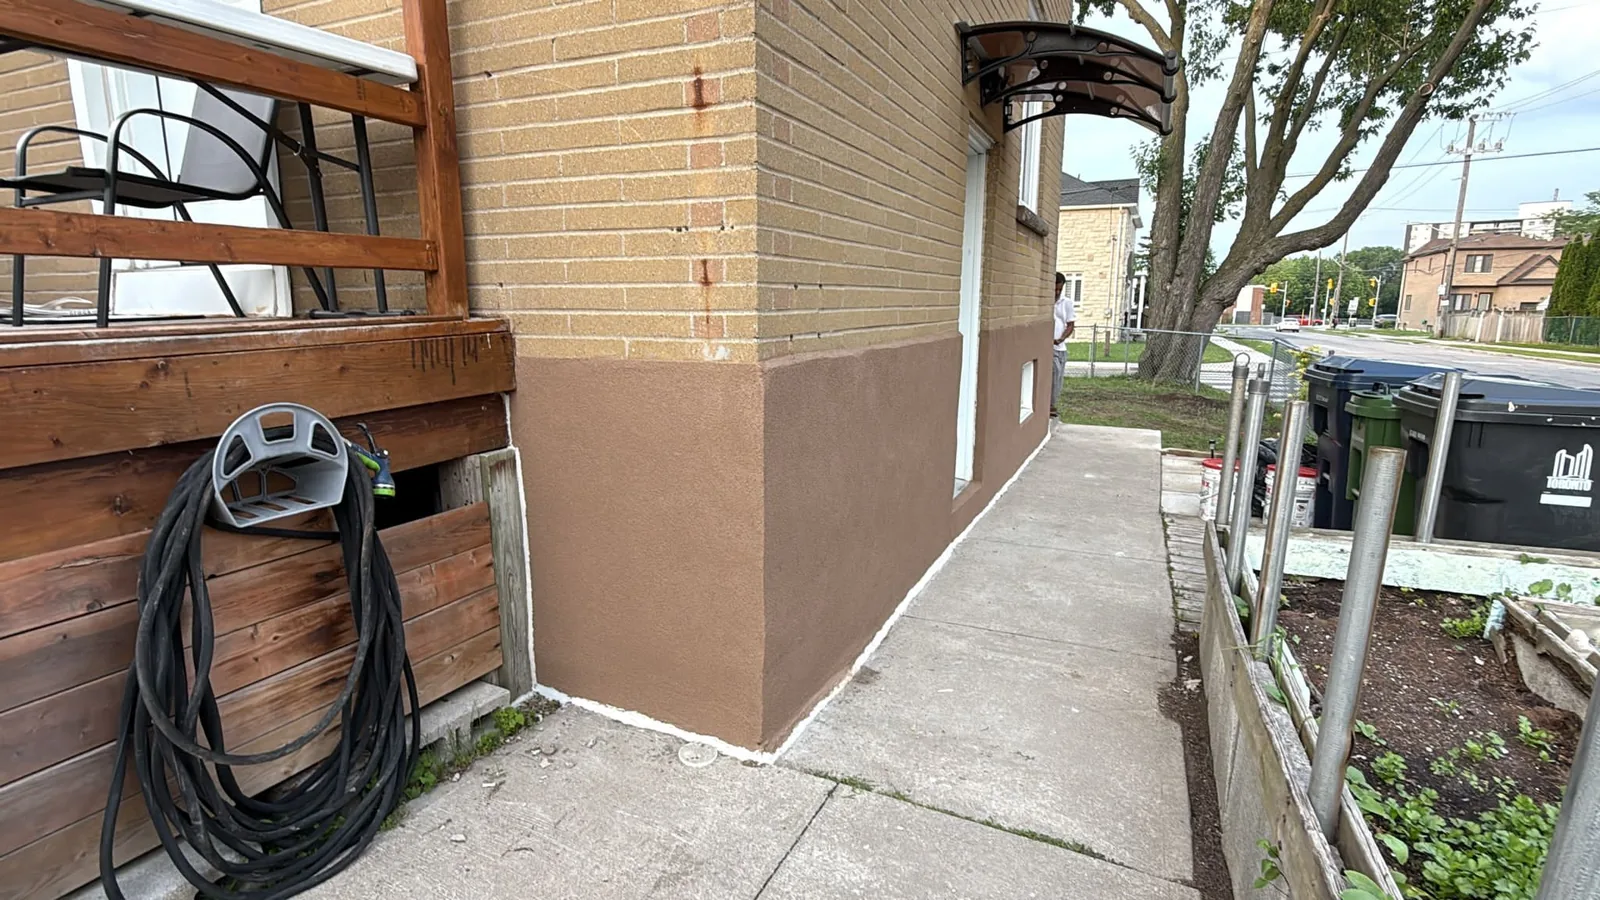
Once the finish was dry, the surfaces were cleaned up and high-quality, bold caulk beads were run along the bottom corners of the building — sealing the joint where the wall meets the steps, patio, and walkways. The caulking cured, the site was cleaned, and the job wrapped with the scope complete and a satisfied customer.
Stage By Stage

Cover — Grind — Base Coat — Finish — Caulk

Patio wall of the Scarborough home with the old worn coating before stucco refinishing
Before — the old coating, dull and patchy across the patio walls
Rear door wall with the old coating before grinding, materials staged on the patio
Before — rear door wall ahead of surface prep, materials staged
Old flaking coating around the masked basement window with drop paper laid down
Prep — window masked, paper down, old coating flaking
FAIME tradesperson grinding the old coating off the corner of the wall with a grinding machine
Surface grinding — the old coating comes off the corner
Wall along the side steps after grinding with loose coating stripped and debris on the steps
Ground off — loose coating stripped along the side steps
Fresh grey cementitious base coat around the rear door with the brick line taped in red
Base coat — around the rear door, brick line taped
Base coat wrapped around the corner and brick chimney return
Base coat — corners and returns wrapped in one layer
Long wall in fresh base coat with mesh embedded and covered
Base coat — mesh embedded, covered, and levelled
Base coat on the side steps wall levelled flat before the finish coat
Base coat — levelled dead-flat before any finish goes on
Patio window wall in grey base coat framed square around the window
Base coat — patio window wall, framed square
Finished patio walls in the warm tinted stucco finish
Finished — patio walls in the warm tinted finish
Finished window wall in tinted stucco, crisp against the brick above
Finished — window wall, crisp at the brick line
Finished rear door wall in the warm tinted stucco finish
Finished — rear door wall
Finished stucco along the side steps with the top line straight against the brick
Finished — side steps, top line dead-straight
Finished side walkway wall with a clean caulked base by the AC unit
Finished — side walkway, sealed tight at the base
Finished garden corner with a bold clean caulk line along the bottom of the wall
Finished — garden corner, bold caulk line at the bottom
Drag to Reveal

See the Transformation

Grab the slider and drag it side to side to compare these walls before and after FAIME refinished them. Real job photos — nothing staged.

Side Steps Wall — Ground Off to Fresh Finish

Finished stucco along the side steps in a warm tinted finish The same wall along the side steps with the old coating stripped off during grinding Before After

The same wall along the side steps — old flaking coating ground off, rebuilt with a mesh-reinforced base, levelled flat, and finished.

Rear Door Wall — Before to Finished

Finished rear door wall in the warm tinted stucco finish The rear door wall with the old coating before the refinish Before After

The rear door wall off the patio — from the tired old coating to a flat, warm-toned finish that stops clean at the brick.

Straight From the Job

Watch It Happen

Surface prep — the old coating ground off and the first base coat worked on.
Finished walkthrough — patio, garden corner, and the side steps. Press play.
What Was Done

Scope Breakdown

01

Cover & Protect

  • Steps, patio and walkways covered before any grinding
  • Windows, doors and the brick line masked off
  • Drop paper laid across the work areas
02

Surface Grinding

  • Old failing coating ground off with grinding machines
  • Every wall and corner taken back to a sound base
  • New system bonds to solid material, not a flaking skin
03

Base Coat, Mesh & Levelling

  • First base coat applied, fibreglass mesh embedded
  • Mesh covered and cured — hours set by the weather
  • Walls levelled dead-flat so the finish reads sharp
04

Finish, Caulking & Close-Out

  • FAIME's signature tinted finish stucco troweled on
  • Bold, high-quality caulk lines along the building base
  • Surfaces cleaned, site cleared, customer satisfied
Good to Know

Stucco Refinishing FAQ

Why does the old stucco coating need to be ground off first?

Because a new coat is only as strong as what it sticks to. If stucco is applied over a coating that is already flaking, the new layer fails with the old one. FAIME grinds the failing coating off with grinding machines until the wall is back to a sound base the new mesh-reinforced system can actually bond to.

What are the steps in a stucco refinish like this?

Five stages: (1) cover and protect the steps, patio, walkways and windows; (2) grind the old coating off to a sound base; (3) apply a cementitious base coat, embed fibreglass mesh, cover it and let it cure; (4) level the base dead-flat, then trowel on the tinted finish coat; (5) run clean caulk lines along the base of the building and clean up.

Why does the base coat have to be perfectly flat?

The finish coat follows whatever is underneath it. If the base is wavy, the finish shows every wave — especially in low sun — and the wall looks bad no matter how good the finish material is. FAIME levels the base coat dead-flat before any finish goes on; that flatness is what makes the final wall read sharp.

How long does each coat take to dry?

It depends on the weather. The base coat and the finish coat each typically need a few hours to set — warm, dry days move faster, humid or cool days take longer. FAIME works with the conditions rather than rushing a coat that is not ready.

Why caulk the bottom corners of the building?

The joint where the stucco meets the steps, patio, or walkway is where water tries to get behind the wall. FAIME finishes every stucco refinish with bold, high-quality caulk beads along those bottom corners and joints — it seals the system and gives the base of the building a clean, deliberate line.

Where does FAIME do exterior stucco refinishing?

FAIME Construction refinishes exterior stucco, EIFS and parging in Scarborough, Toronto and across the Greater Toronto Area, including Vaughan, Richmond Hill, Markham, Mississauga and Brampton. Established 2021 with 15+ years of trade experience, WSIB Active and $2M general liability insurance. Book a free on-site visit and get a written quote within 48 hours.

Keep Exploring

More Projects

Have a Similar Project in Mind?

Let's talk. Tell us what you're picturing and we'll put together a clear, written estimate — no obligation.

Google Reviews

Happy With Our Work?
Tell Google.

Reviews help GTA homeowners and contractors find a trusted specialty team. If we earned your confidence, we'd be grateful for 60 seconds of your time.

Leave Us a Google Review

Takes 60 seconds — helps us more than you know

Call Now WhatsApp