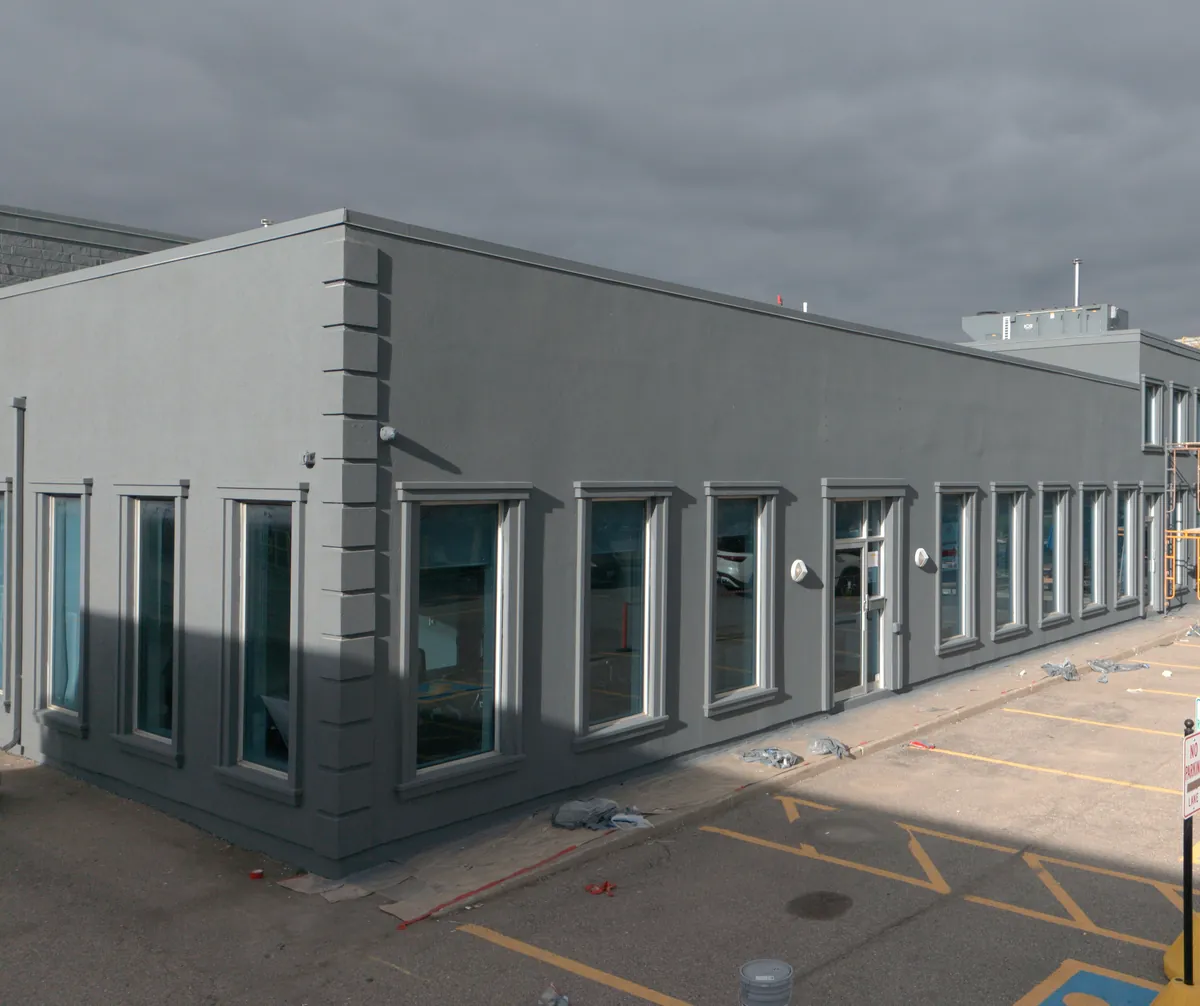
Drone view of a commercial building in Vaughan after FAIME's full envelope repair and repaint, finished in dark grey with light window trim
Home/Projects/Vaughan Commercial Envelope & Repaint
General Contracting · Commercial

Commercial Building Envelope Repair & Full Repaint

◆ Vaughan, Ontario ◆ 2026 ◆ FAIME as General Contractor ◆ Completed ✓
Location
Vaughan, ON
Our Role
General Contractor
On Site
7–10 Days
Scope
Repairs · Sealants · Finish · Paint
Status
Completed ✓
Project Scope

One Contractor, the Whole Envelope,
With the Building Still Open

FAIME Construction ran this Vaughan commercial building as general contractor, start to finish. We covered and protected the site and put up scaffolding, then repaired the stucco and brick damage. We removed an old hose bib, redundant wiring and an old light fixture, cut out and redid the joint sealants and window caulking, and applied a Venetian finish wherever the wall needed it, using the same finish for the parging. The quoins were replaced with Canamould stock. The roof metals, entry plaza doors and railings, metal stairs and dock-door edges were painted, and the whole building got two full coats of Benjamin Moore 1602. It took 7–10 working days, and the tenant stayed open the whole time.Commercial envelope & finishing · Vaughan, York Region & the GTA · WSIB Active · $2M CGL · 2-year workmanship warranty

Project Overview

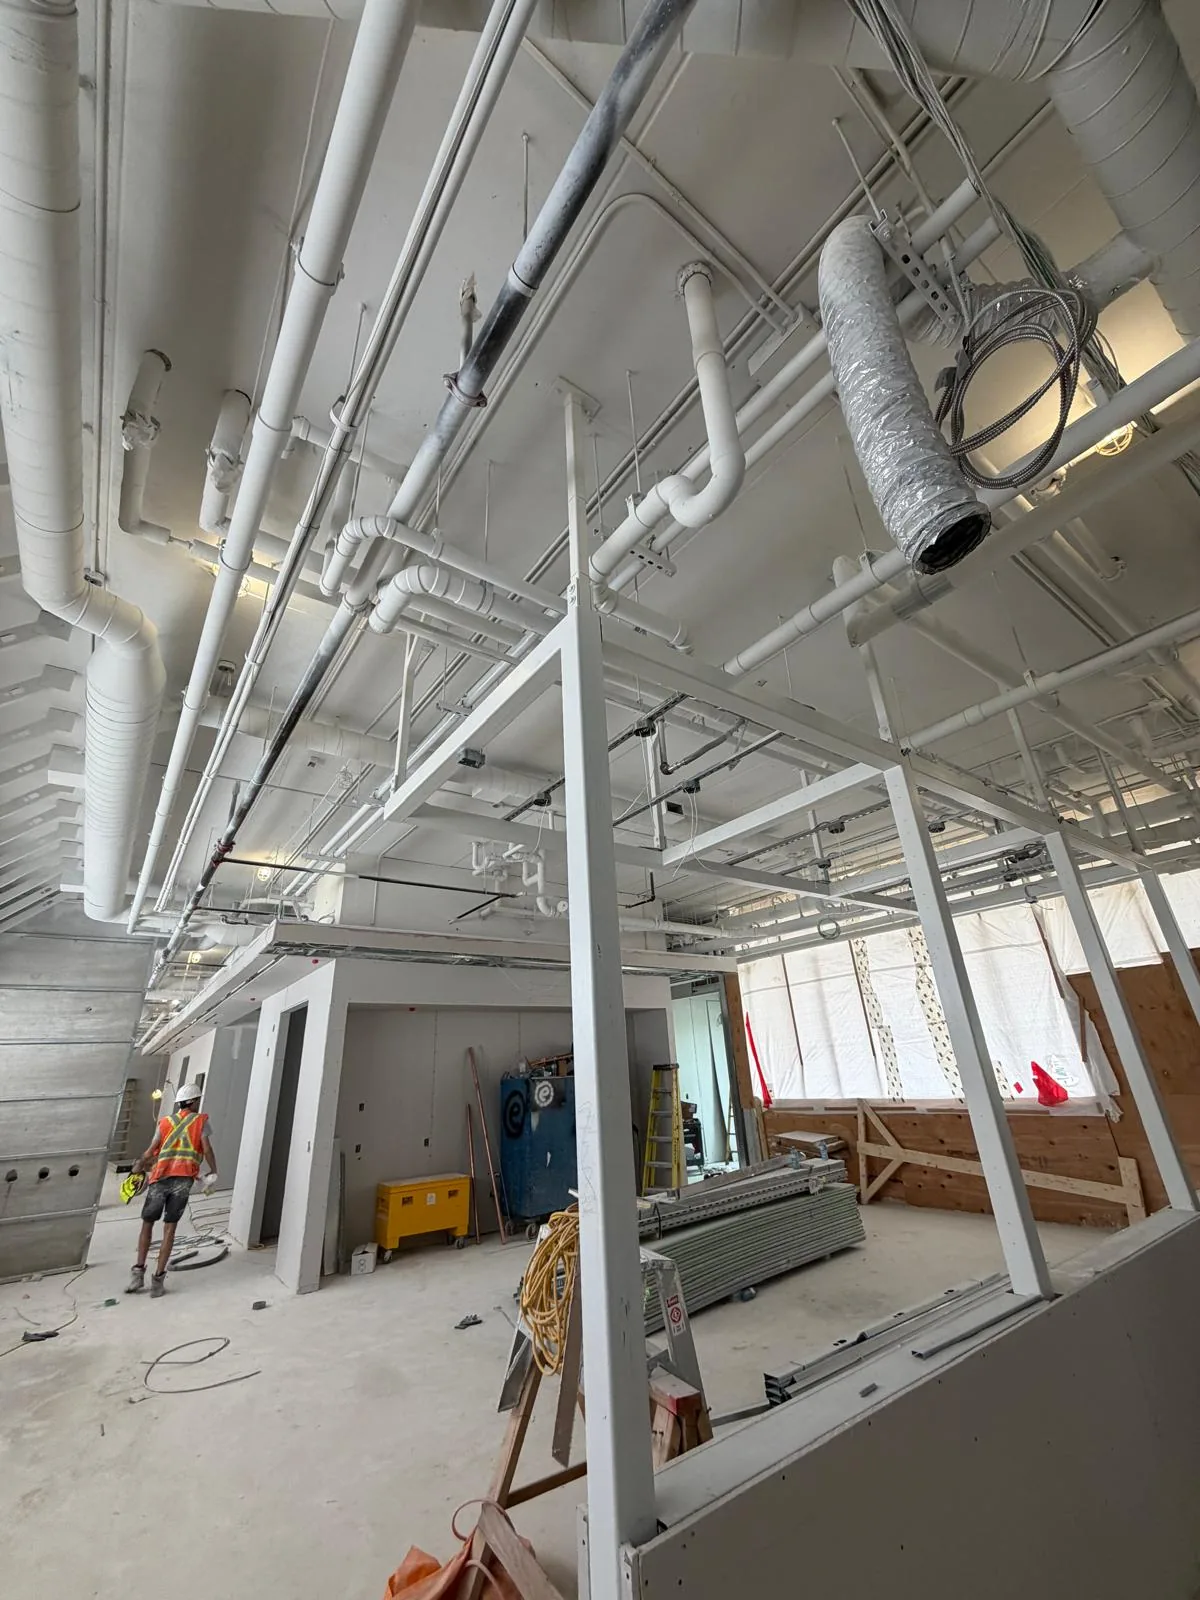
This was a large commercial building, part single-storey and part two-storey, with an office front, a long blank rear wall, a brick section and a loading dock. It was not one repair but a whole envelope that needed putting right and then refinishing in a new colour. FAIME held the whole job: the repairs, the sealants, the finish coats and the paint. We also coordinated the site so the tenant kept working and the other teams on the building could do their part. Every stage below is shown with photos and video from this job.

What We Found on the Walk-Around

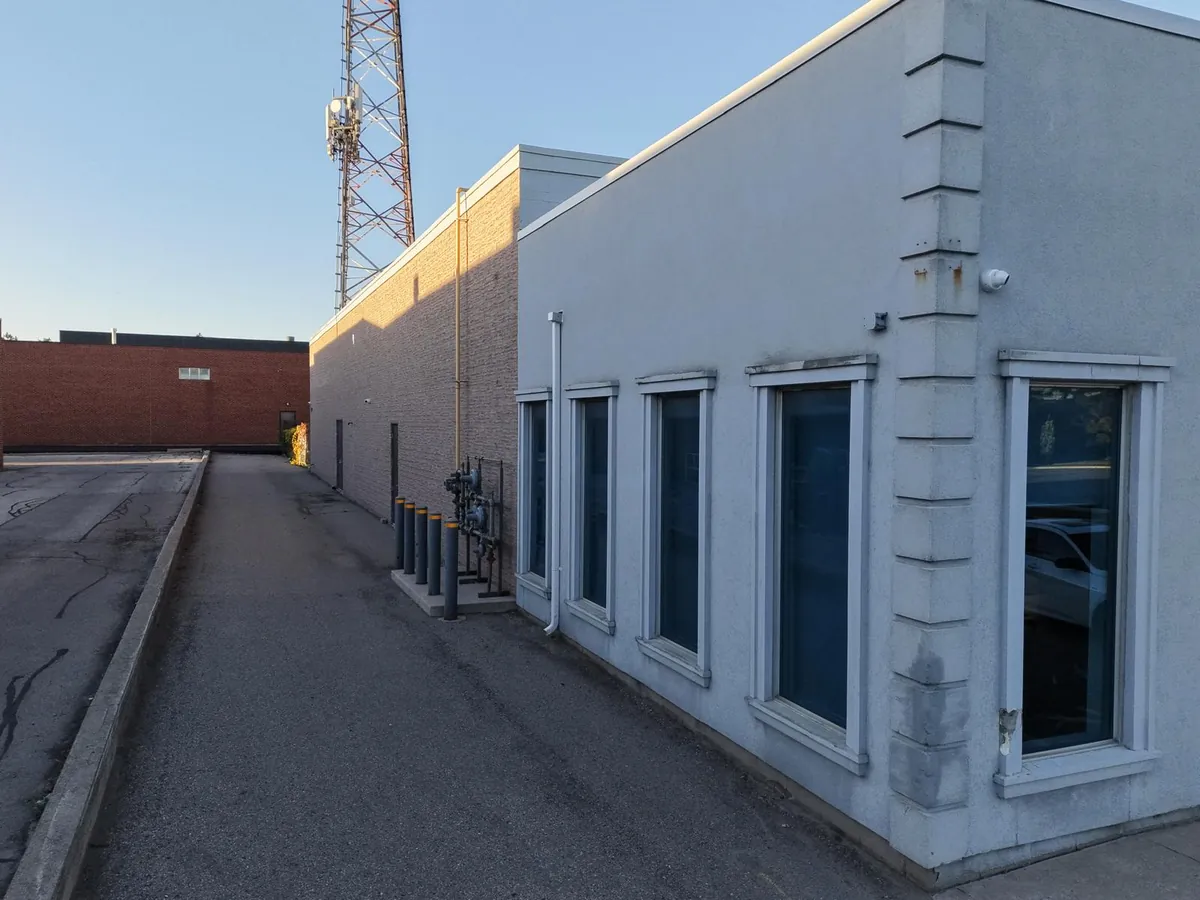
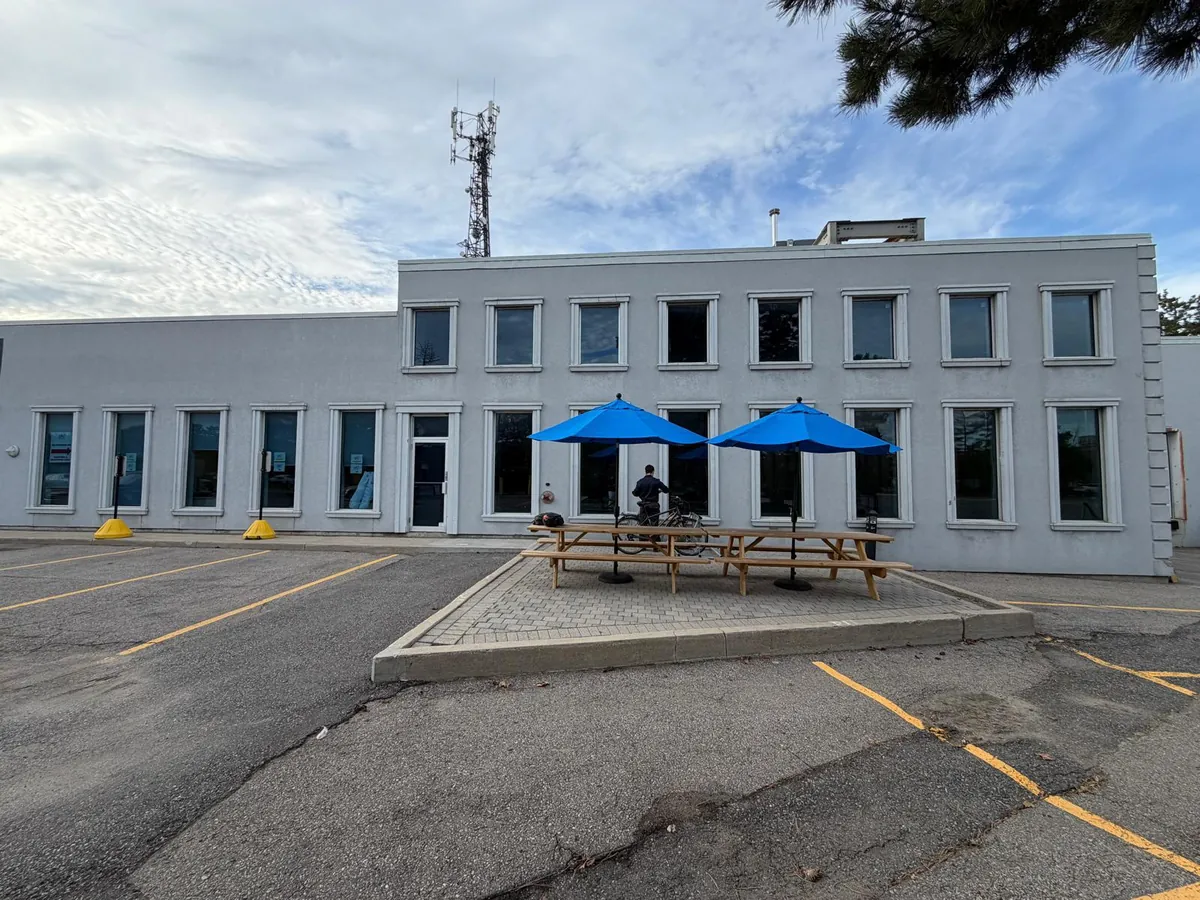
From across the parking lot, the building just looked tired. The problems showed up up close. Stucco was damaged in patches along the long walls. The corner quoins were stained and worn. Brick joints and control-joint sealant had opened up, and the caulking around the windows had dried out and let go at the sills. The walls also carried decades of leftovers: an old hose bib, wiring nobody used any more and an old light fixture, each one a hole in the envelope.

That is why this could not be a repaint. Paint over open joints, failed caulking and cracked stucco looks good for one season, then the water finds the same gaps. The order of work on this job follows from that: repair and seal first, then finish, then paint.

Stage 1 — Cover-Up & Scaffolding

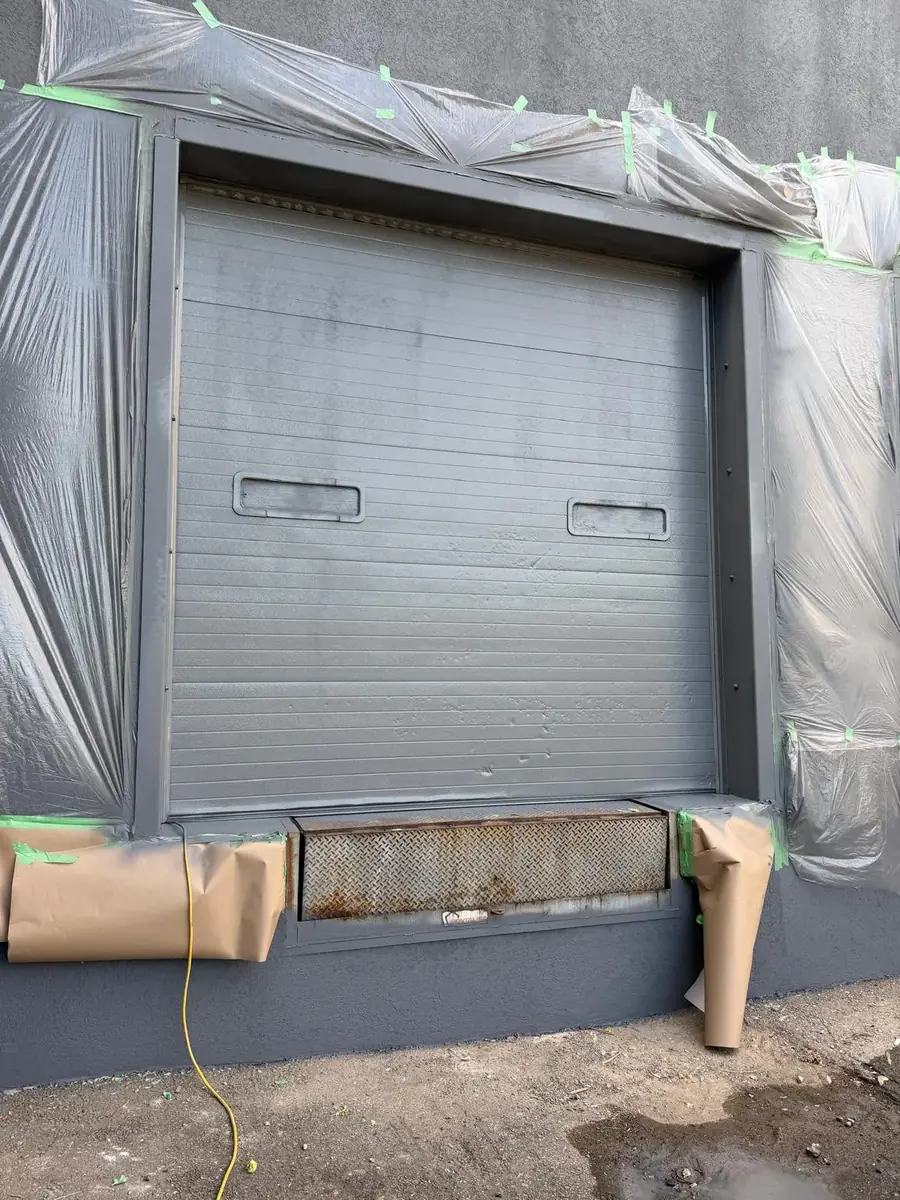
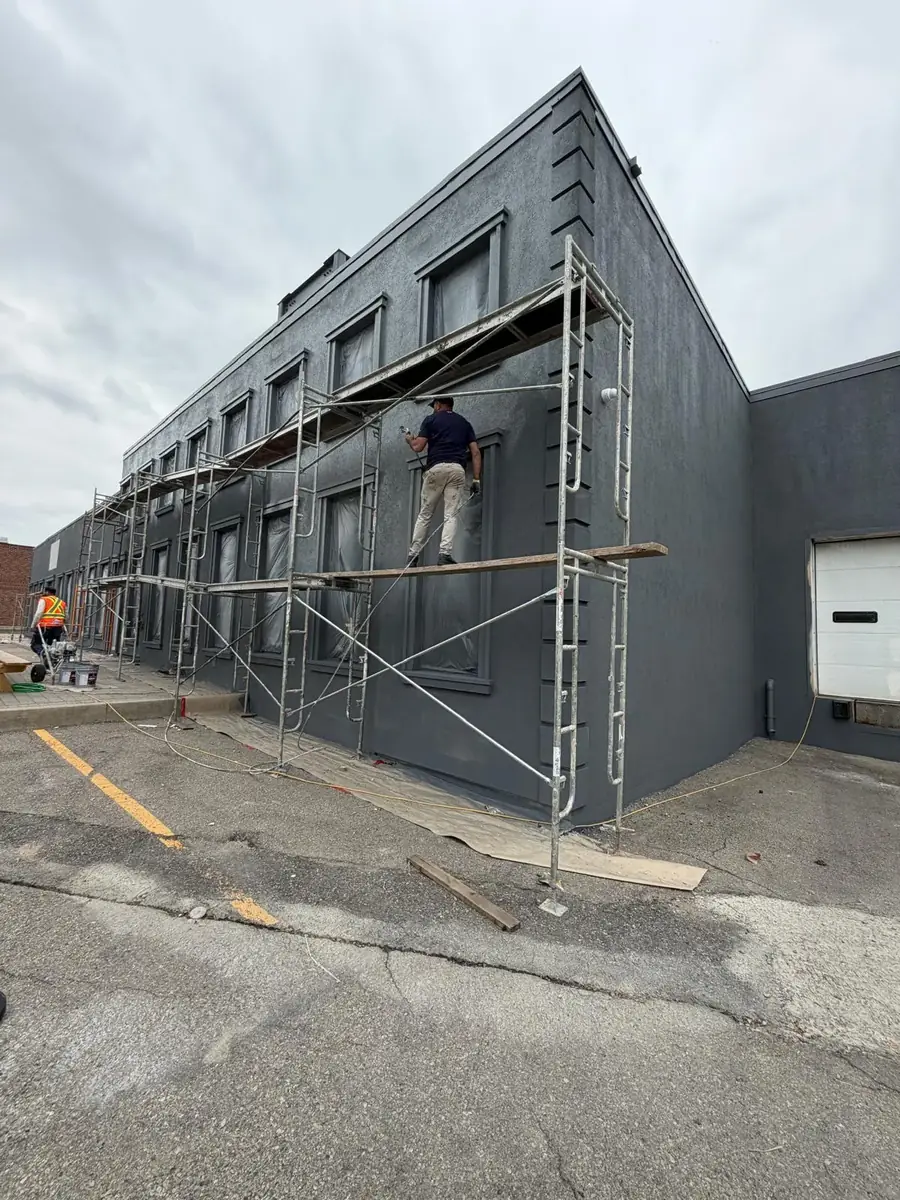
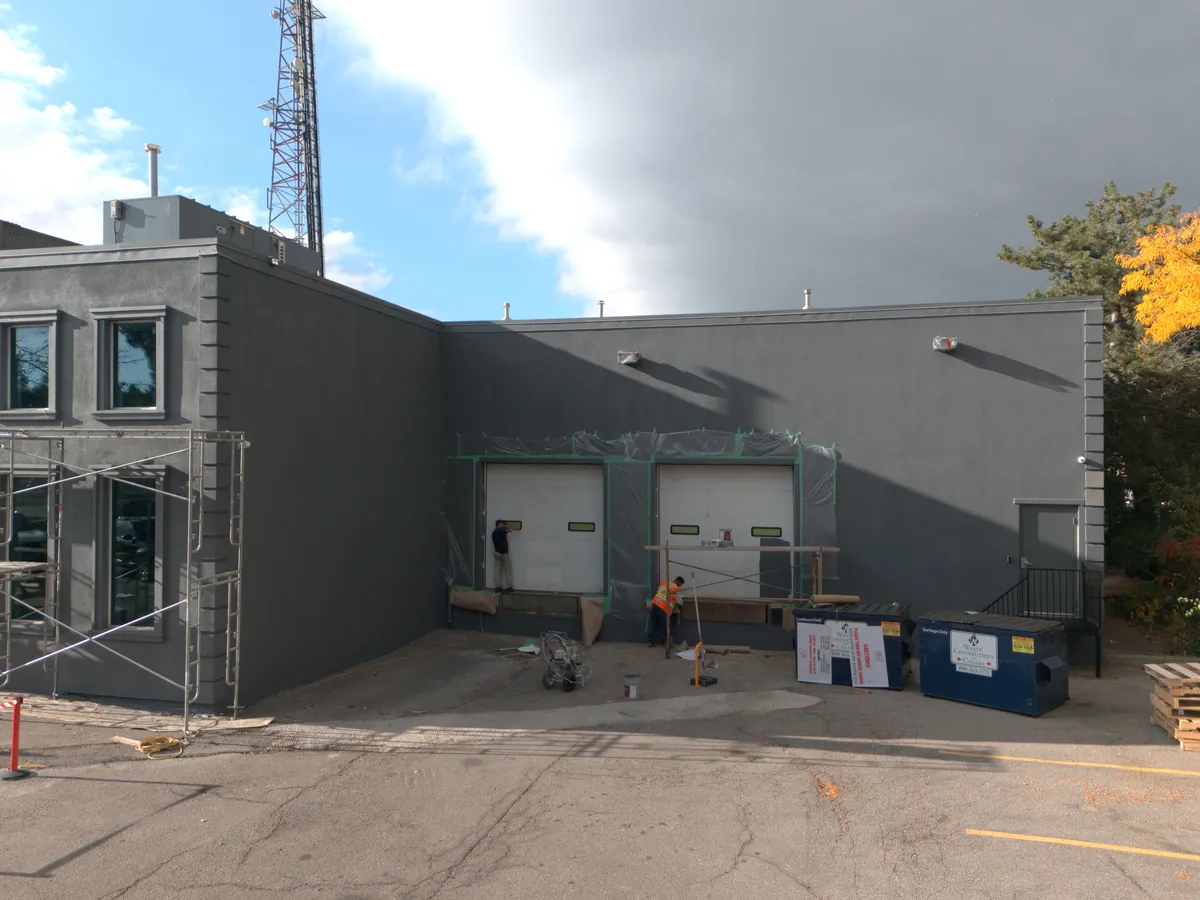
Before any tools came out, the site was covered. Walkways and paving got drop sheets, windows were masked, and dock doors and entrances were sheeted and taped off. Scaffolding then went up along the elevations. On an occupied building, this is also the stage that keeps the tenant working. Entrances stay usable, routes stay clear, and the dust and overspray stay on our side of the tape.

Stage 2 — Stucco & Brick Repairs

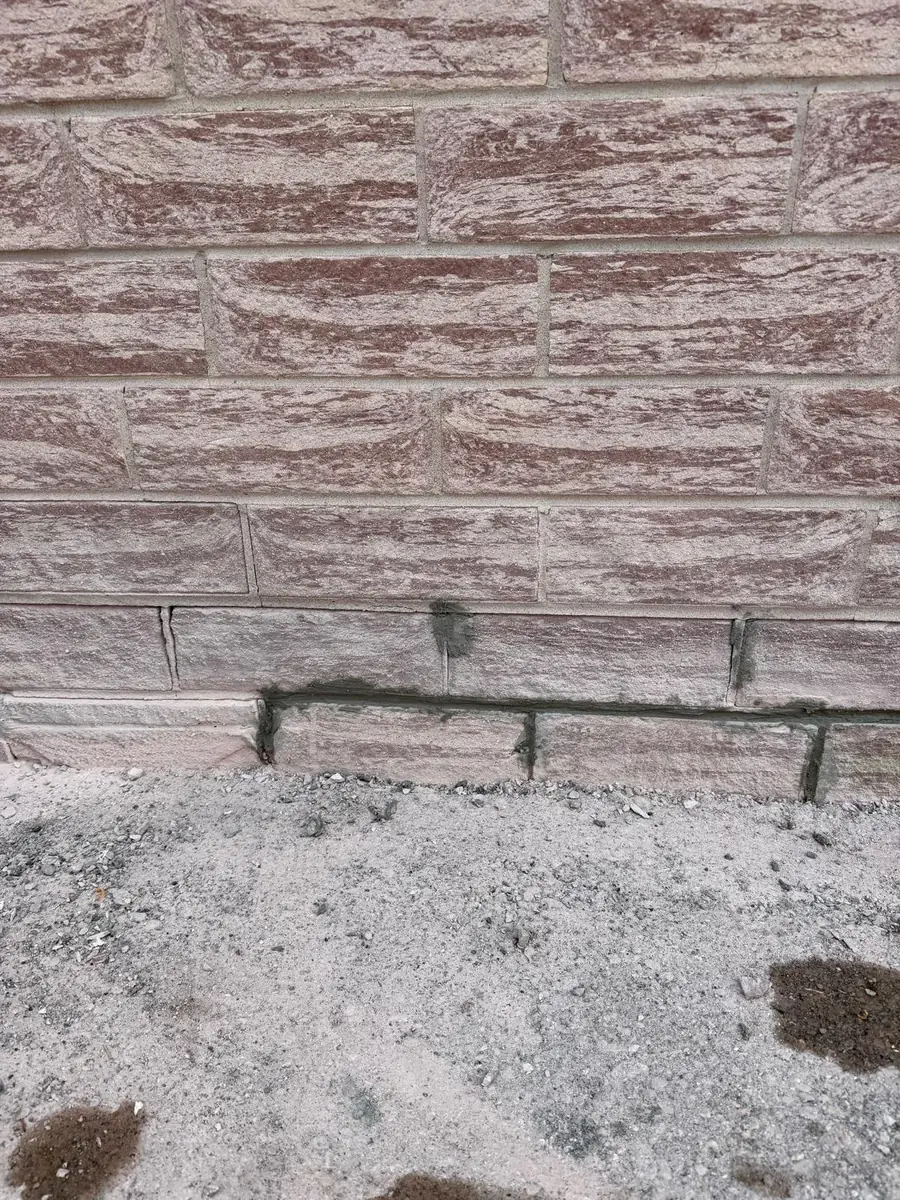
All of the stucco damage was cut back and patched, and the brick repairs were done across the whole building. Damaged joints and units were made good so the wall was sound before any finish went over it. This is the stage the colour change hides, and the one that decides how long the finish lasts.

Stage 3 — Removals

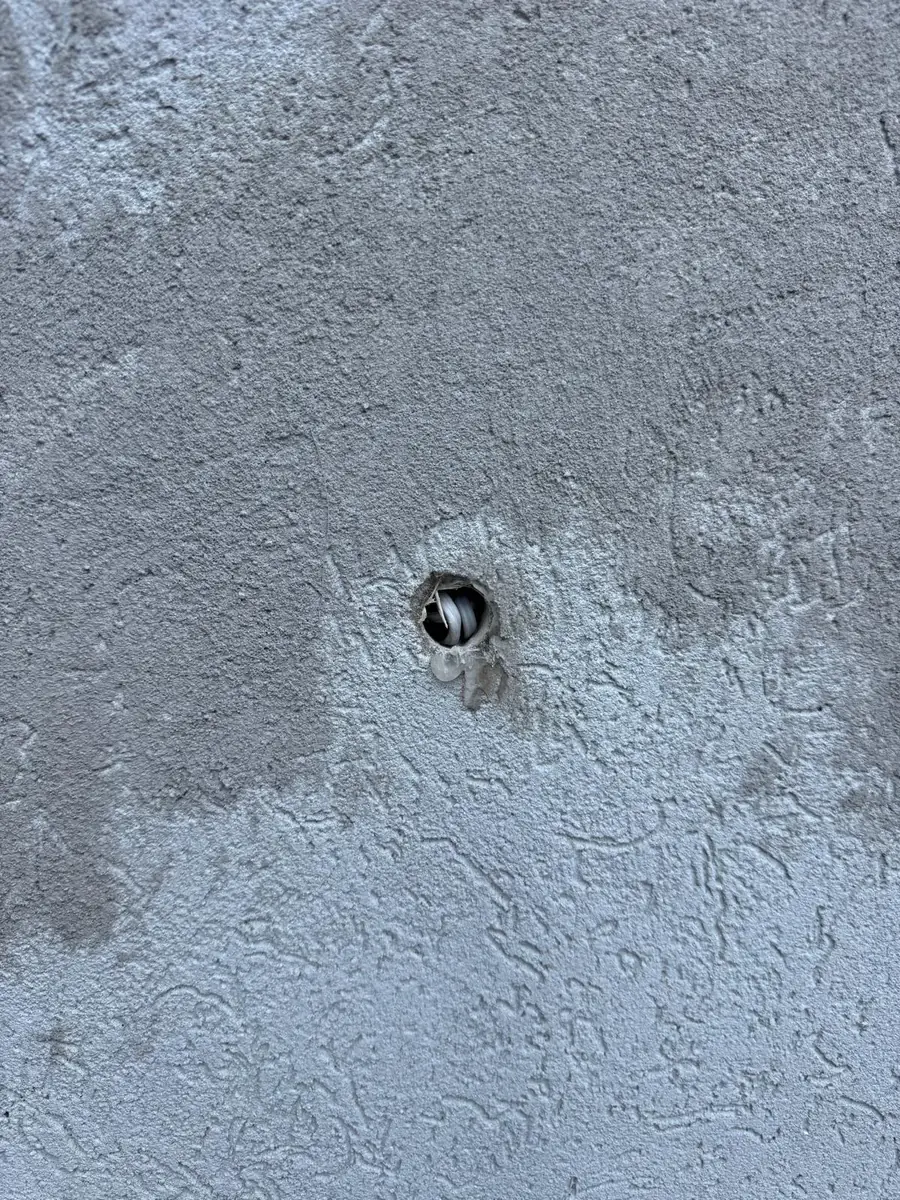
The old hose bib, redundant wiring and the old light fixture came off the walls, and each opening was patched and closed. Every one of those was a penetration letting water behind the finish. Taking them out before the new coats went on means the finished wall is continuous, not painted around old hardware.

Stage 4 — Joint Sealants & Window Caulking

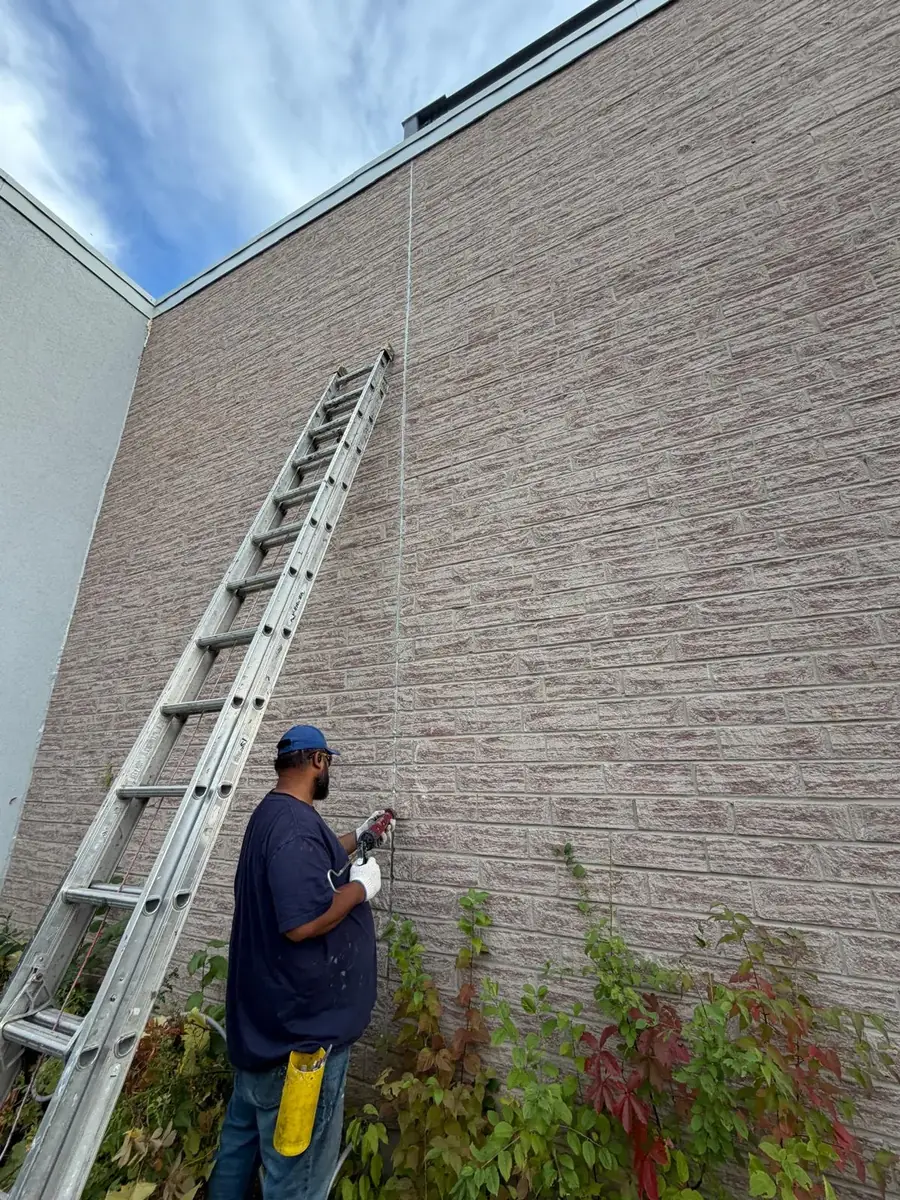
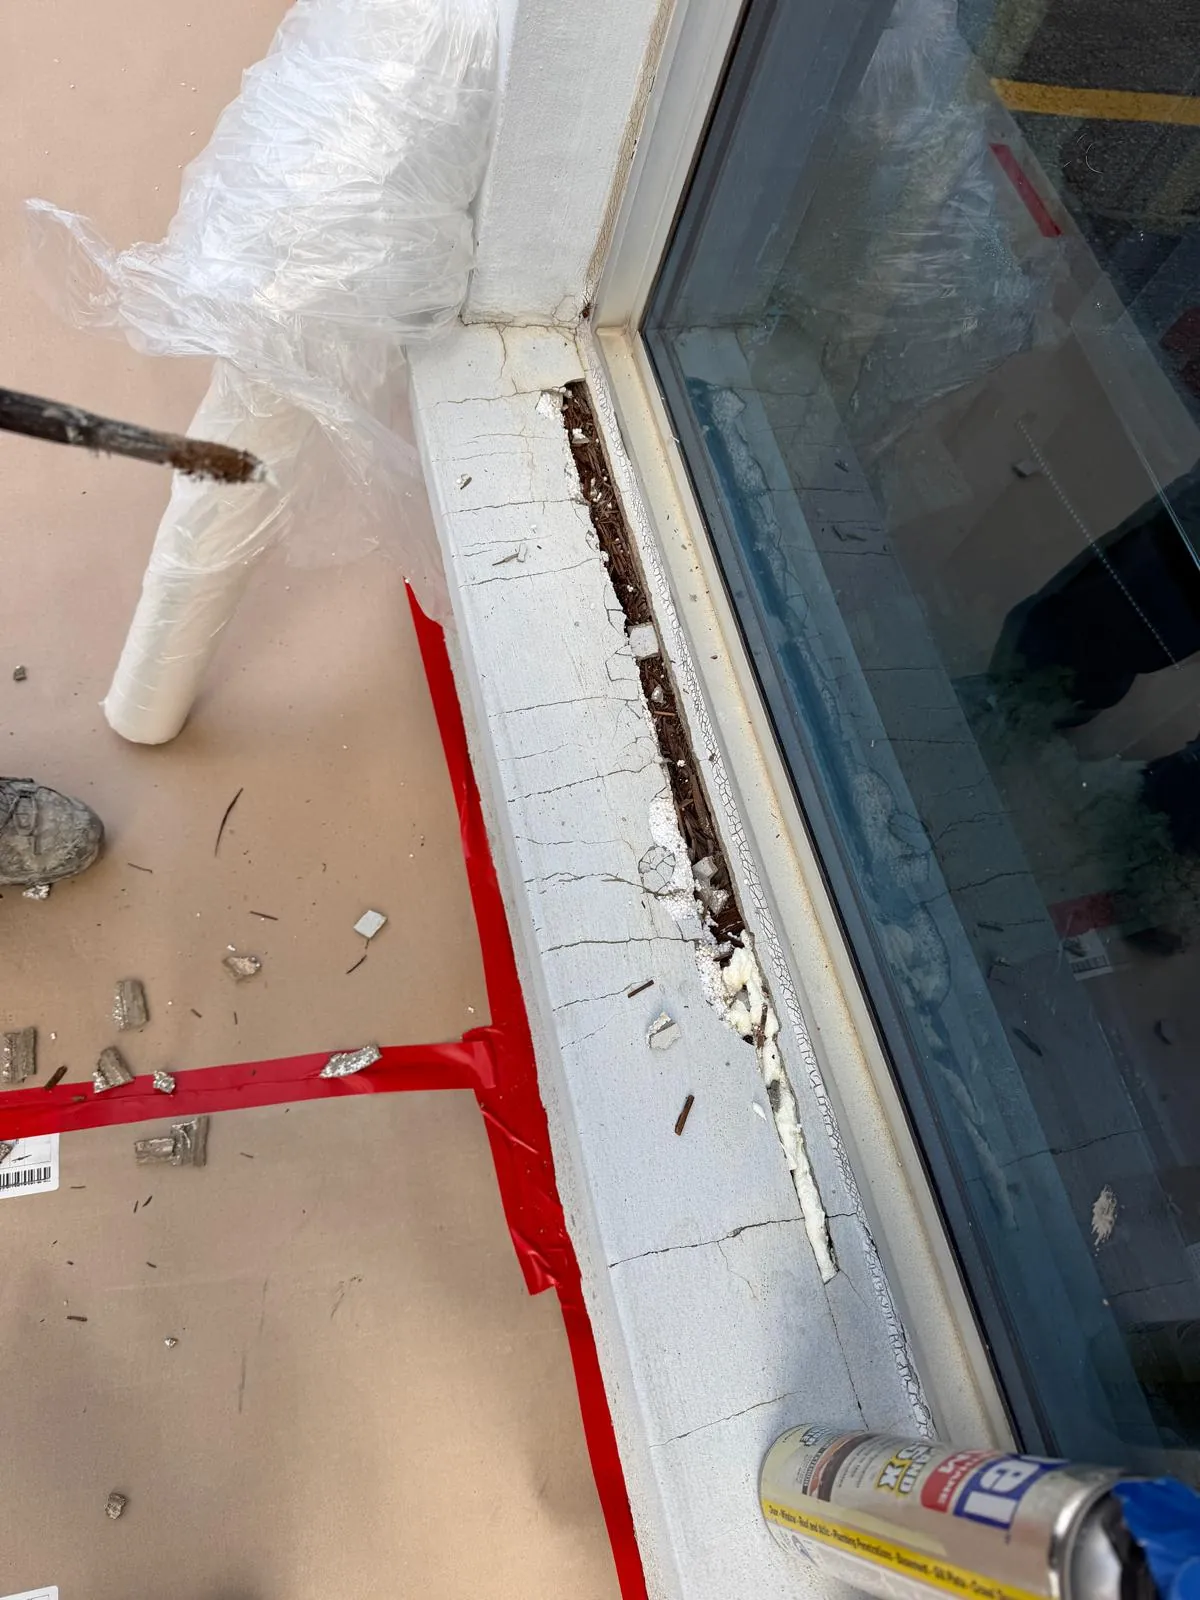
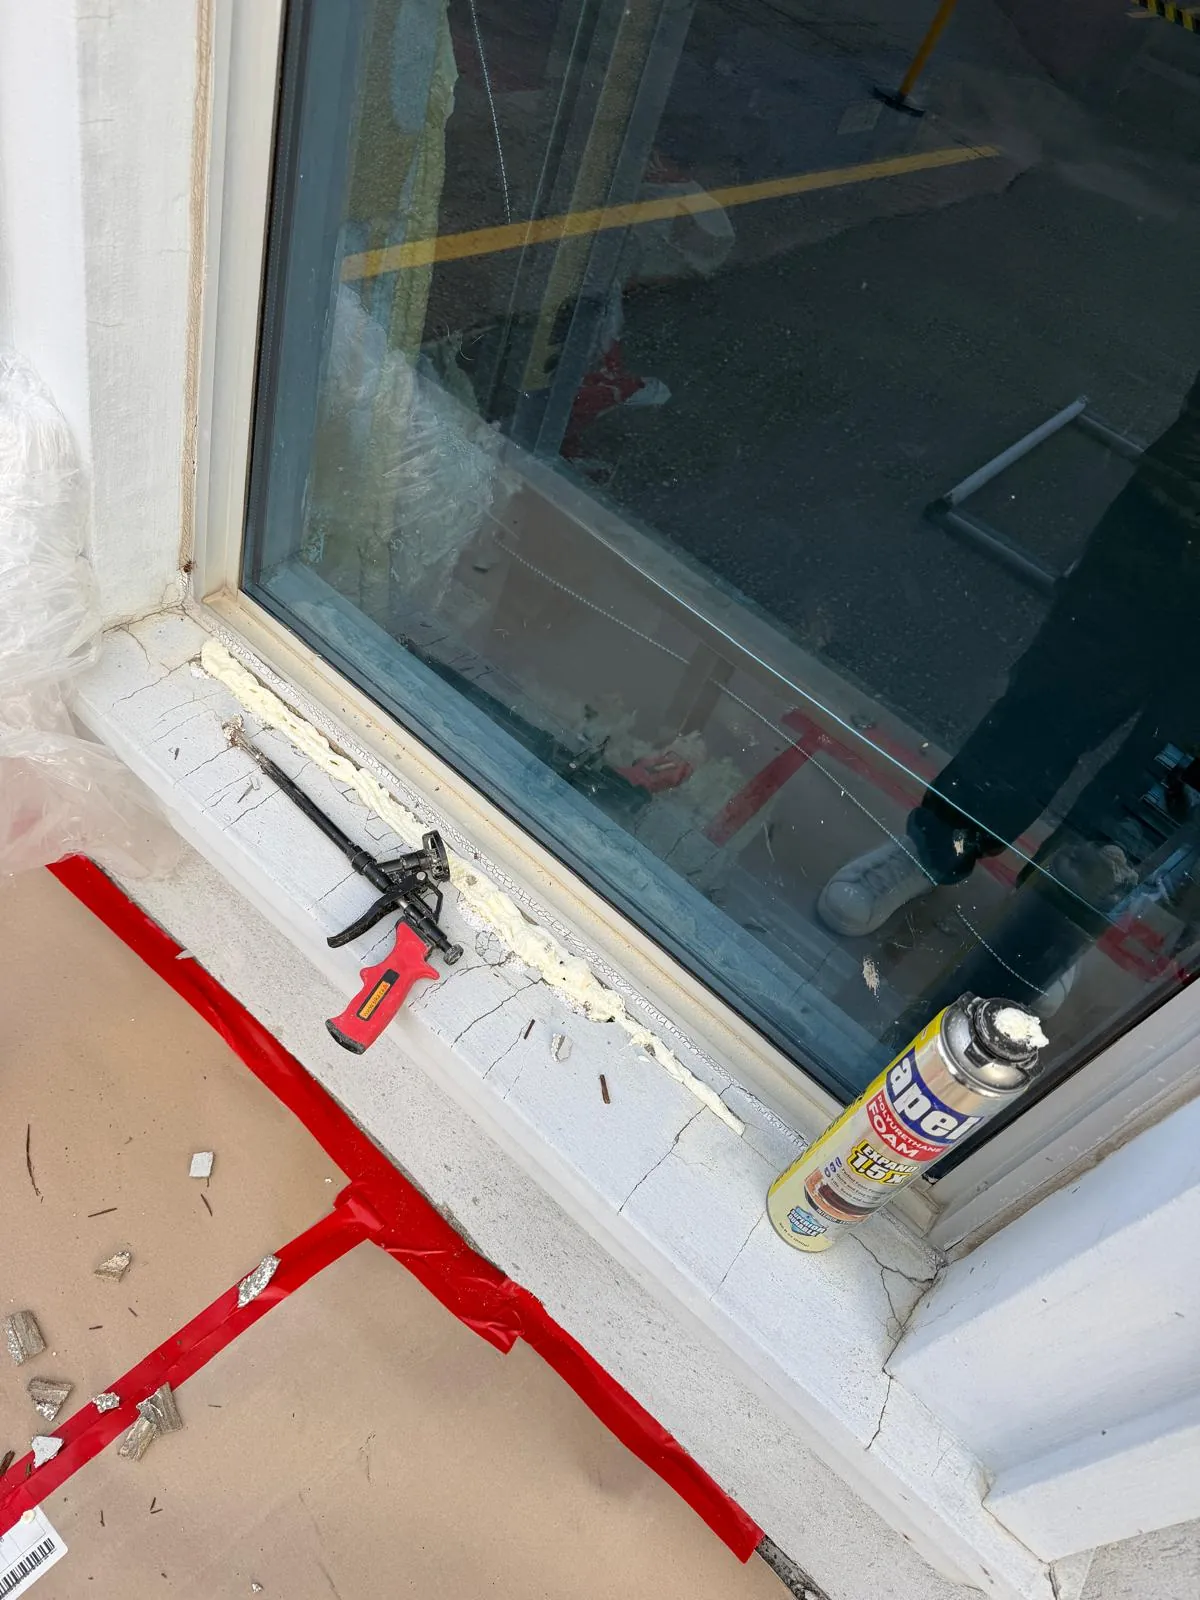
The existing joint sealants and window caulking were cut out, not caulked over. New sealant was run in the control joints, and every window got a new caulking line. New caulk over old, failed caulk has nothing sound to bond to, so it fails along the same line. Cutting it back to clean surfaces is slower, and it is the only way the new bead holds.

Stage 5 — Venetian Finish, Parging & New Quoins

Where the wall needed it, a Venetian finish was applied over the repairs so the patched areas and the original wall read as one surface. Fibreglass mesh went in wherever the substrate needed reinforcing. The same Venetian finish was used for the parging at the base, so it matches the wall above. The old quoins at the building corners were replaced with new Canamould stock.

Stage 6 — Metals, Doors & Dock

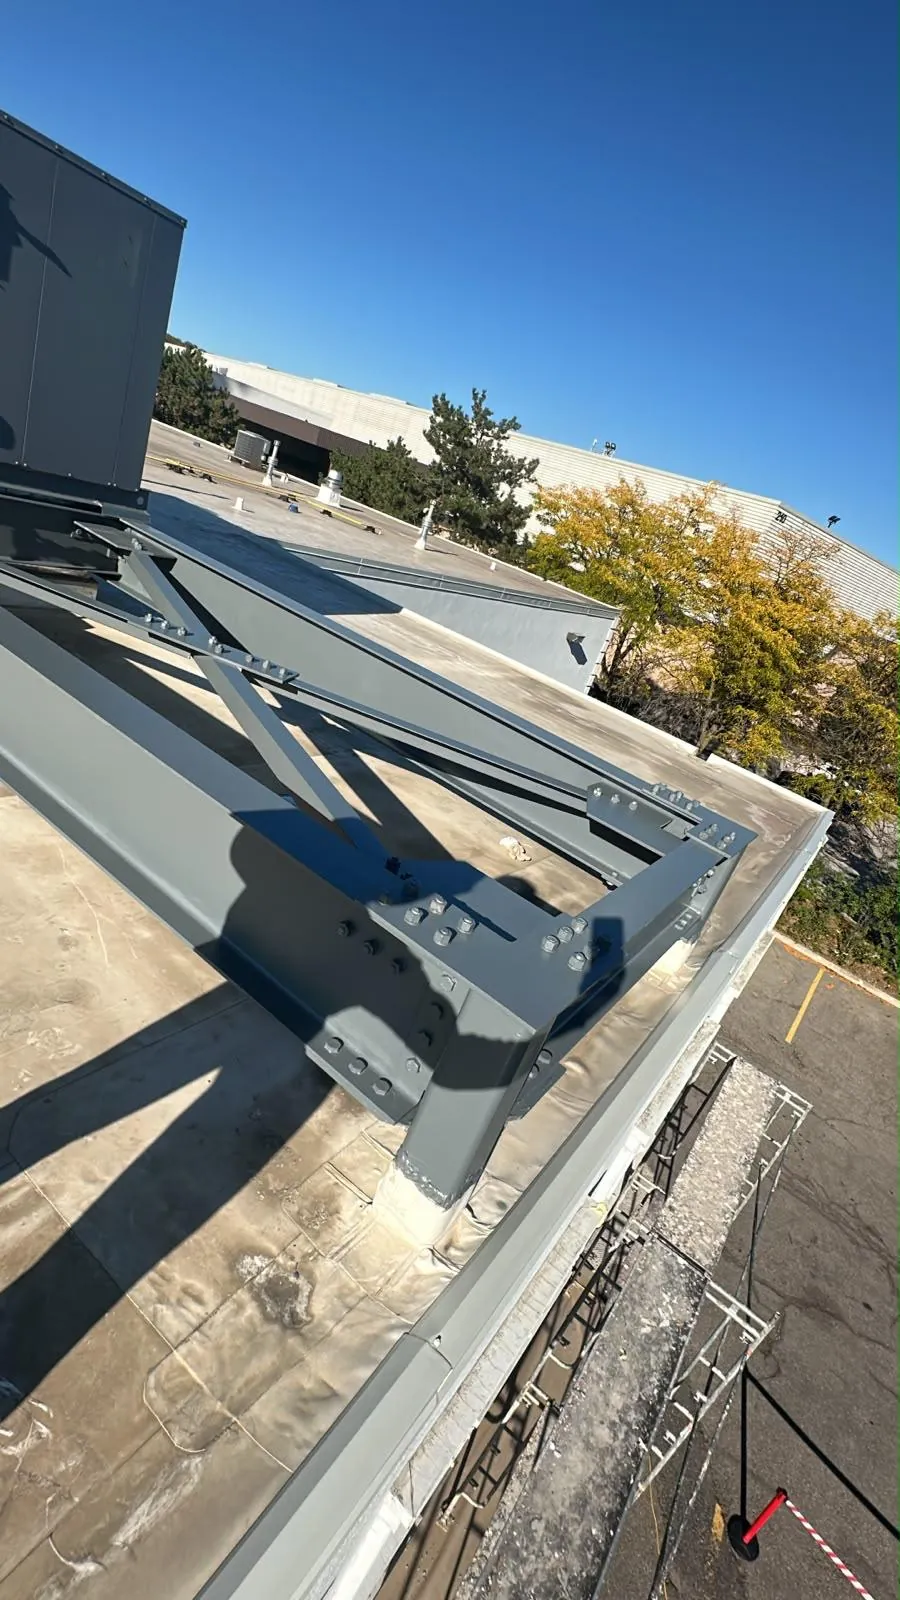
The metals at the roof were painted, as were the entry plaza doors and railings. The metal stairs were painted completely black, and the dock doors and the metal edges around them were painted too. On a commercial building these details are what visitors and delivery drivers see up close. A new wall colour next to a rusty door frame still looks unfinished.

Stage 7 — Two Full Coats, Whole Building

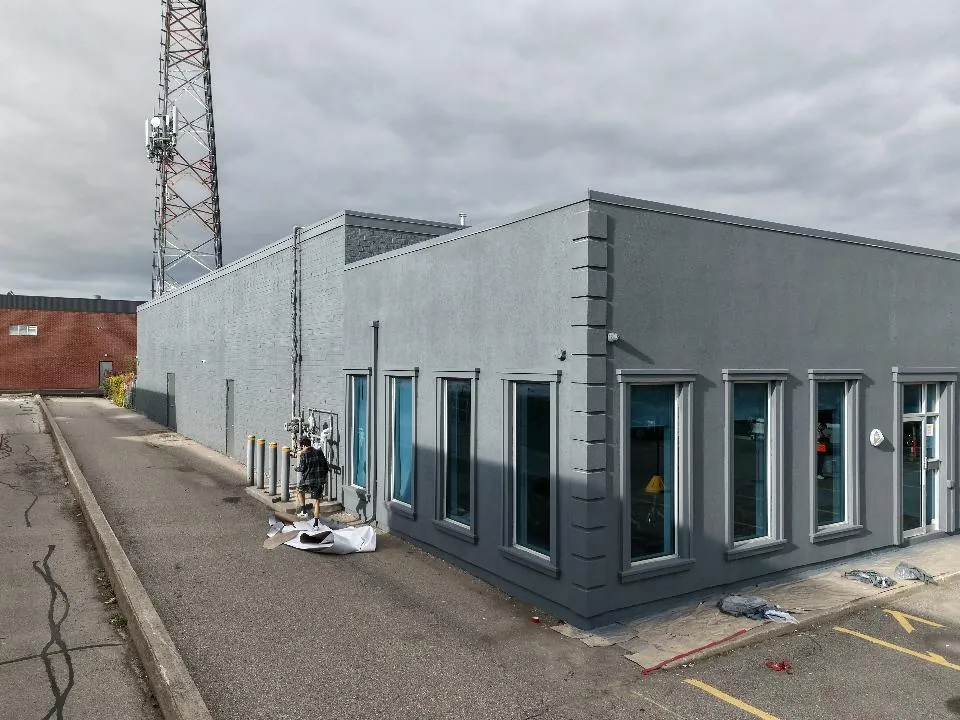
With the repairs, sealants and finish coats done, the whole building was painted in two full coats of Benjamin Moore 1602, the colour the client chose. That took it from faded cream to a deep grey, with light trim around every window. Masking came down, the site was cleared, and the building was handed back finished.
Stage By Stage

Protect — Repair — Seal — Finish — Paint

The front courtyard elevation before work started, in its original faded cream finish
Before — the courtyard elevation in the original faded cream finish
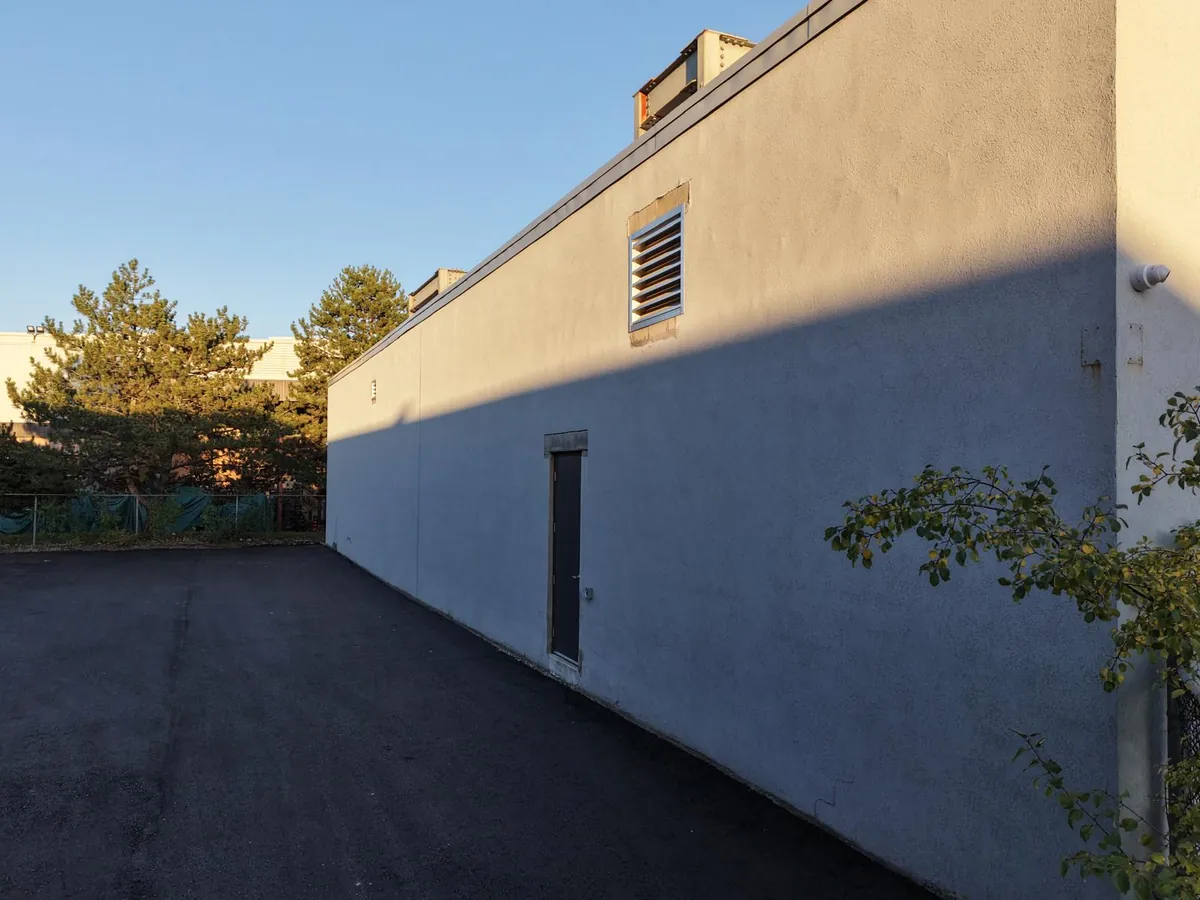
The long rear wall before work, a single flat run of weathered finish
Before — the long rear wall, weathered and marked
A loading-dock door fully wrapped in plastic sheeting and taped off before any coating work
Protect — dock doors sheeted and taped before a drop of paint
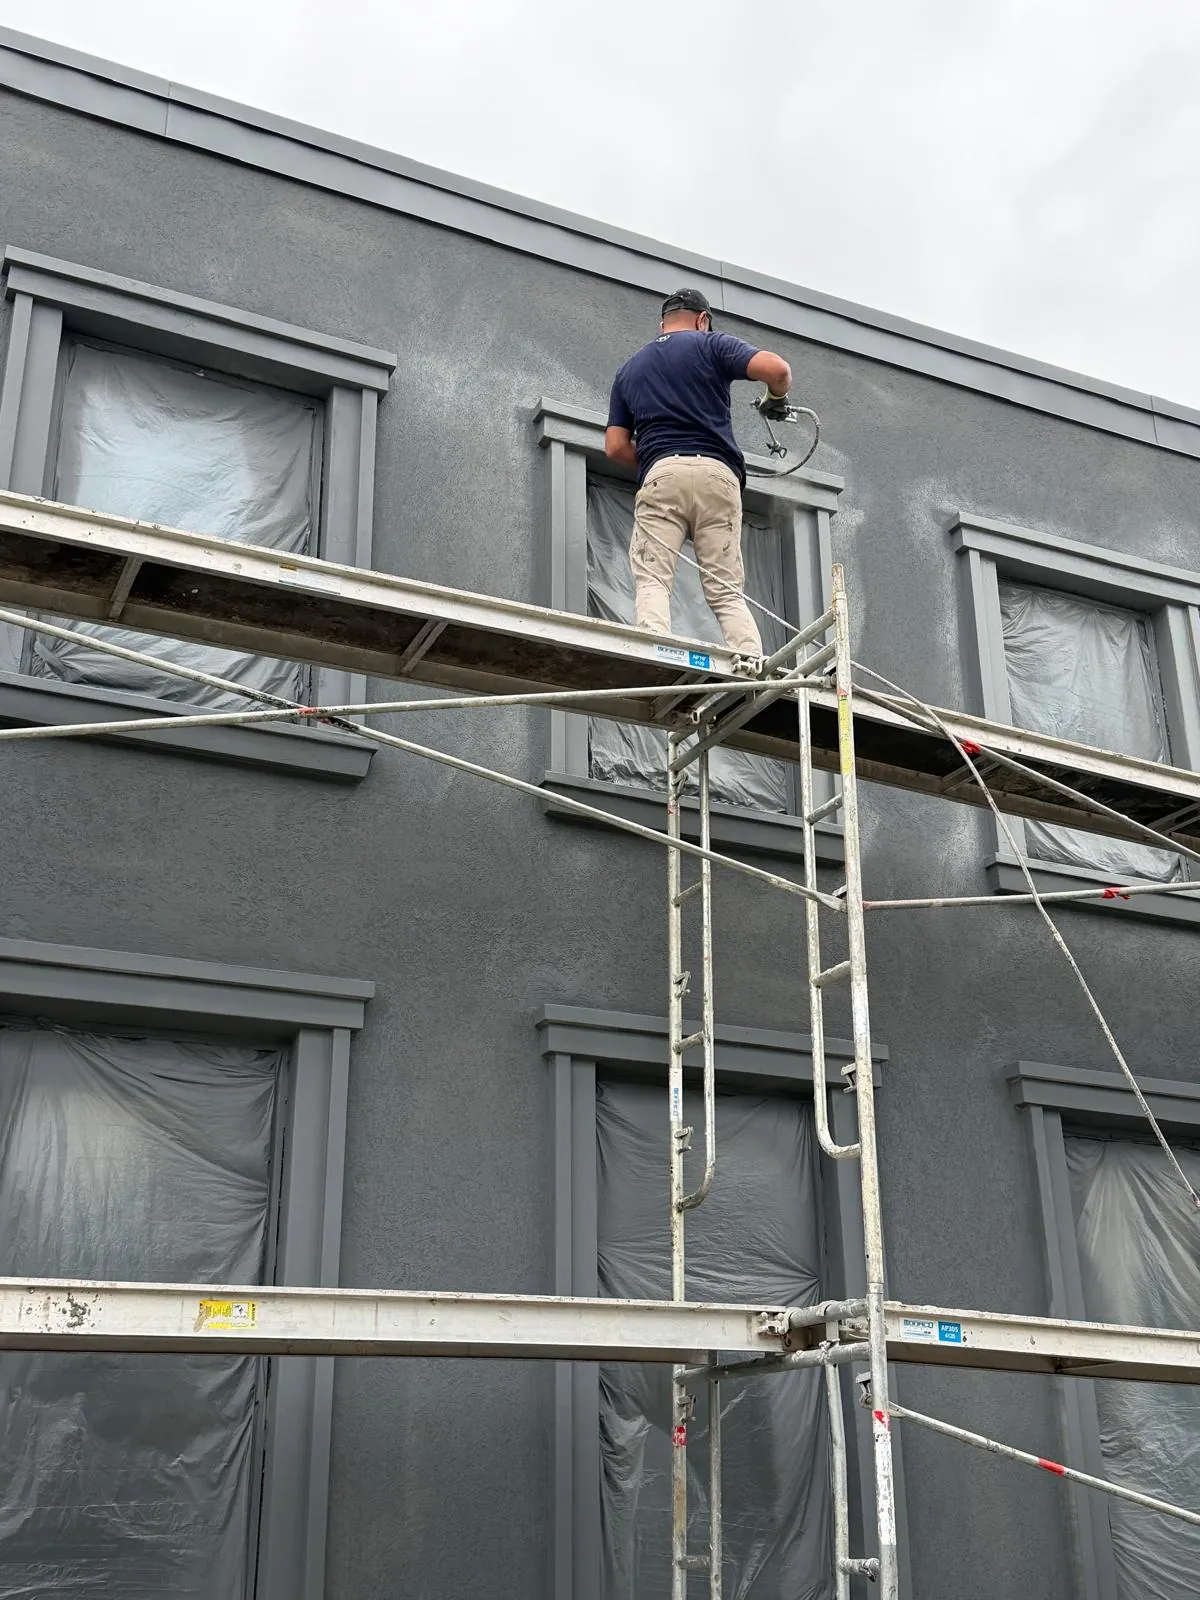
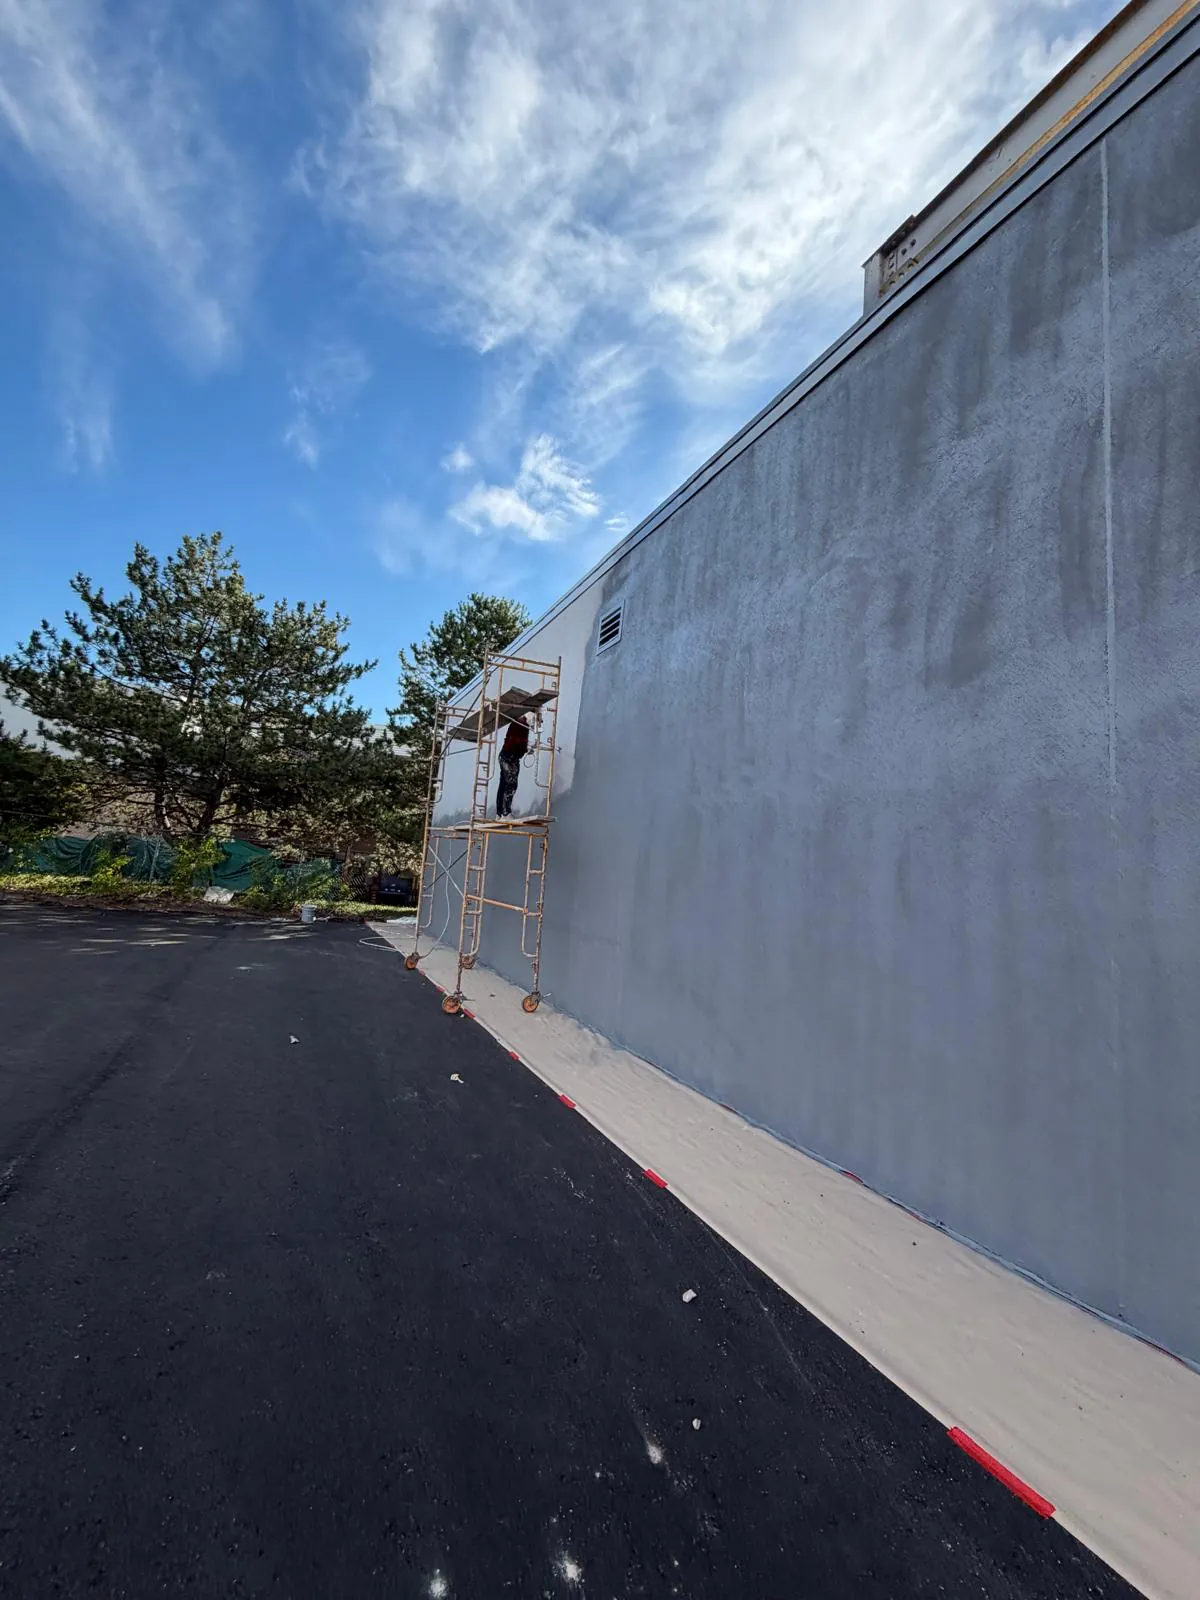
A FAIME crew member working from scaffold beside masked windows on the upper wall
Scaffold up — crew working the upper wall, every window masked
Scaffolding set along the full elevation of the commercial building
Scaffolding settled along the elevation before the repairs began
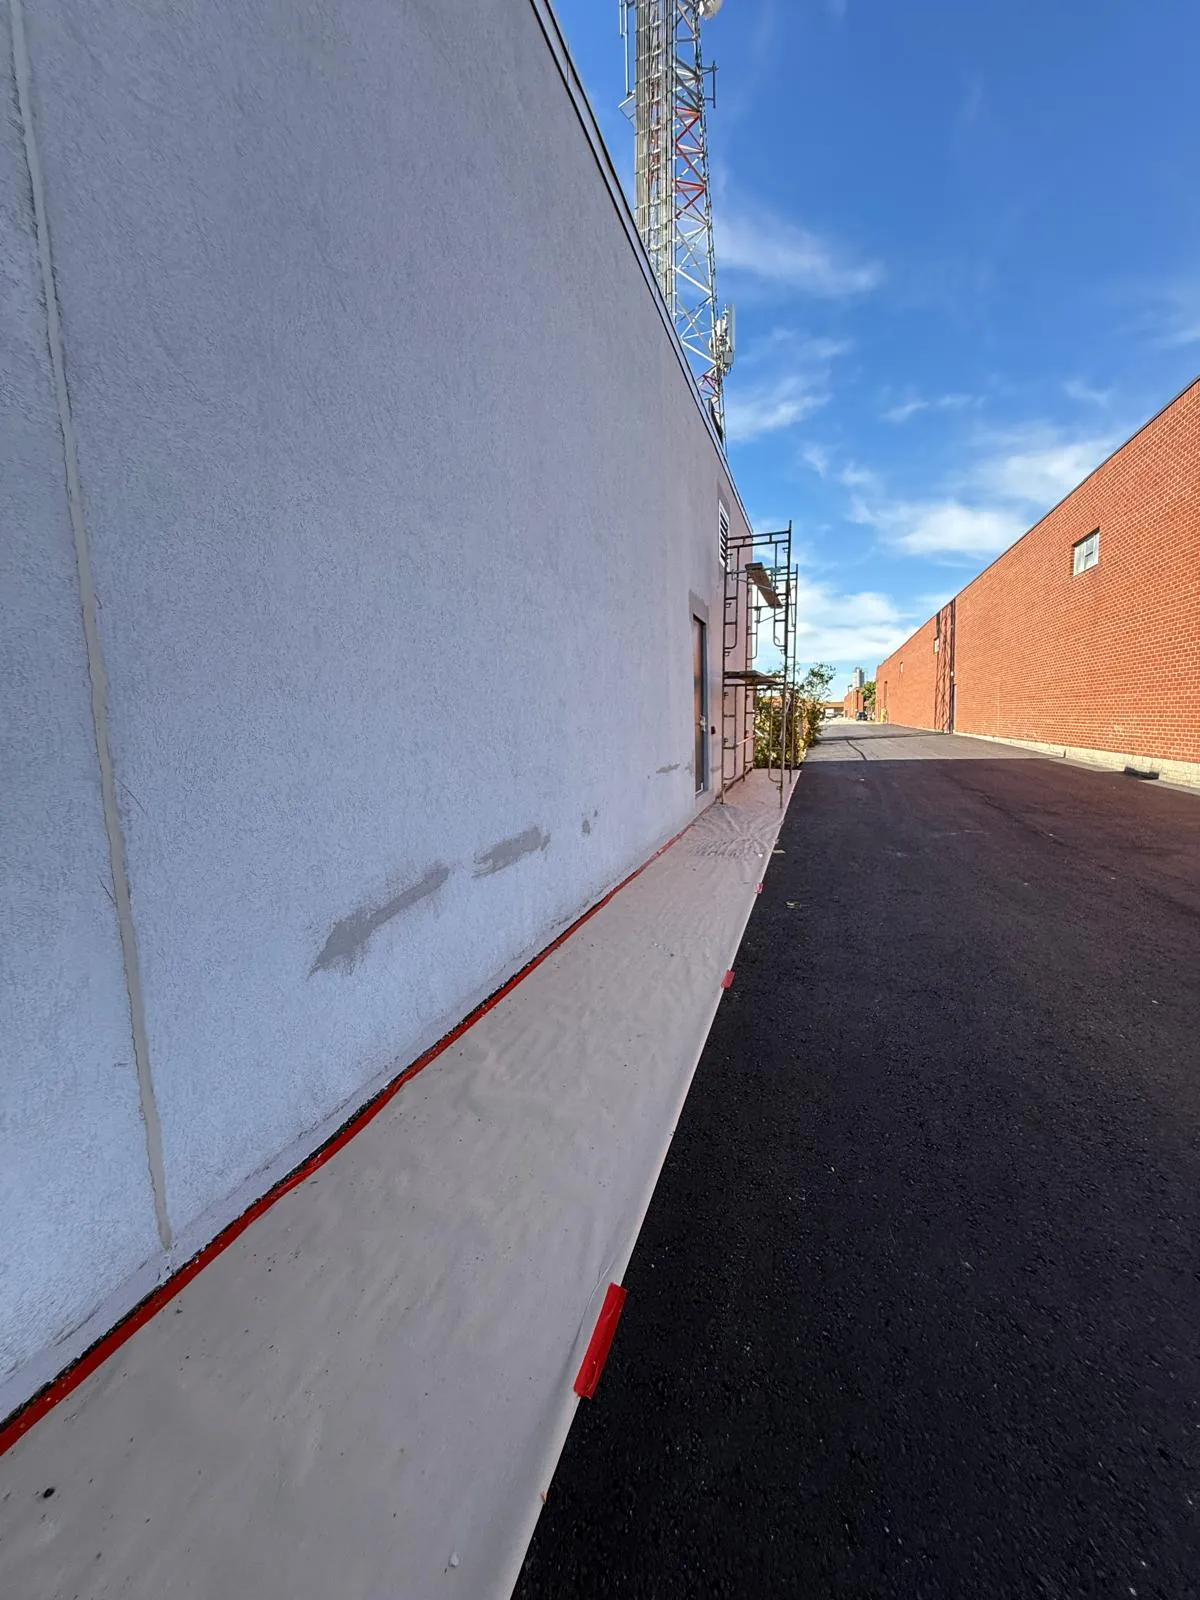
Freshly patched stucco damage along the long wall, over drop sheets
Stucco repairs — damaged areas cut back and patched
Brick repair at the base of a wall, new mortar pointed into the damaged joints
Brick repair — damaged joints and units made good at the base
A FAIME tradesman on a ladder sealing the vertical control joint in a brick wall
Joint sealants — old control-joint sealant out, new bead in
The old window caulking being cut out along a sill, with the floor protected
Window caulking — the old, failed bead cut out first
A window sill cleaned back and ready for new caulking, cartridge and gun on the protected floor
Window caulking — cleaned back and re-caulked
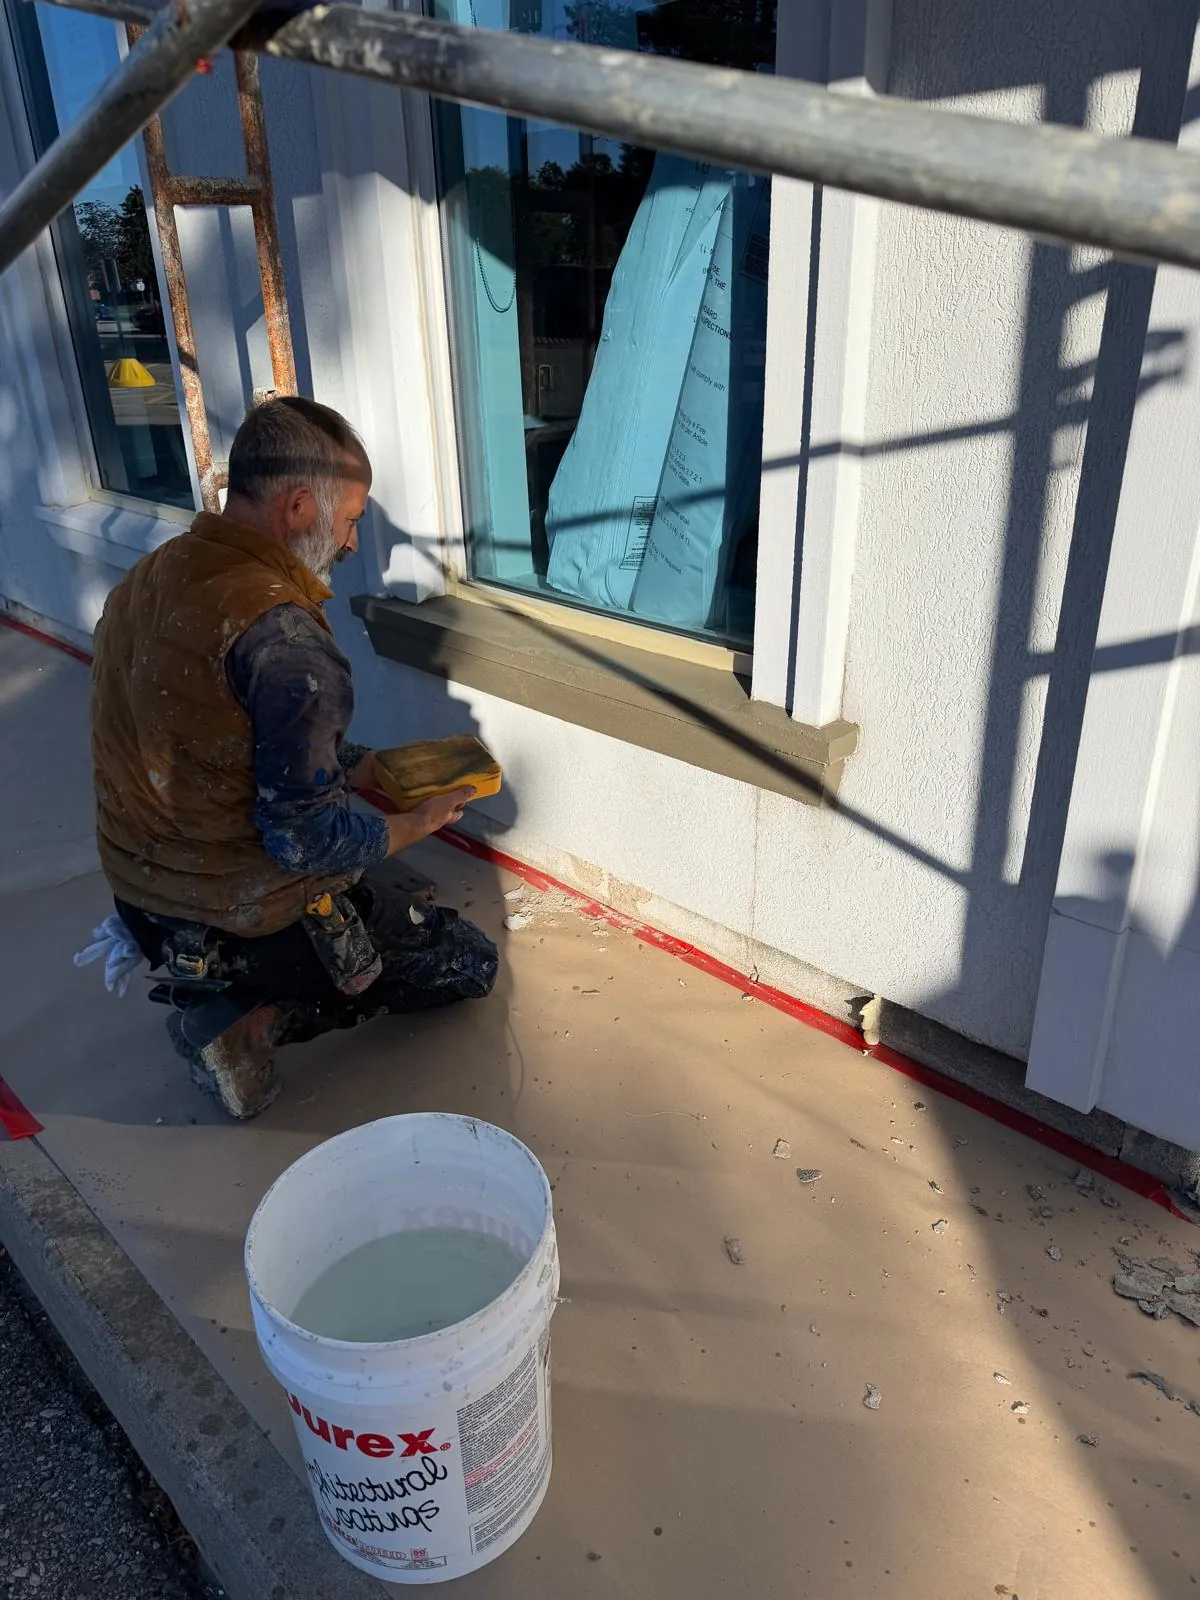
A FAIME tradesman kneeling at a window sill, finishing the new sill and caulking line
Sill detail — finishing the new line by hand
The wall opening left after the old fixture was removed, ready to be patched
Old hose, wiring and light fixture removed — openings patched
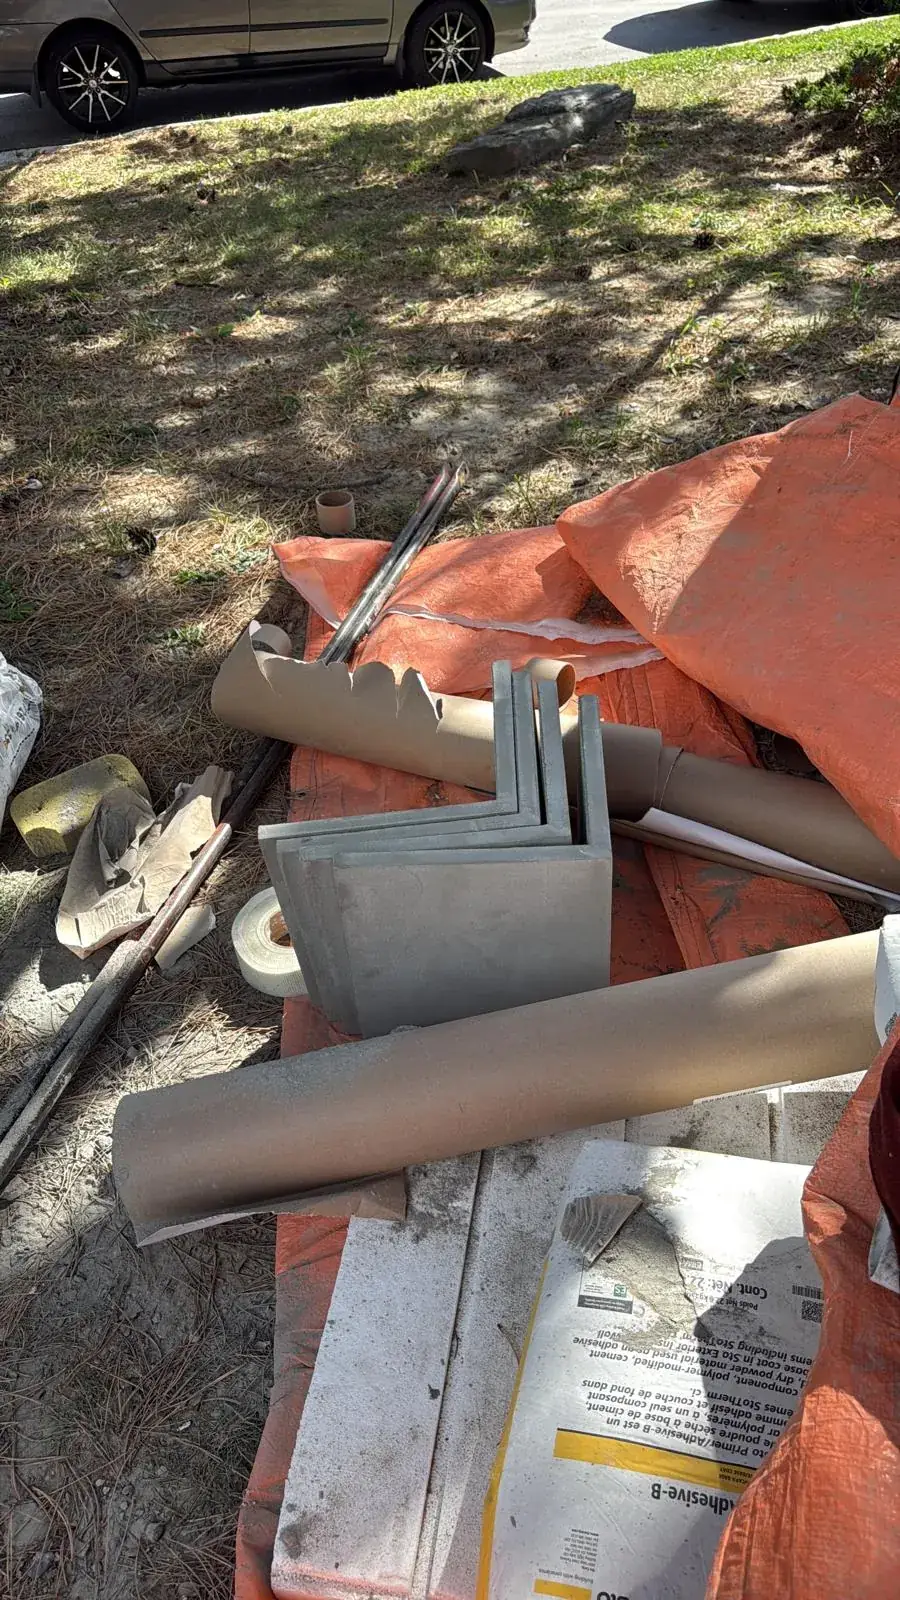
New moulding stock on site for replacing the quoins at the building corners
New quoins — Canamould stock staged for the corners
The long wall mid-way through the Venetian finish, patched areas blending into the new coat
Venetian finish — evening out the wall where it was needed
Roof-level metal framing freshly painted in grey
Roof metals — painted to match the new colour
The rear corner of the building before work, in the old cream finish with staining down the corner quoins
Before — the rear corner, stained quoins and a tired finish
The same rear corner after the repaint, finished in a dark grey with light window trim
After — the same corner in two coats of Benjamin Moore 1602
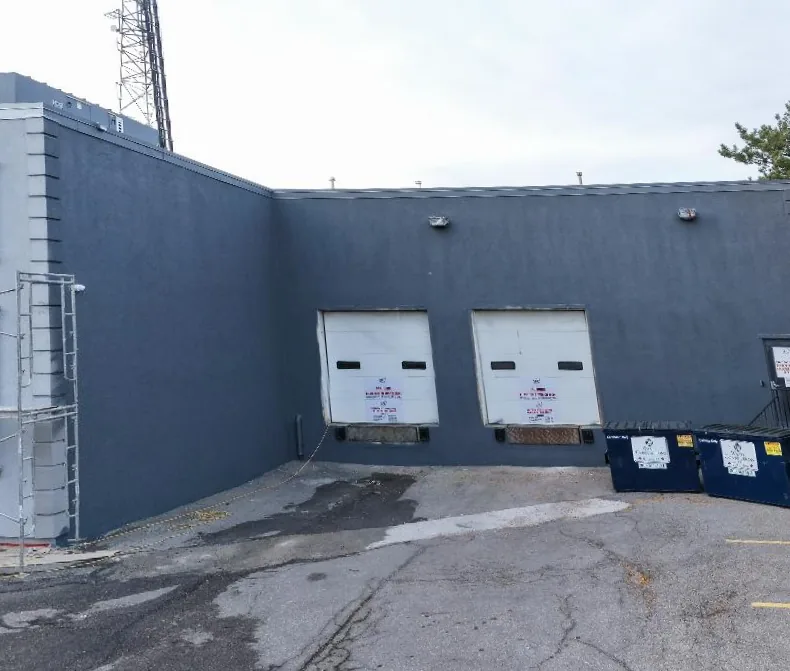
Drone view of the loading-dock elevation finished in dark grey, dock doors masked and the crew finishing up
Loading dock — walls finished, dock doors and edges being painted
Drone view of the long elevation finished in dark grey with light trim around every window
Finished — the long elevation, two full coats top to bottom
Drag to Reveal

See the Transformation

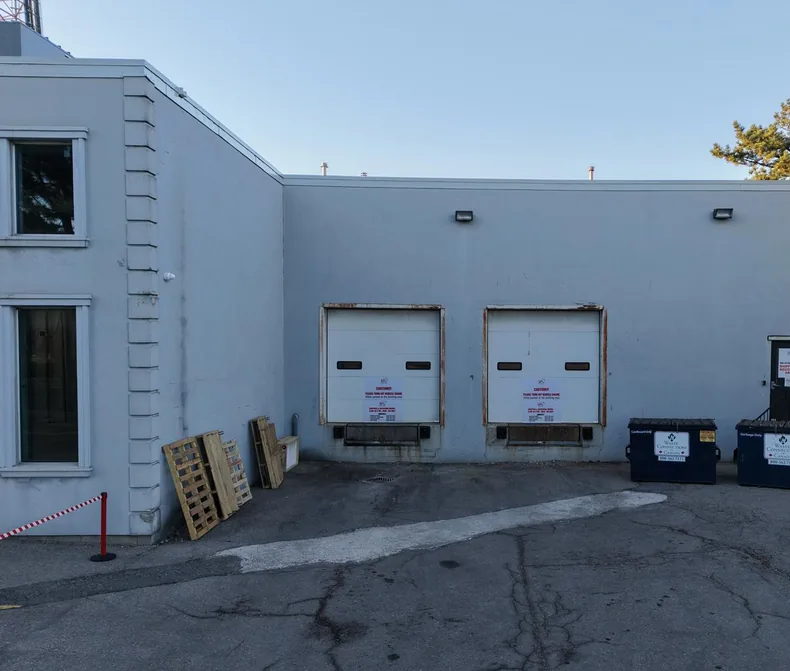
Drag the slider from side to side to compare the loading dock before and after FAIME finished it. These are real photos from this job, taken from the same spot, with nothing staged.

Loading Dock — Faded Cream to Two Coats of Grey

The loading-dock elevation after the repaint, walls finished in dark grey around the two dock doors The same loading-dock elevation before work, in a faded cream finish with rust at the dock-door frames Before After

The same wall, dock doors and corner. The faded cream is repaired, sealed and refinished in two coats of Benjamin Moore 1602, and the rusted dock-door edges are painted.

On Site

Watch It Happen

Working the upper wall from the scaffold, with every window masked.
New sealant going into the brick control joints after the old sealant was cut out.
The new colour going on across the brick section and around the service door. Press play.
What Was Done

Scope Breakdown

01

Protect, Scaffold & Coordinate

  • Site covered, windows masked, doors and dock doors sheeted
  • Scaffolding set up along the elevations
  • Worked around the tenant’s day and coordinated the other teams on site
02

Repair & Remove

  • All stucco damage cut back and repaired
  • Brick repairs across the whole building
  • Old hose bib, redundant wiring and old light fixture removed, openings patched
03

Seal, Finish & Quoins

  • Joint sealants and window caulking cut out and redone
  • Venetian finish where needed, with mesh where required; same finish for the parging
  • Quoins replaced with new Canamould stock
04

Paint & Hand Over

  • Roof metals, entry plaza doors and railings painted; metal stairs painted black
  • Dock doors and the metal edges around them painted
  • Whole building in two coats of Benjamin Moore 1602, then site cleared
Good to Know

Commercial Envelope FAQ

Can you repaint and repair a commercial building while the tenant stays open?

Yes. That is how this Vaughan job ran. The building stayed occupied for the full 7–10 days. FAIME kept entrances usable, sheeted off dock doors and walkways, sequenced each elevation around the tenant’s day, and coordinated with the other teams on site. As general contractor, FAIME owned that coordination, so the building owner had one point of contact.

Why cut out old caulking instead of caulking over it?

New caulk laid over old, failed caulk has nothing sound to bond to, so it lets go along the same line, usually within a season or two. On this building FAIME cut out the existing joint sealants and window caulking back to clean surfaces and ran new beads. It is slower, and it is the only way the seal lasts.

What is a Venetian finish on an exterior wall, and why use it for parging?

Here it means a trowel-applied finish coat over the repaired wall, so patched areas and the original surface read as one even face, with fibreglass mesh embedded wherever the substrate needs reinforcing. Using the same finish for the parging at the base means the bottom of the wall matches the wall above instead of looking like a separate band.

What are quoins, and why replace them?

Quoins are the raised decorative blocks that run up the outside corners of a building. On this job the old ones were stained and worn, so FAIME replaced them with new Canamould stock before the building was painted, giving the new colour clean, sharp corners.

Why repair stucco and brick before painting?

Paint is a coating, not a repair. Painting over cracked stucco, open brick joints and old penetrations looks good for a season, then water gets in through the same gaps and the new colour blisters and stains. FAIME repaired the stucco and brick, removed the old hose bib, wiring and light fixture, and resealed every joint before the two finish coats went on.

Does FAIME take on commercial projects in Vaughan and York Region?

Yes. FAIME Construction works across the Greater Toronto Area, including Vaughan, Richmond Hill and Markham. FAIME can run a job as general contractor or come in as the envelope and finishing trade. FAIME is WSIB Active, carries $2M general liability insurance with additional-insured endorsements available, and backs its workmanship with a 2-year warranty. Book a free site visit and get a written quote within 48 hours.

Keep Exploring

More Projects

Have a Similar Project in Mind?

Tell us about your building and we'll walk the envelope with you, show you what actually needs fixing, and give you a clear written estimate. No obligation.

Google Reviews

Happy With Our Work?
Tell Google.

Reviews help GTA homeowners and contractors find a trusted specialty team. If we earned your confidence, we'd be grateful for 60 seconds of your time.

Leave Us a Google Review

Takes 60 seconds — helps us more than you know

Call Now WhatsApp