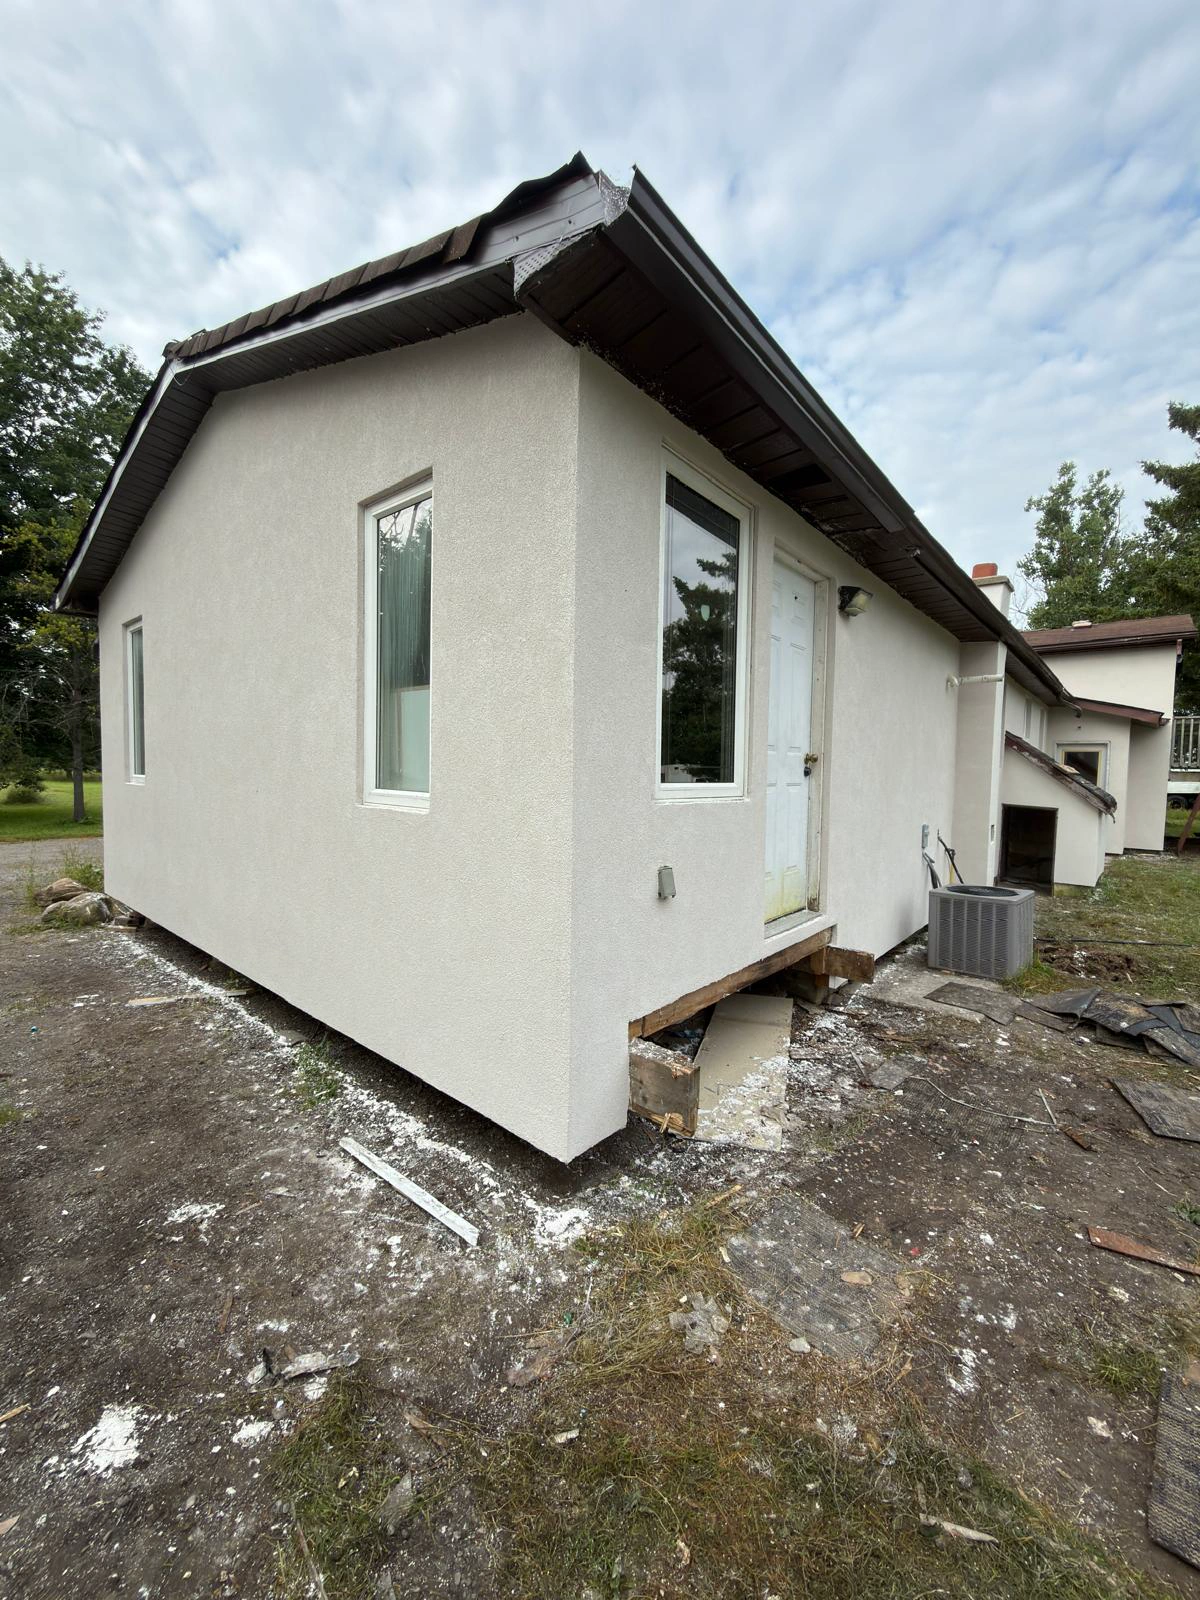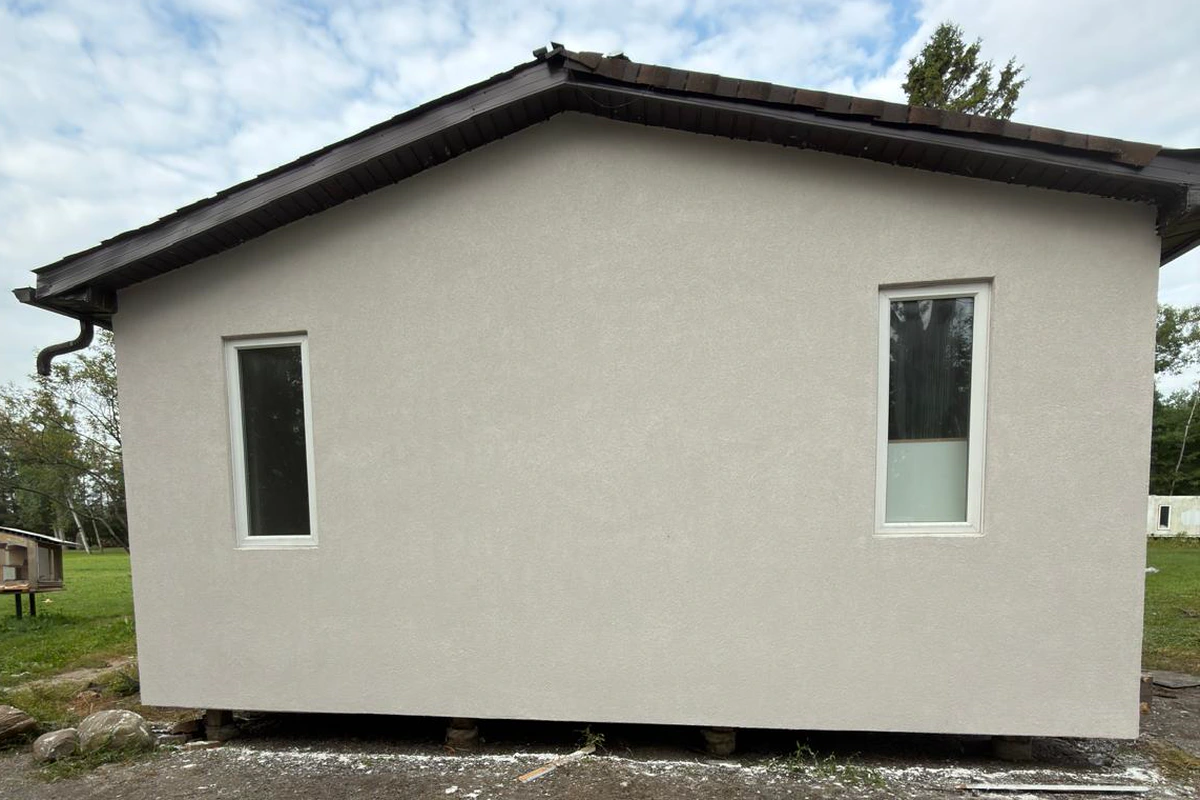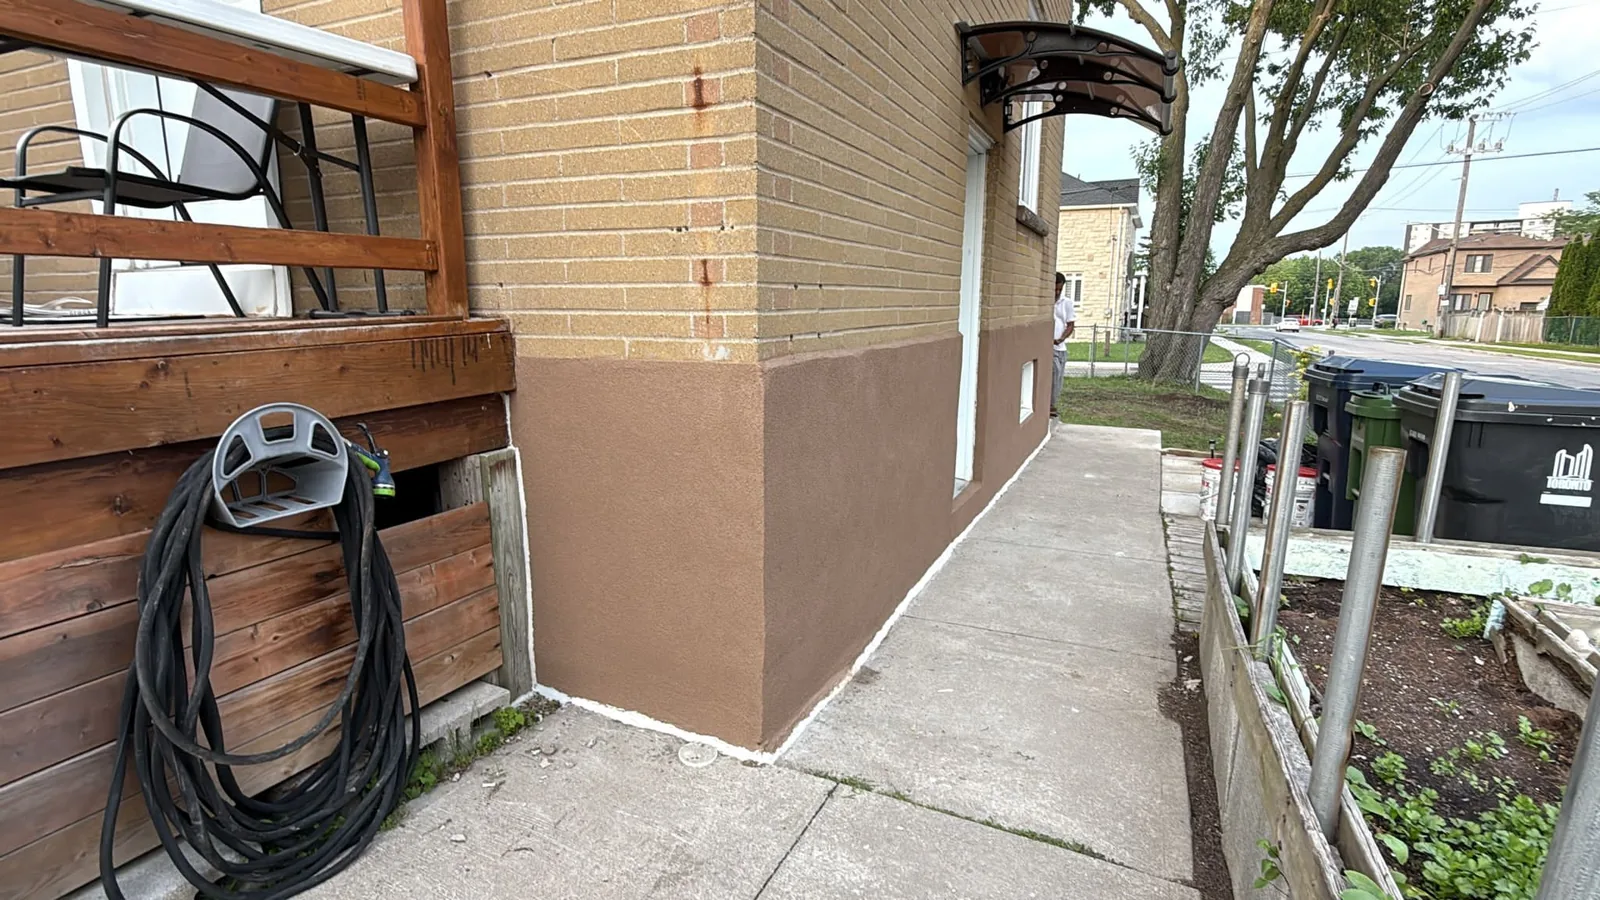
The finished corner of an Innisfil bungalow after a full exterior EIFS transformation by FAIME Construction, showing a flat textured finish coat and clean window returns
Home/Projects/Innisfil Bungalow EIFS Transformation
EIFS & Exterior

Full Exterior EIFS Transformation

Innisfil, Ontario 2026 Rebuilt, Insulated & Finished Completed ✓
Location
Innisfil, ON
Year
2026
Category
EIFS & Exterior
Scope
Wood Repair · EPS · Mesh Base · Finish
Status
Completed ✓
Project Scope

Rebuilt From the Structure Out,
Wrapped in a Flat New Face

FAIME Construction gave this Innisfil bungalow a complete exterior transformation. The ground and windows were covered first, loose and rotten wood was cut out and replaced, smaller splits were filled and extra supporting timber was added to the structure. EPS insulation board was then fixed across every face to bring the walls dead-flat, every fastener head was spotted with base coat and left to dry, a full base coat with fibreglass mesh was applied, and a long-life finish coat was troweled on. The whole property was cleaned down before handover. Free site visit and written quote within 48 hours.EIFS & exterior finishing · Innisfil, Simcoe County & the GTA · 15+ years' trade experience · WSIB Active · $2M CGL · 2-year workmanship warranty

Project Overview

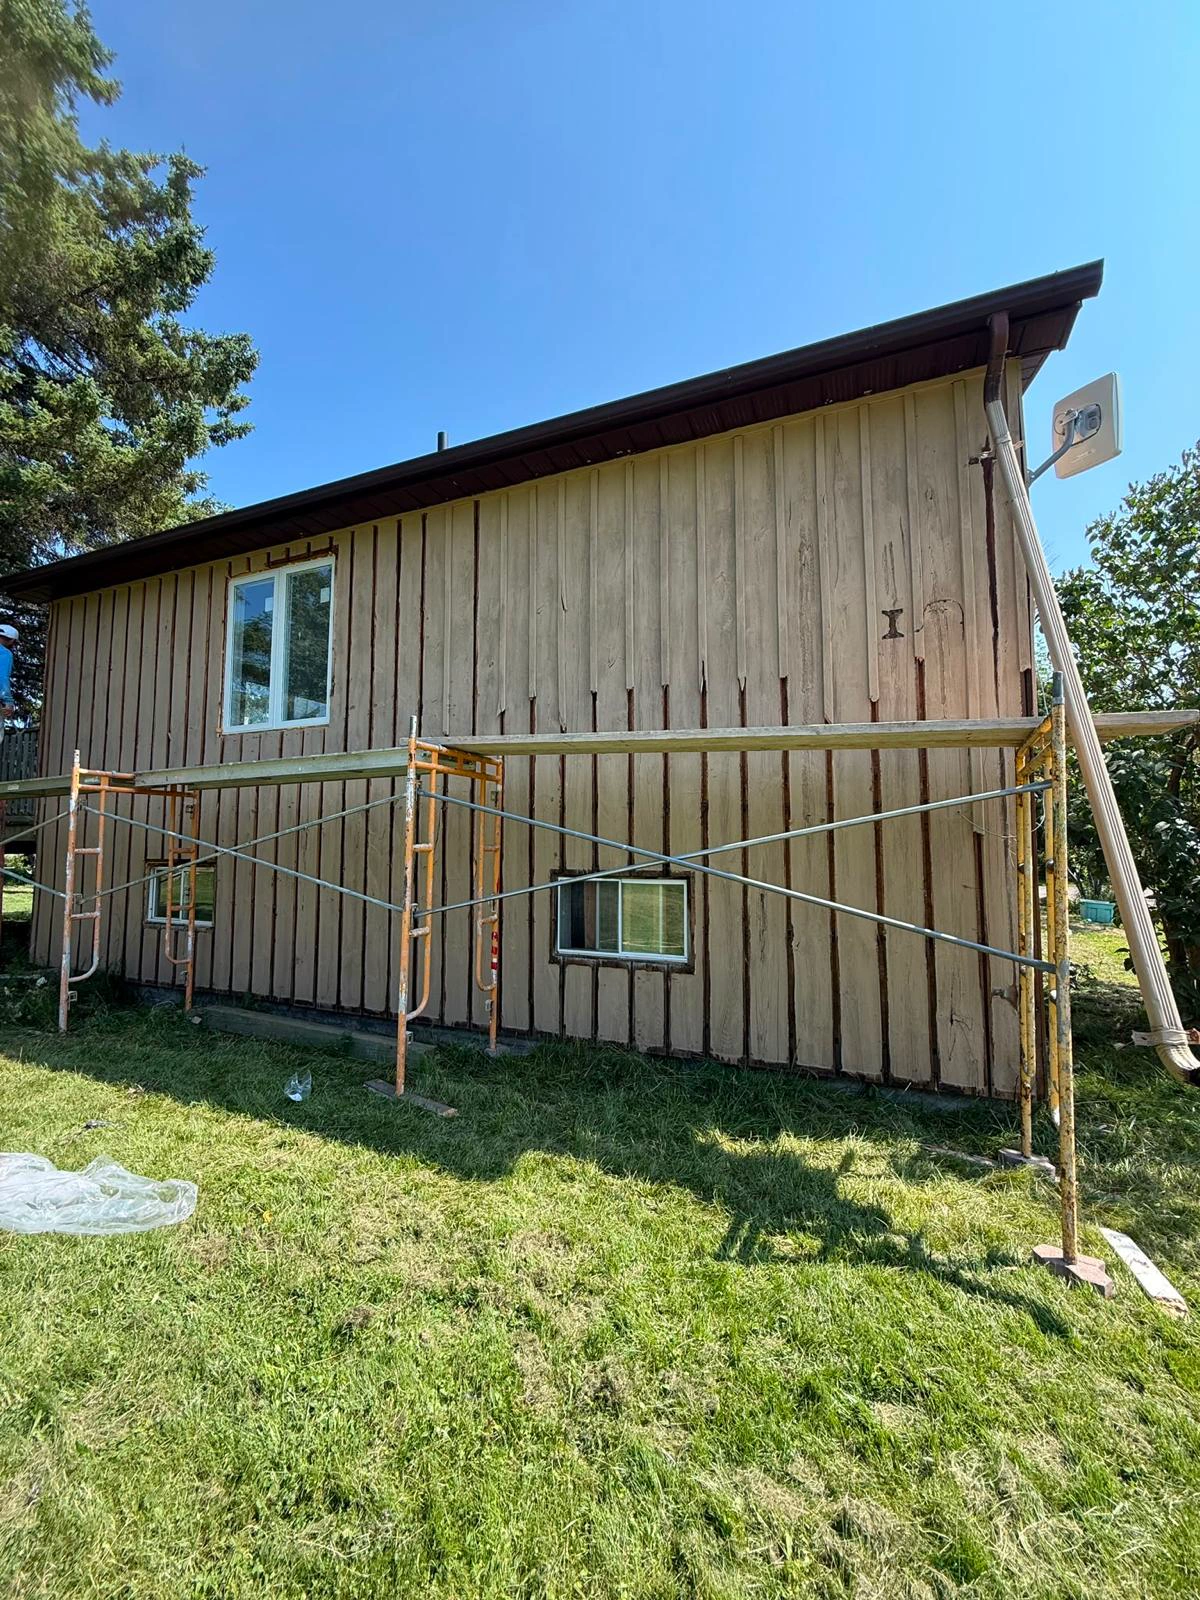
This bungalow was wearing a tired vertical board exterior that had been weathering for decades — boards were soft in places, the wall face was uneven, and no amount of recoating was going to fix what was underneath. Rather than skin over the problem, FAIME took the exterior back to sound structure, repaired and reinforced the wood, then built a completely new insulated face over the whole building. Every stage below is documented with photos and video from this exact job.

Stage 1 — Cover & Protect

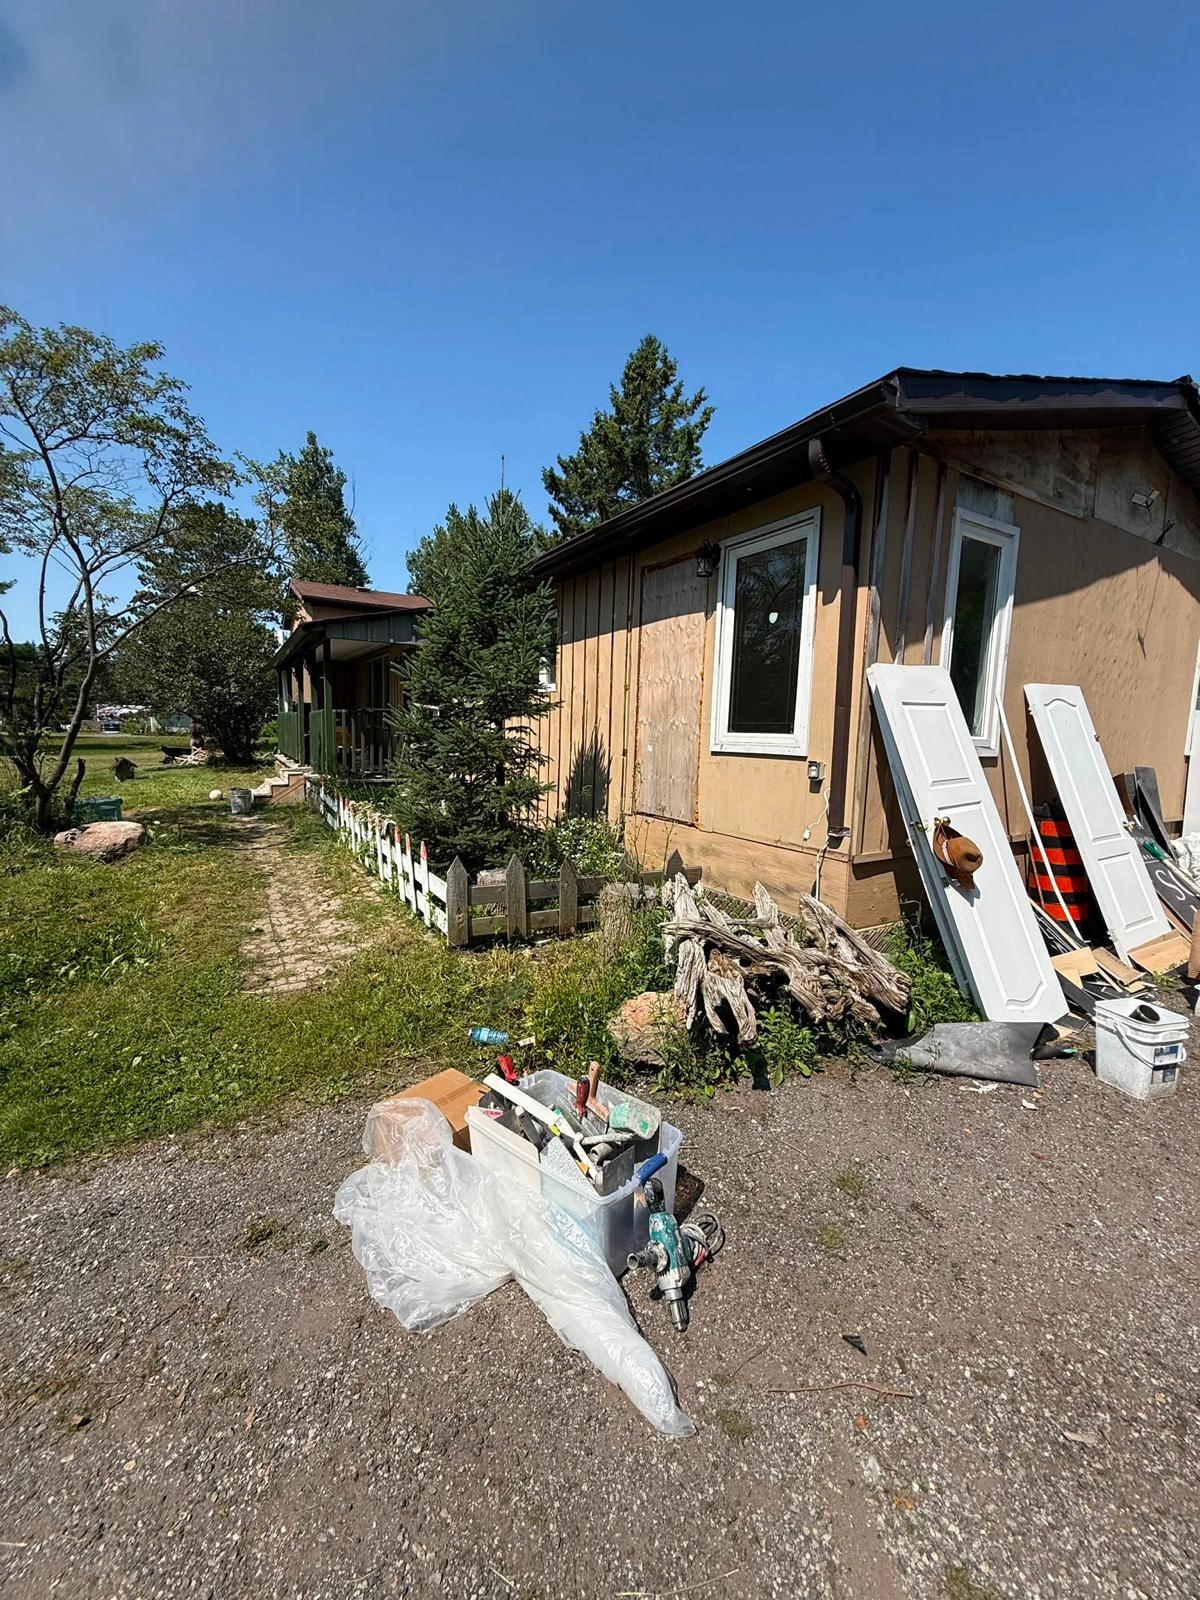
Before anything came off the building, the ground around the property and every window was covered and masked. On a full exterior rebuild there is a lot of removed material, dust and wet coating moving around the site, and the protection that goes down first is what decides how the property looks when the crew leaves.

Stage 2 — Strip Out & Structural Wood Repair

The old exterior came off and the structure underneath was assessed board by board. Loose and rotten wood was cut out and replaced with new timber. Where a board was still sound but had smaller splits or cracks, those were filled with wood filler rather than needlessly replacing good material. Extra supporting timber was then added to the structure so the whole wall face had something solid and continuous to carry the new system.

Stage 3 — EPS Insulation Board

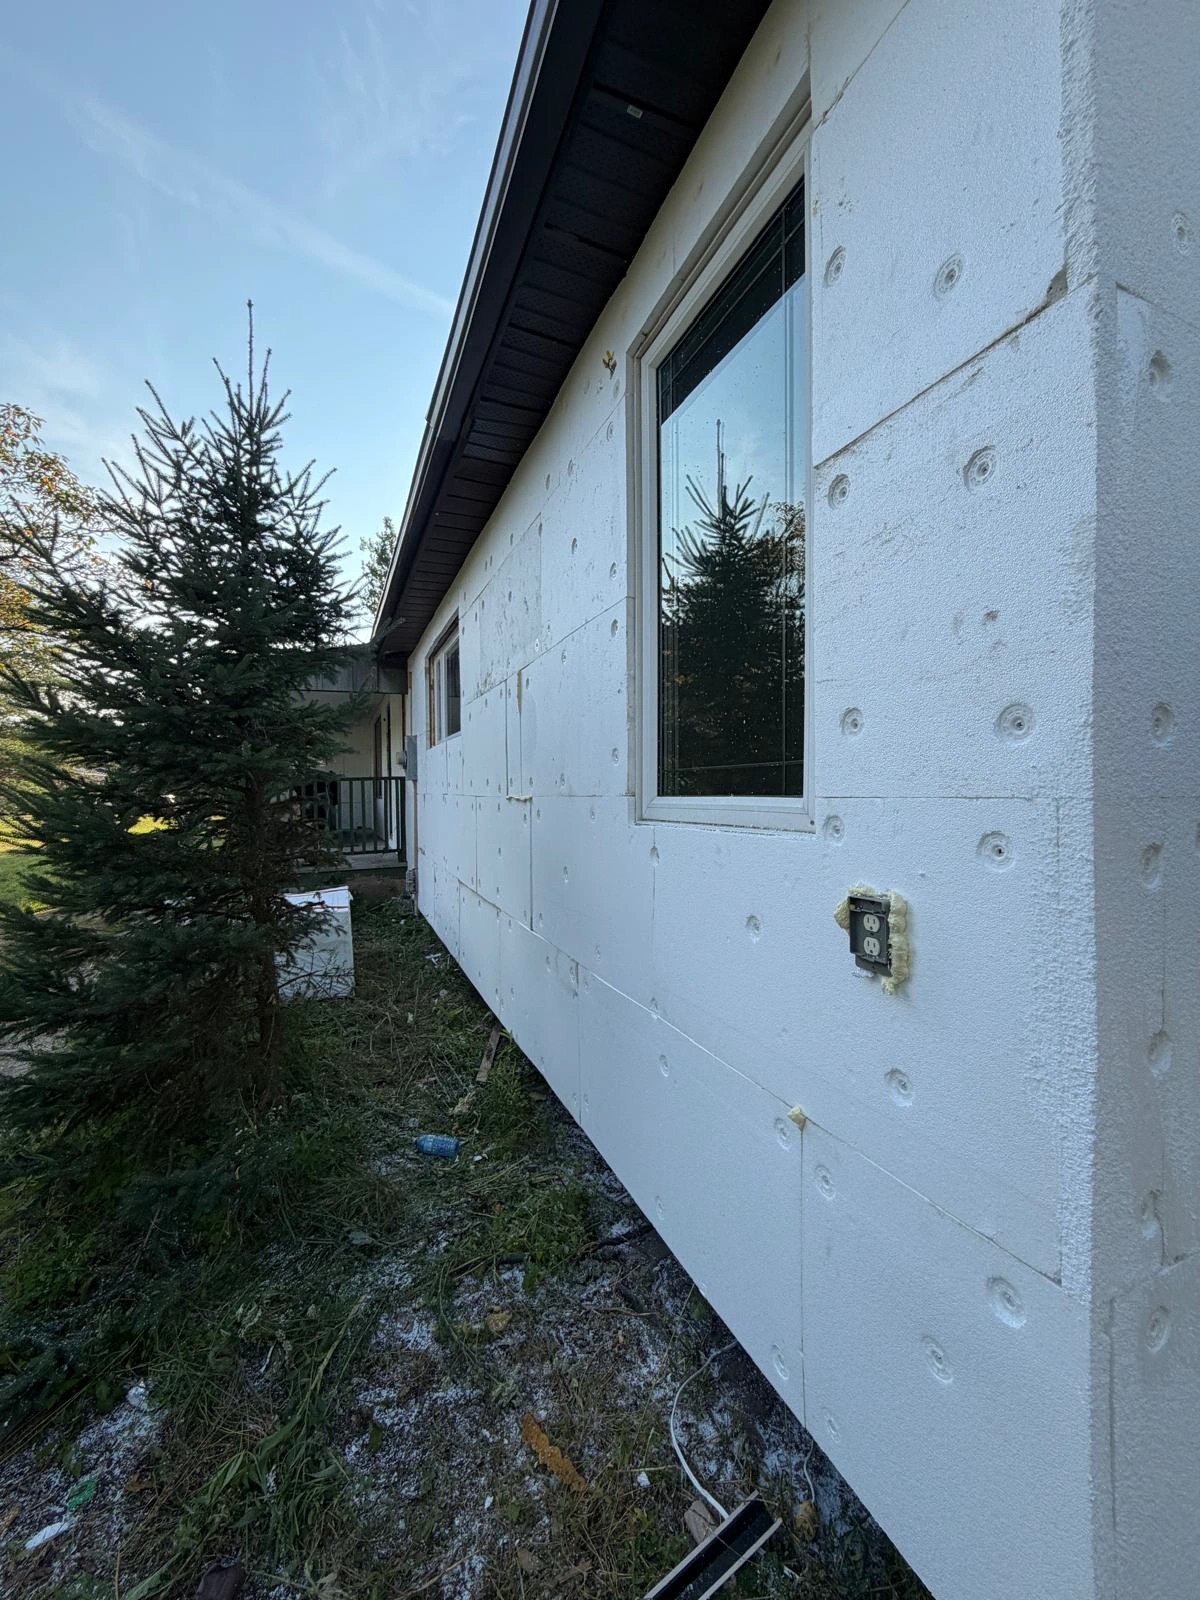
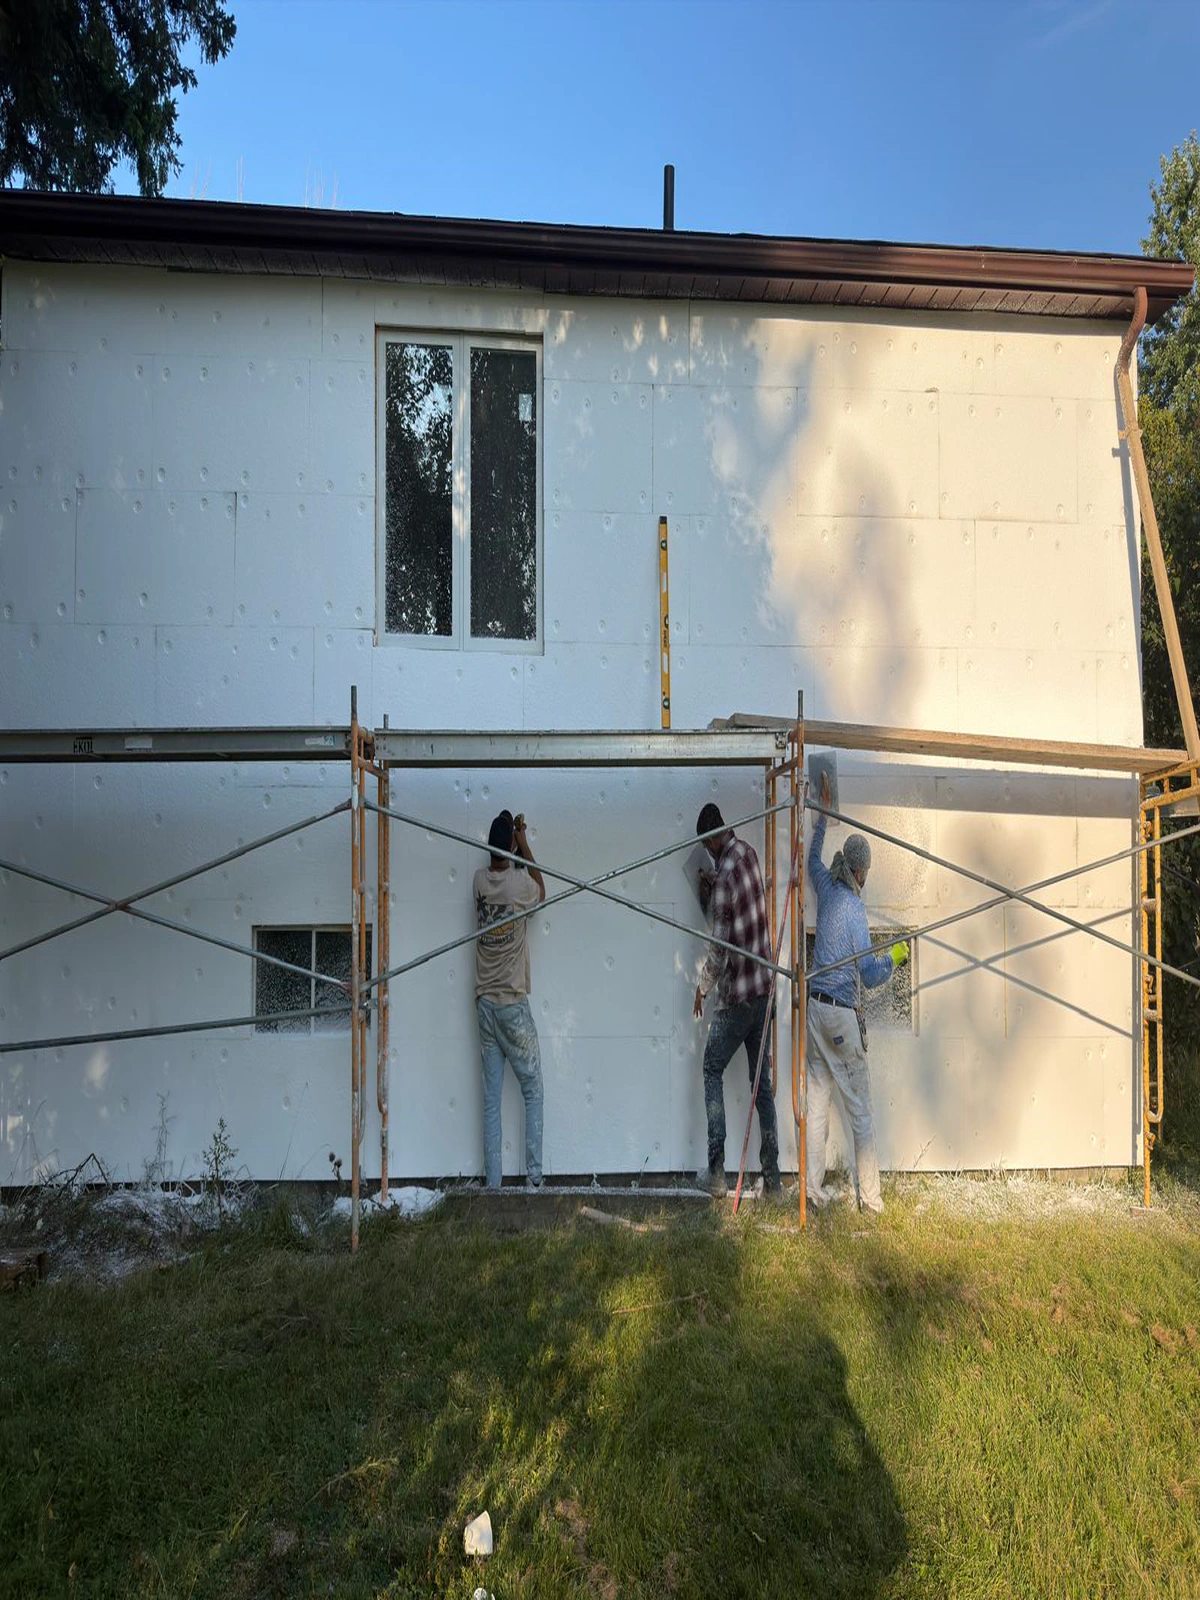
EPS insulation board was installed across every face of the building and mechanically fastened back to the repaired structure. This is the stage that does two jobs at once — it wraps the house in a continuous layer of exterior insulation, and it straightens out an old, wavy wall into a flat plane. A finish is only ever as straight as the surface behind it, and this is where that straightness is won.

Stage 4 — Fastener Spotting & Base Coat

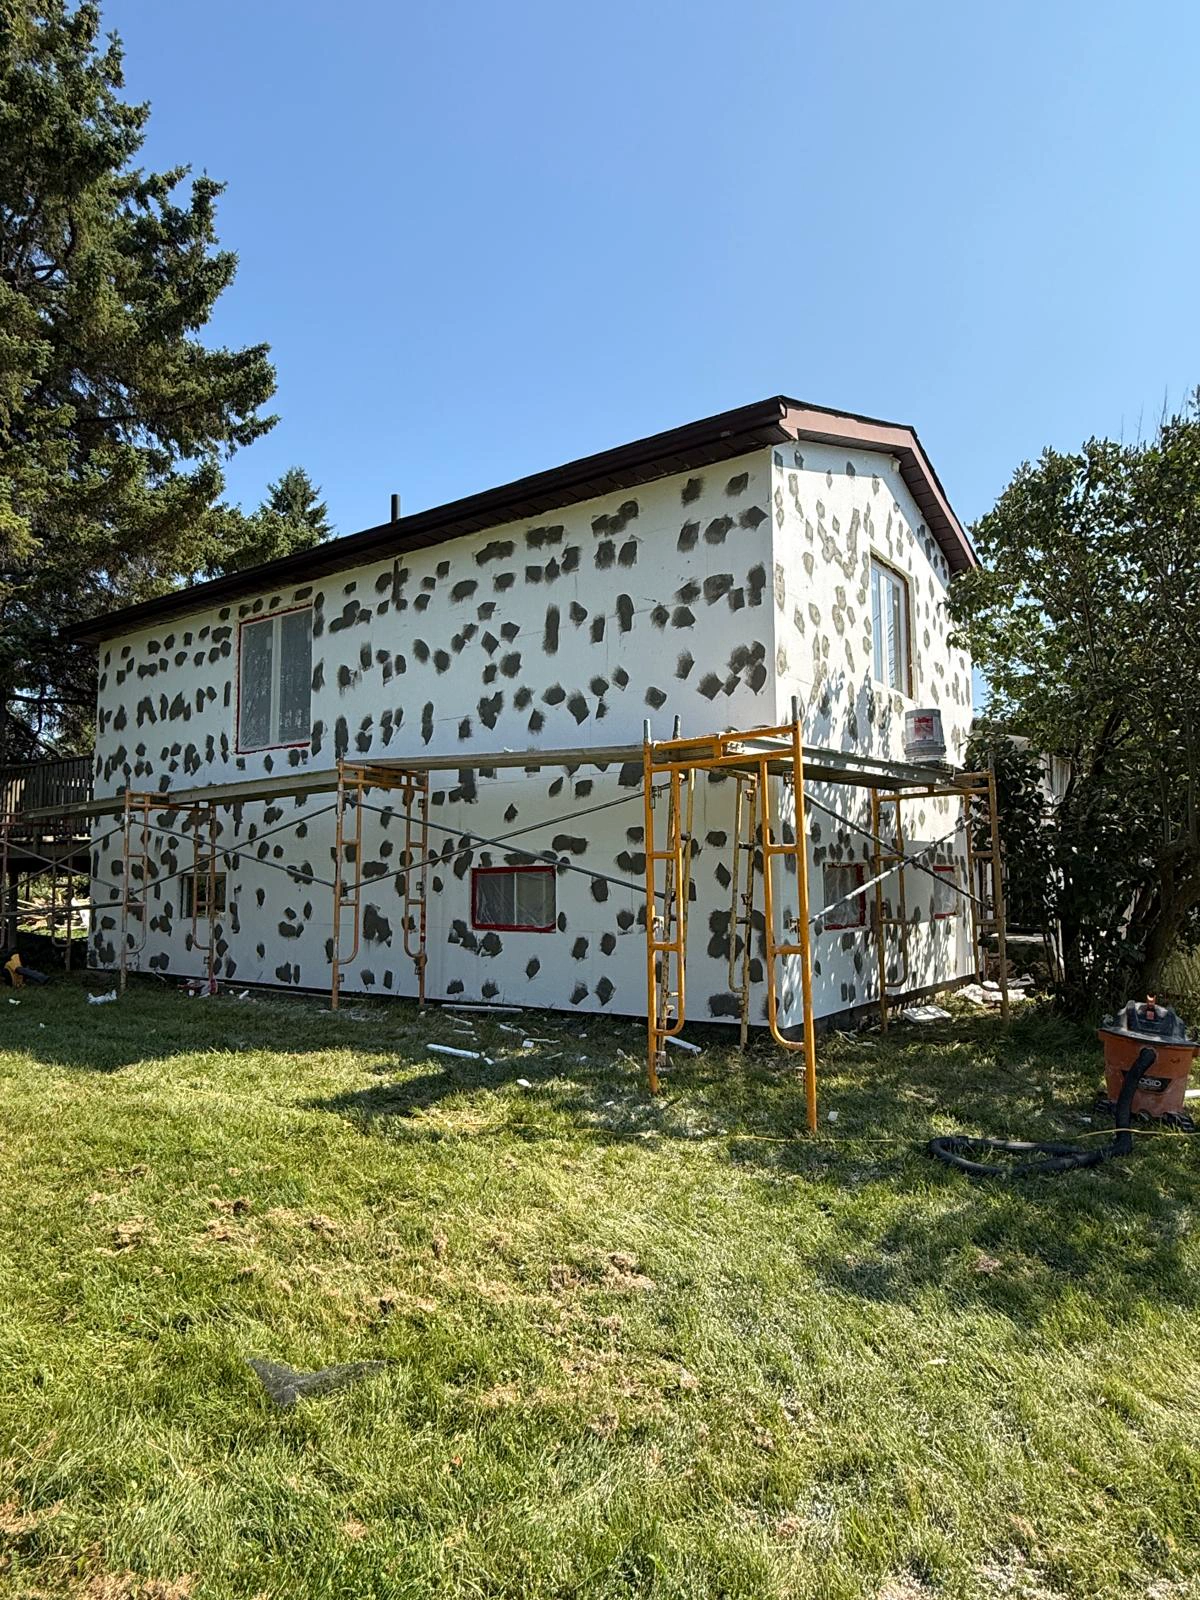
Every fastener head sits fractionally below the board face and leaves a small dimple. Each one was spotted with base coat and left to dry before the main coat went near the wall. Skip this and those dimples telegraph straight through the finish and show across the elevation in low sun. It is a slow, unglamorous step and it is the difference between a wall that reads flat and one that does not.

Stage 5 — Base Coat With Fibreglass Mesh

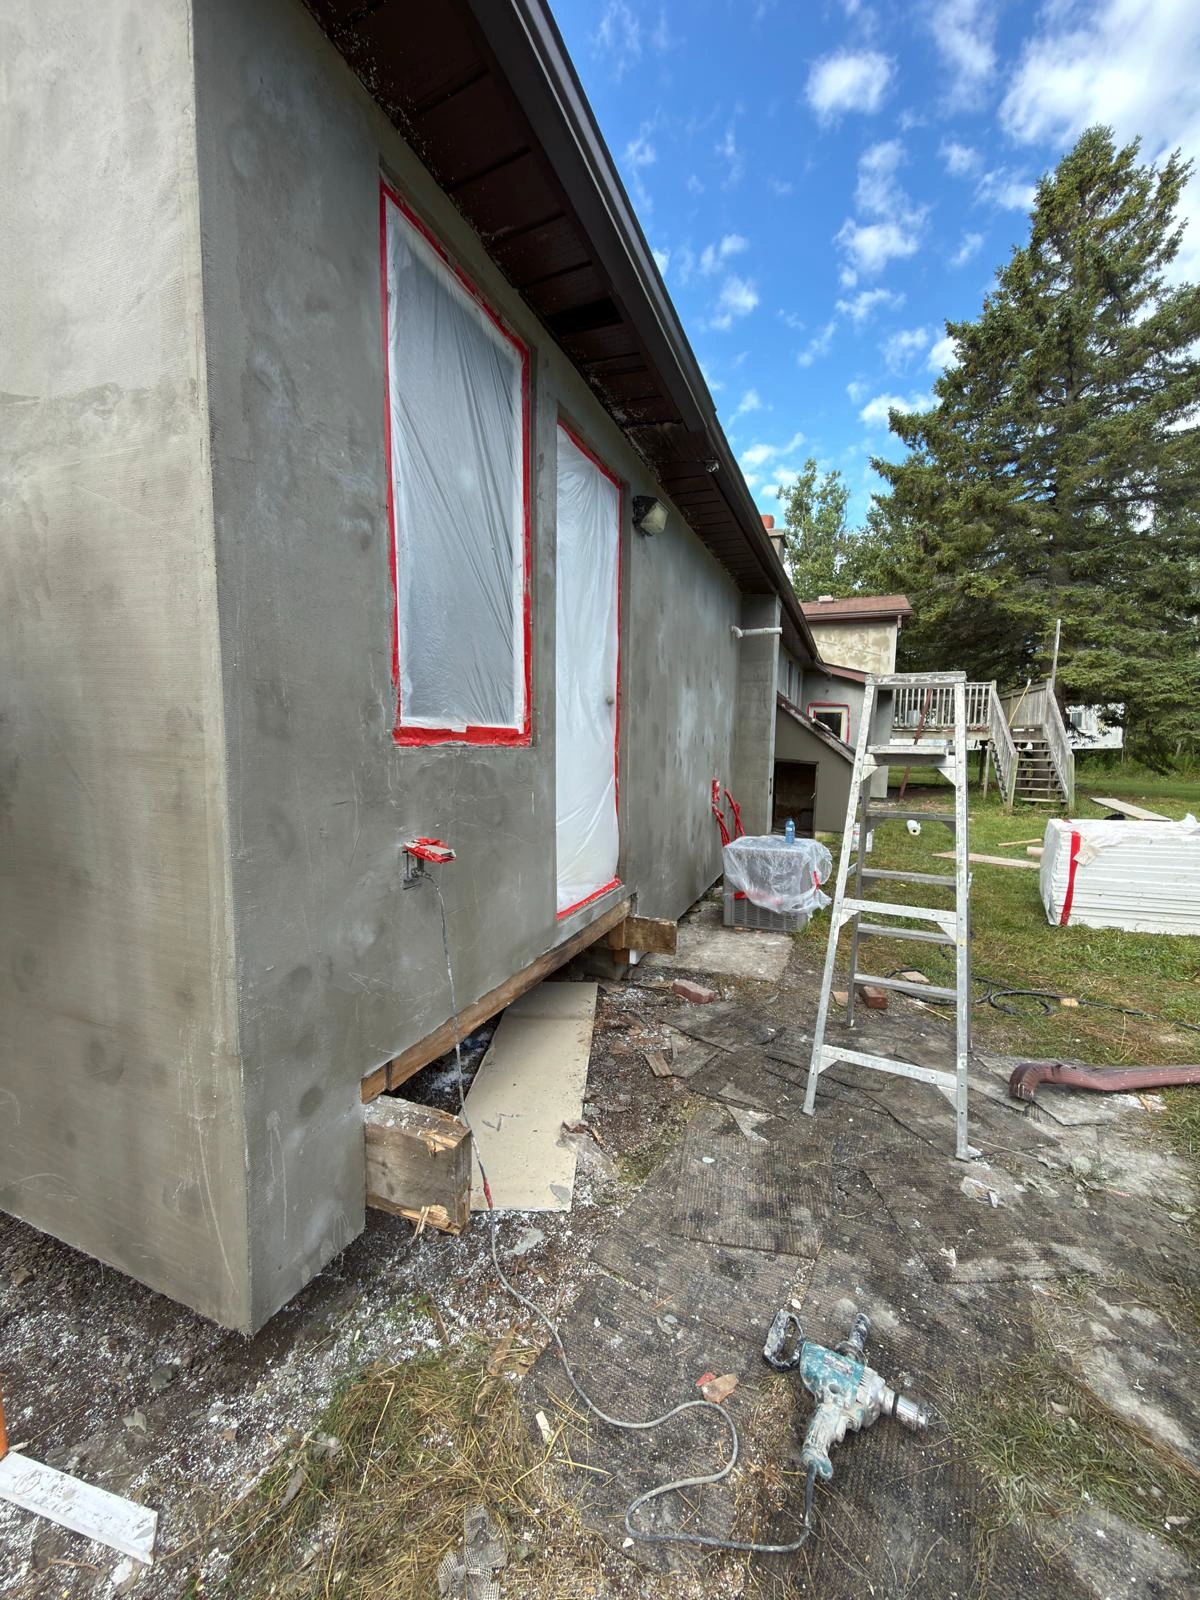
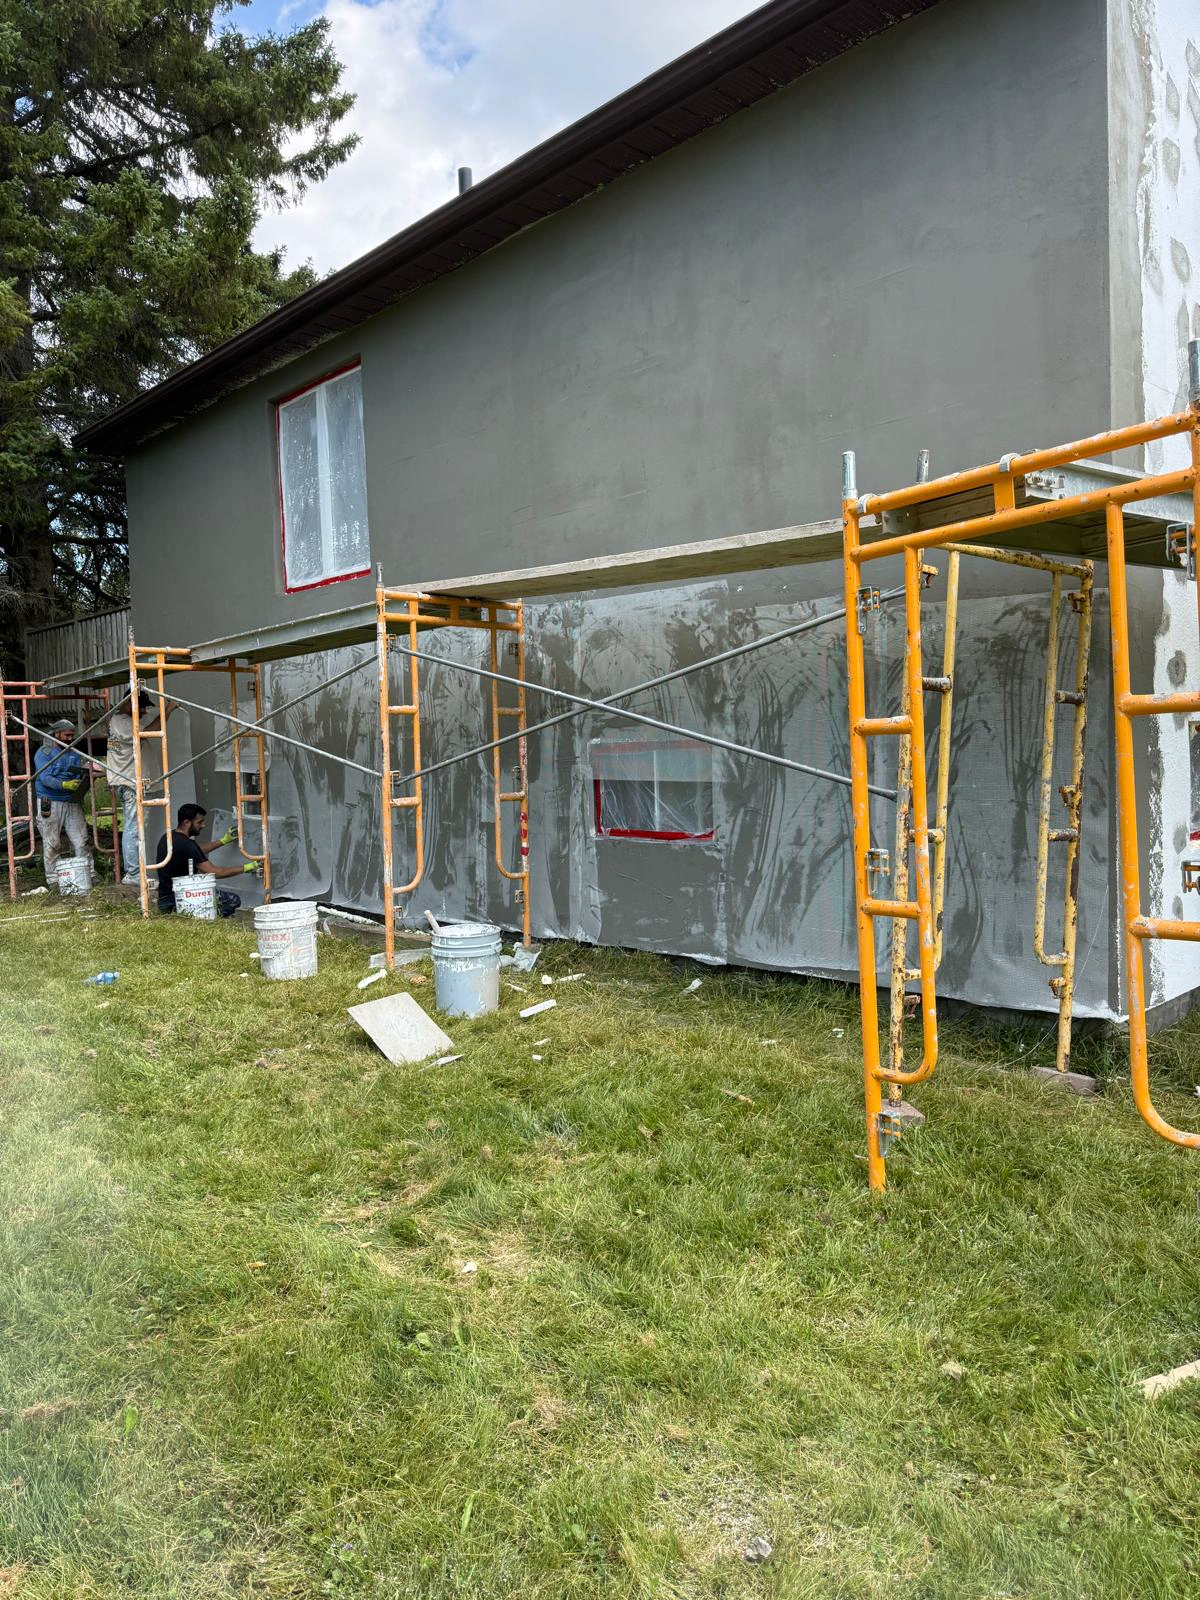
With the spotting dry, a full base coat went on and fibreglass reinforcing mesh was embedded into it and covered. The mesh ties every board and every board joint into one continuous reinforced sheet, which is what stops the joint lines and normal building movement showing up as cracks later. The coat was then left to cure — timing set by the weather, not by the schedule.

Stage 6 — Finish Coat & Clean-Out

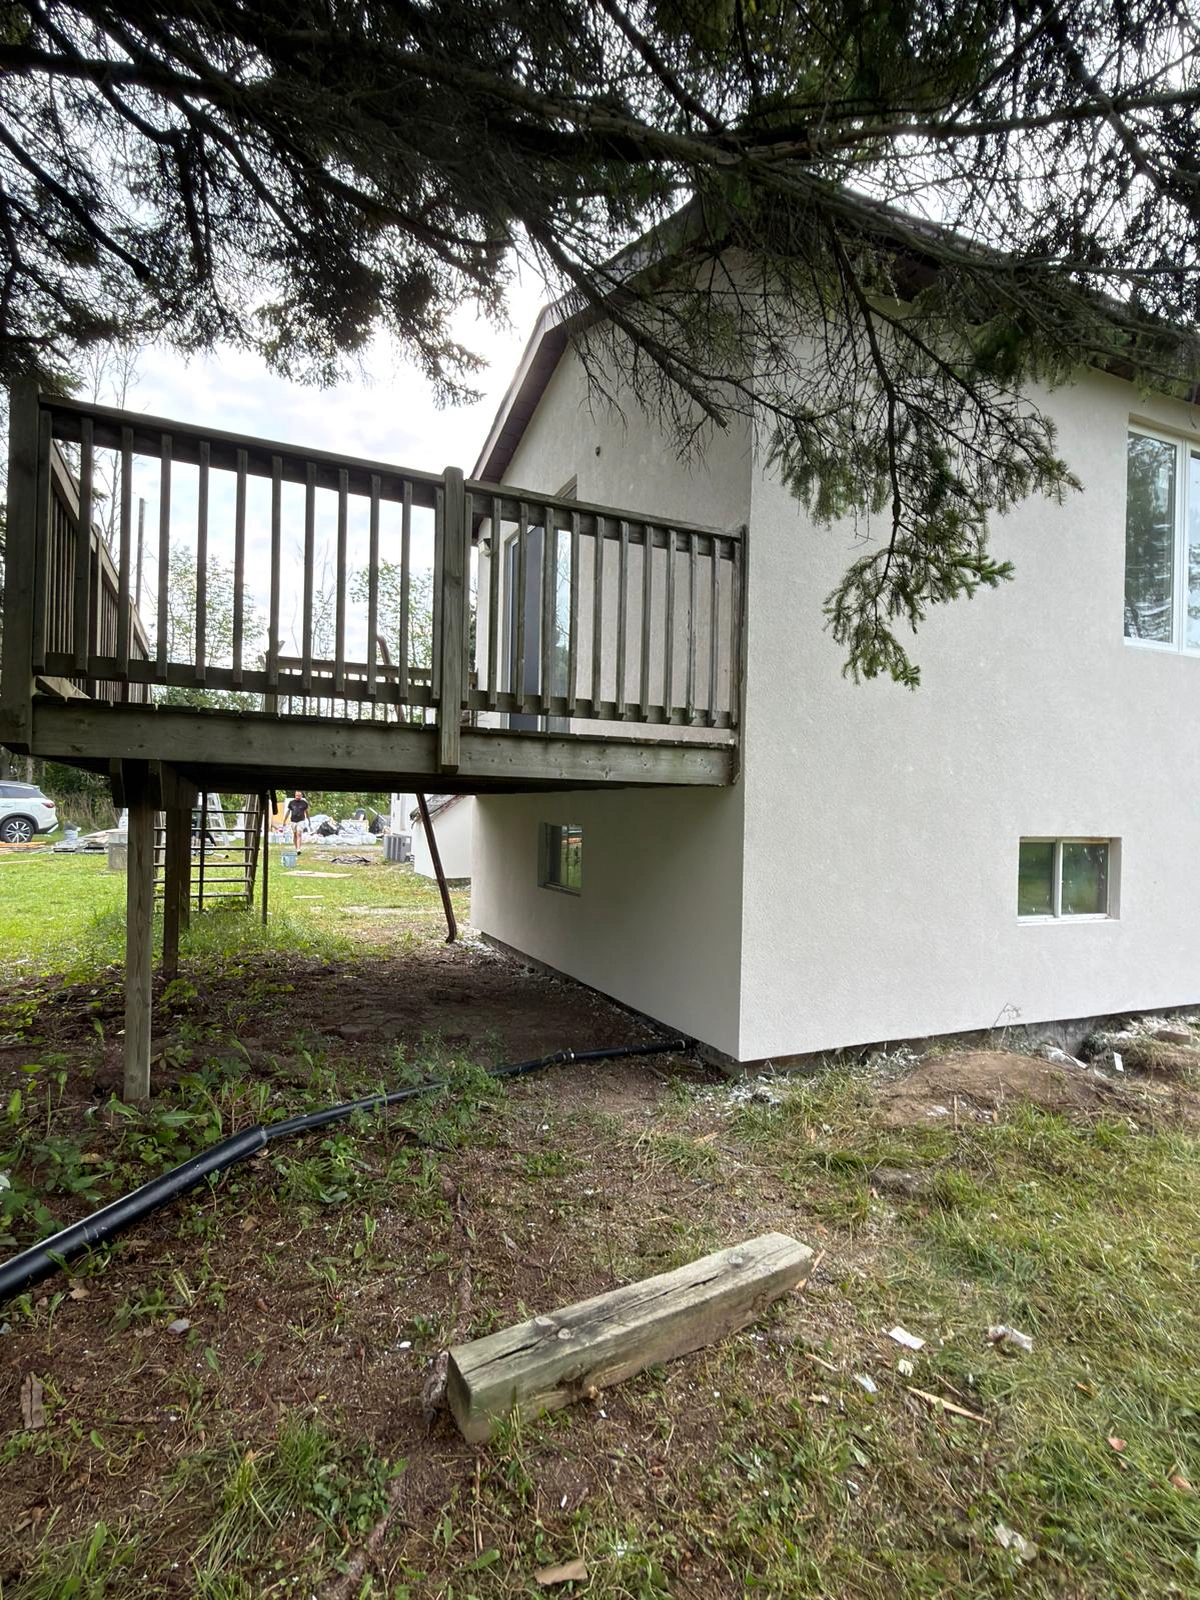
Once the base was cured and flat, FAIME's long-life finish coat was troweled on across the whole building, carrying evenly around corners, window returns and under the raised deck. When the finish had set, the entire property was cleaned down — material cleared, ground raked off, everything taken away — and the house was handed back finished, with the scope completed exactly as the client asked for it.
Stage By Stage

Protect — Repair — Insulate — Mesh — Finish

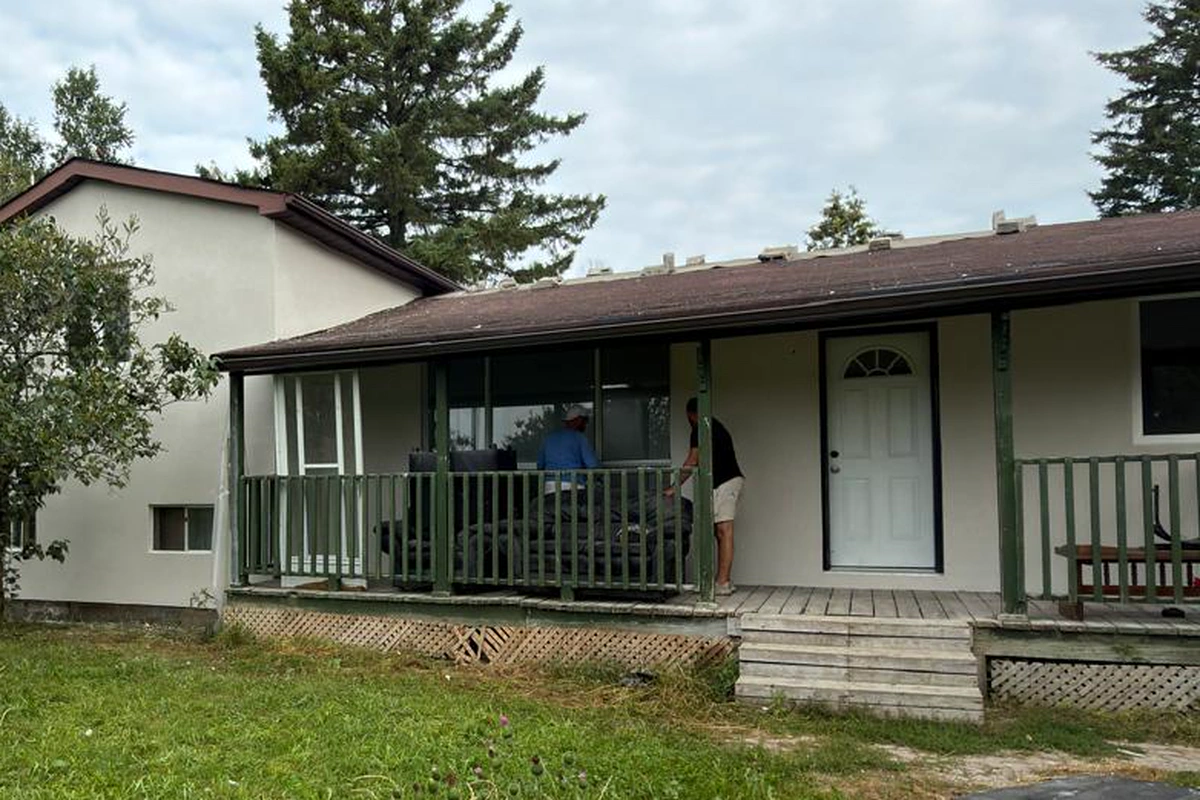
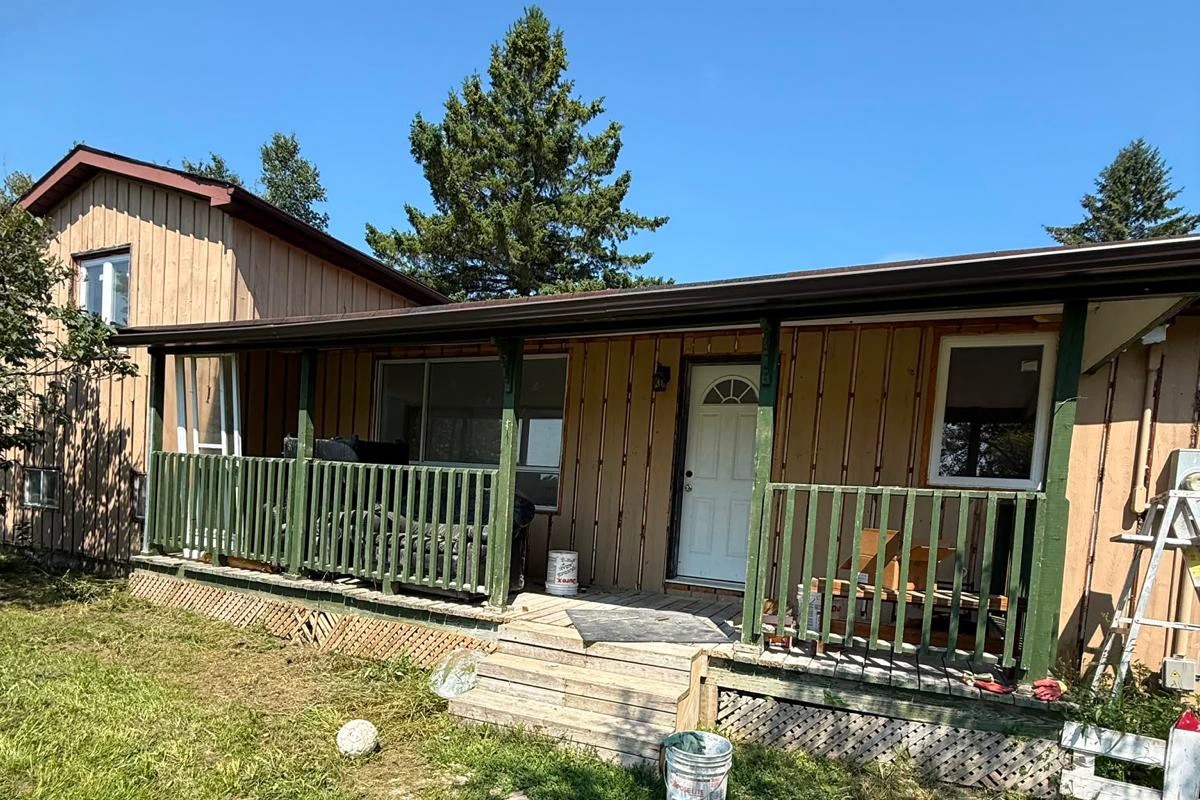
The Innisfil bungalow before work started, showing the original weathered vertical board exterior and green porch
Before — the original board-and-batten front, weathered and tired
The driveway gable end with the old cladding stripped back to bare sheathing and the yard still full of removed material
Before — driveway gable stripped back, old material cleared out
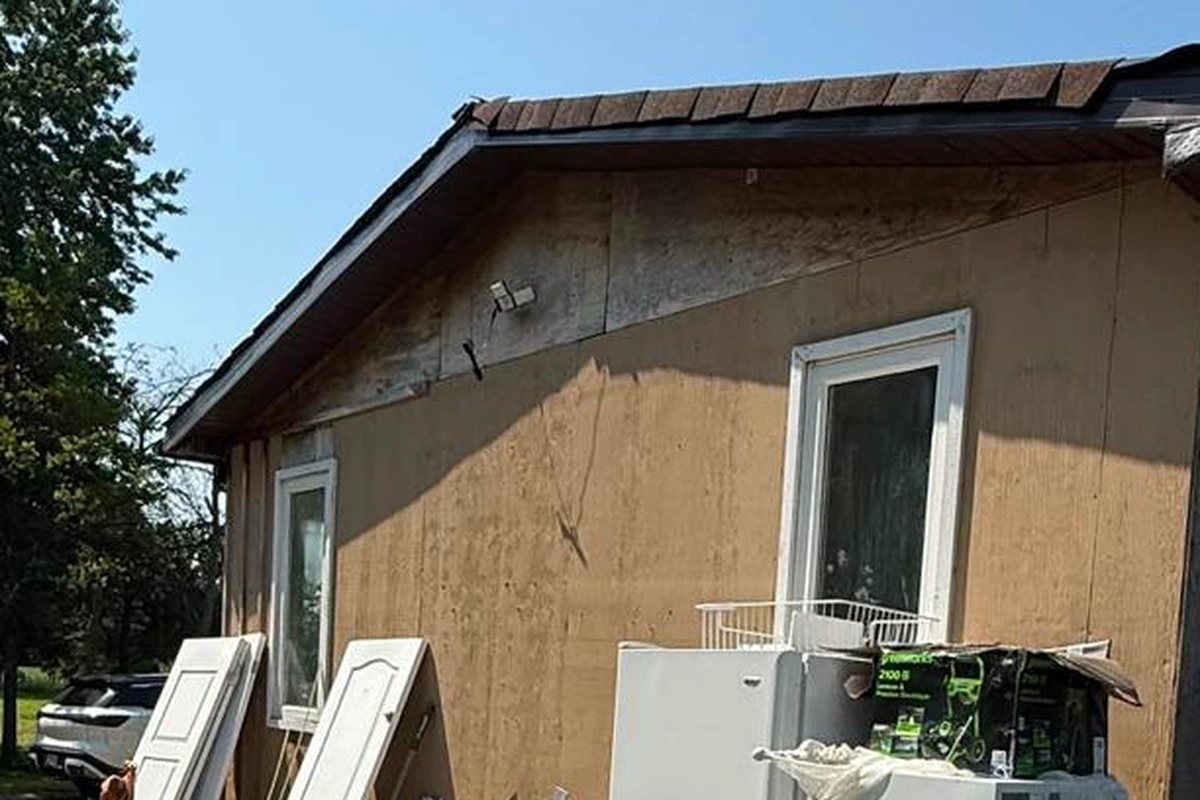
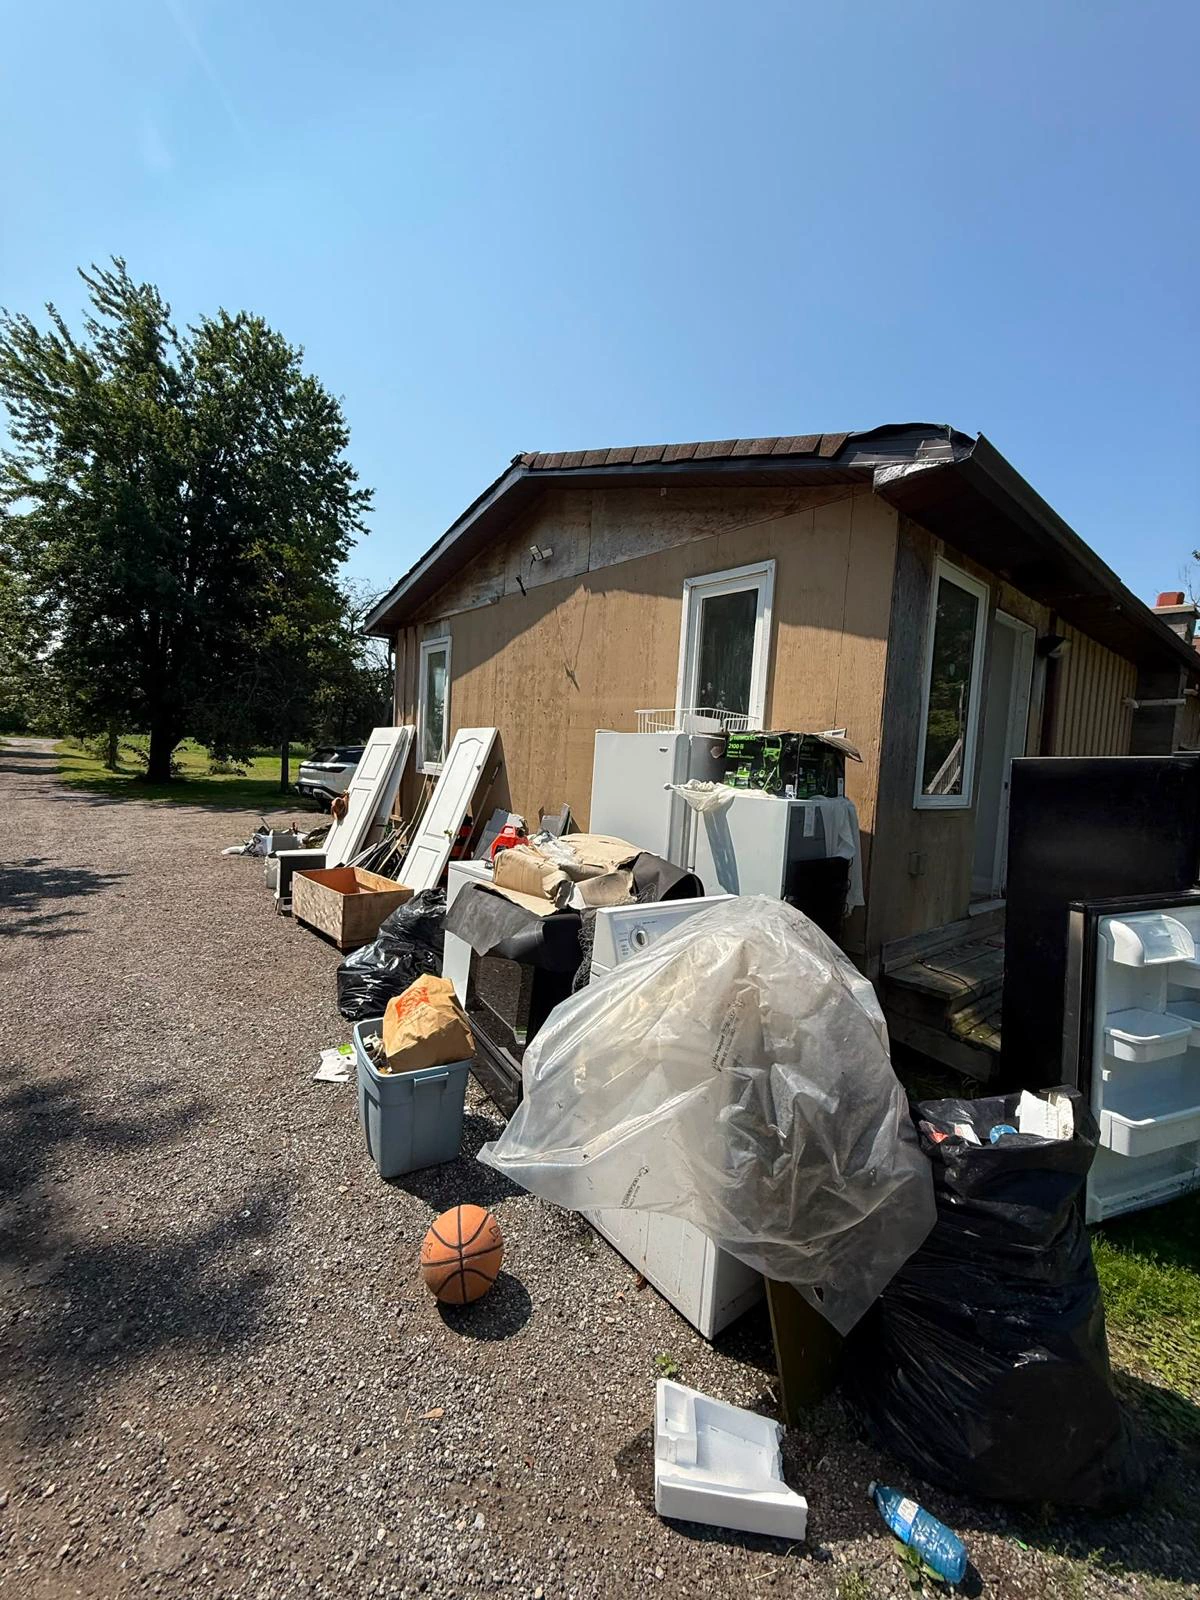
Side of the bungalow with the old exterior removed and doors and materials staged on the driveway
Strip-out — old exterior off, materials staged clear of the walls
The long side elevation of the bungalow on scaffold with the original vertical boards still in place
Before — the long side wall on scaffold, original boards in place
EPS insulation board fixed across the wall face of the bungalow, straightening the elevation
Insulation board — EPS fixed across every face, wall brought flat
Insulation boards with every fastener head spotted with base coat, drying before the full coat goes on
Fastener spotting — every screw head dabbed and left to dry
FAIME crew working the base coat across the insulation board face from scaffold
Base coat — the crew working the coat out across the wall
Wall in a full base coat with fibreglass mesh embedded and covered, window openings masked in red tape
Mesh base — fibreglass embedded, covered, and levelled
Scaffold set along the base-coated wall with the windows fully sheeted and masked before the finish coat
Masked and sheeted — windows protected before any finish goes on
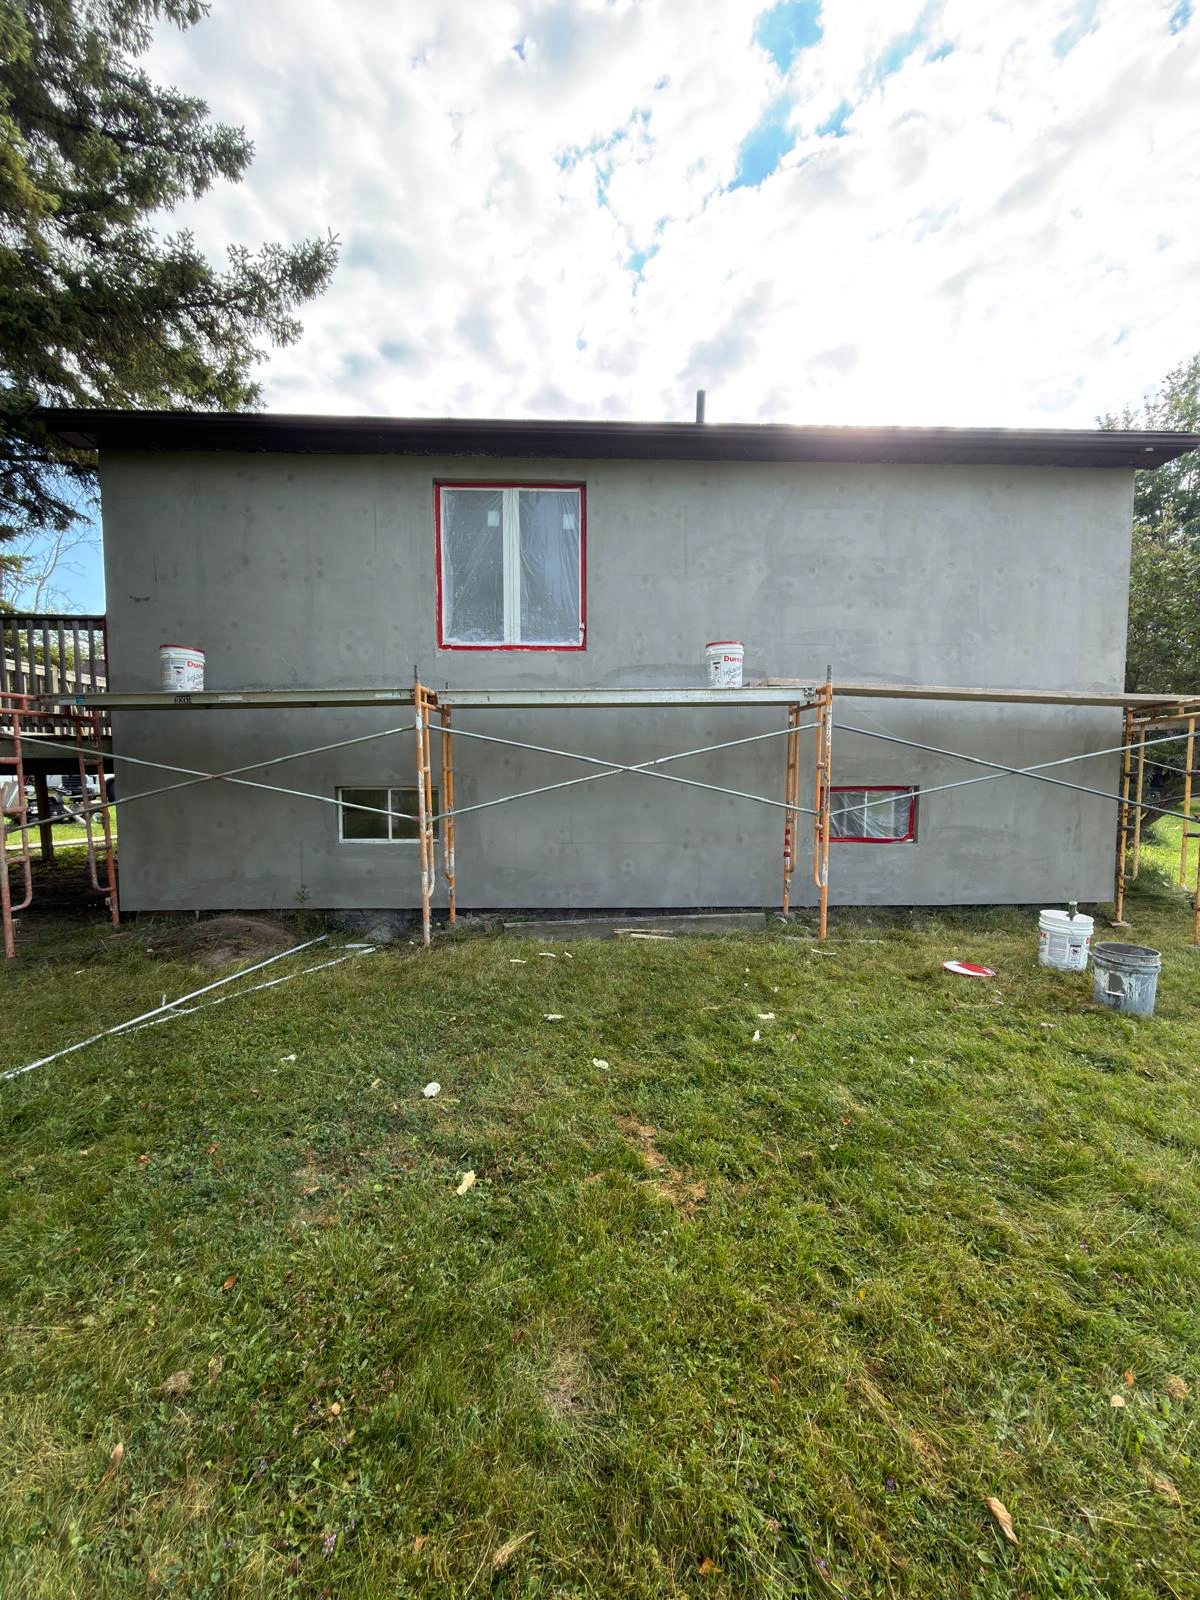
Rear elevation of the bungalow wrapped in base coat and levelled ready for the finish
Base coat — rear elevation wrapped and levelled
Finished corner of the bungalow in the final textured finish coat with clean window returns
Finished — corner detail, flat face and clean returns
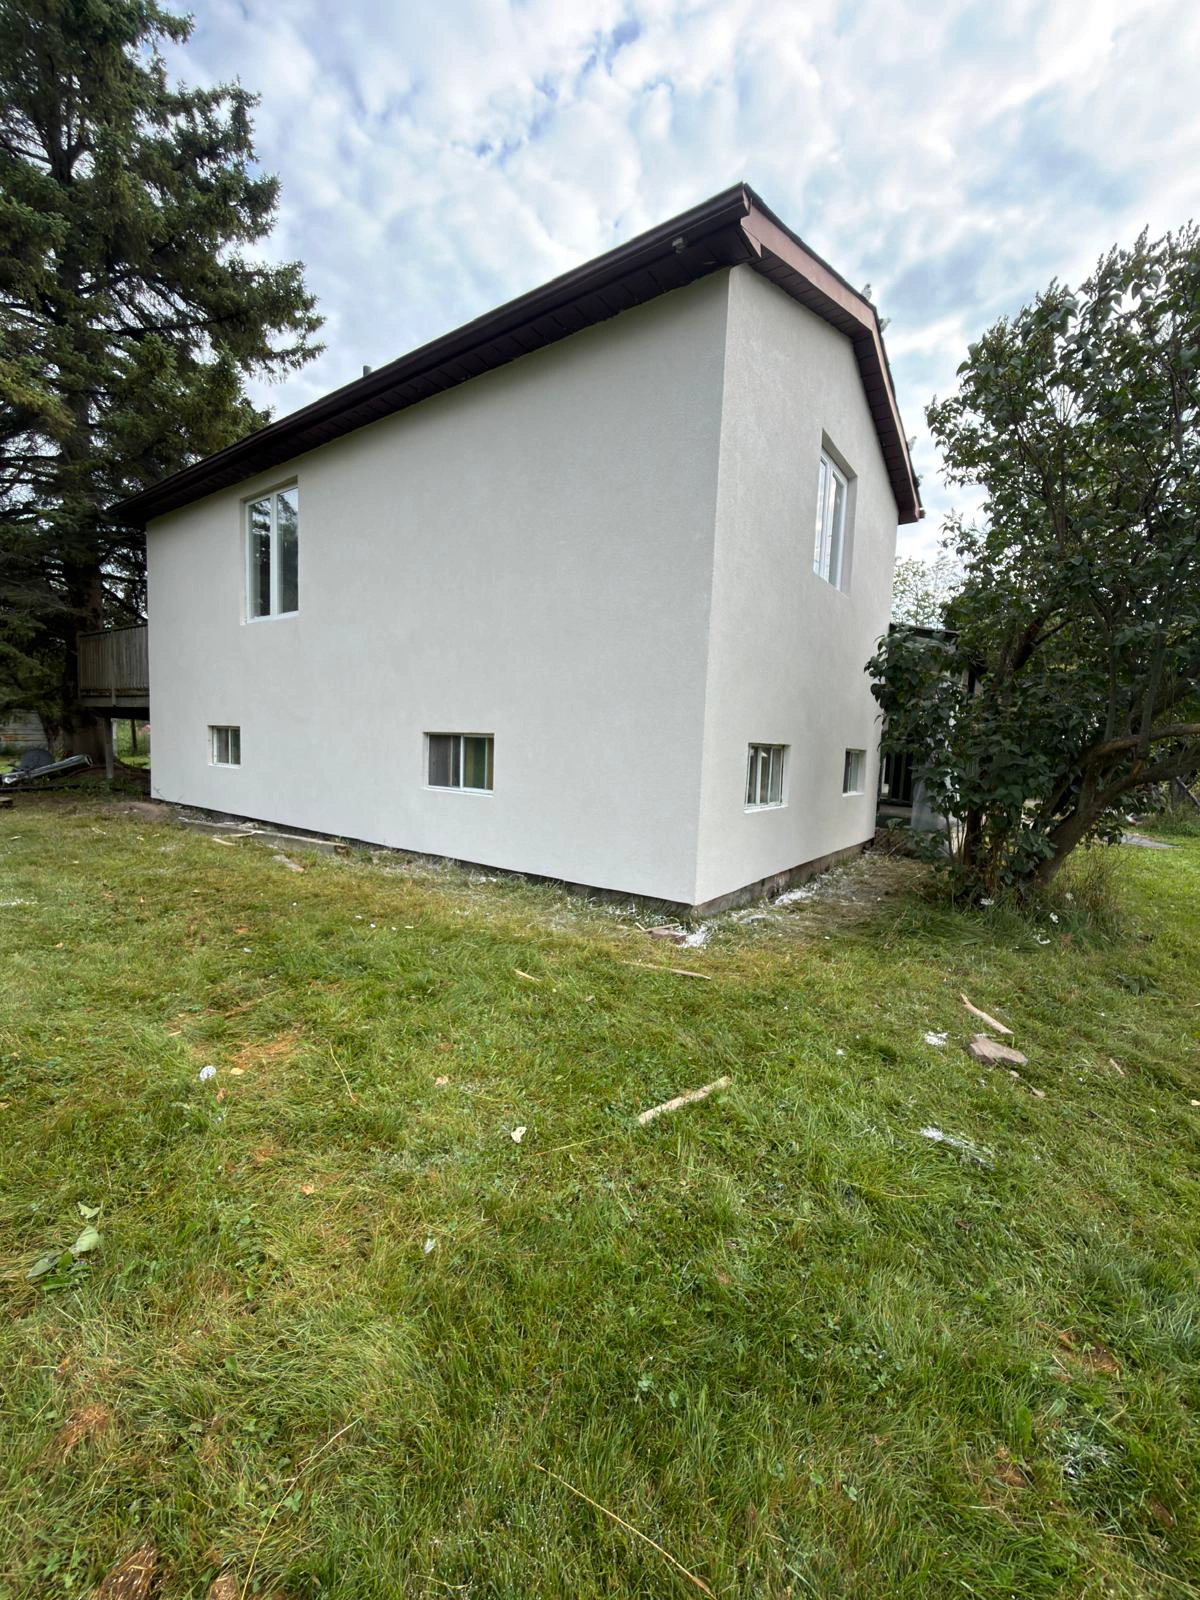
Finished gable end of the bungalow in an even textured finish coat
Finished — gable end, texture even across the whole face
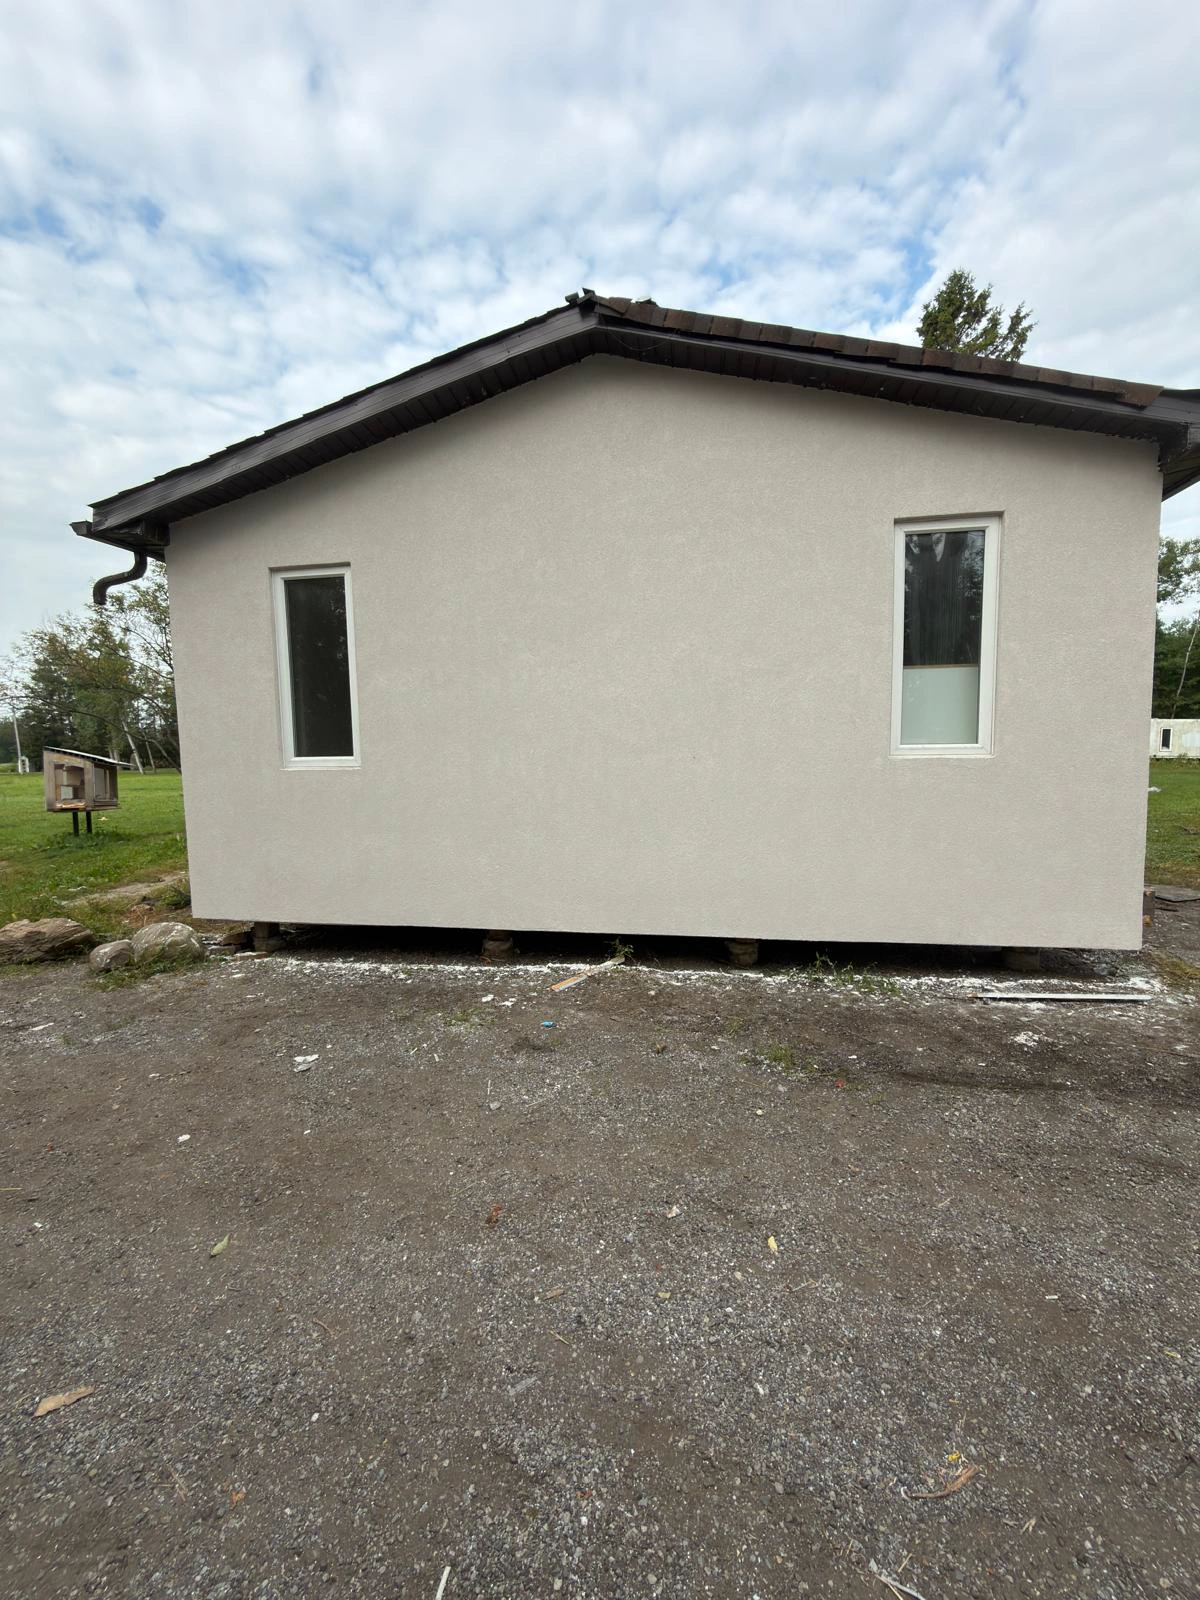
The driveway gable end finished in the final coat, squared and clean with the site cleared
Finished — driveway gable squared off, site cleared
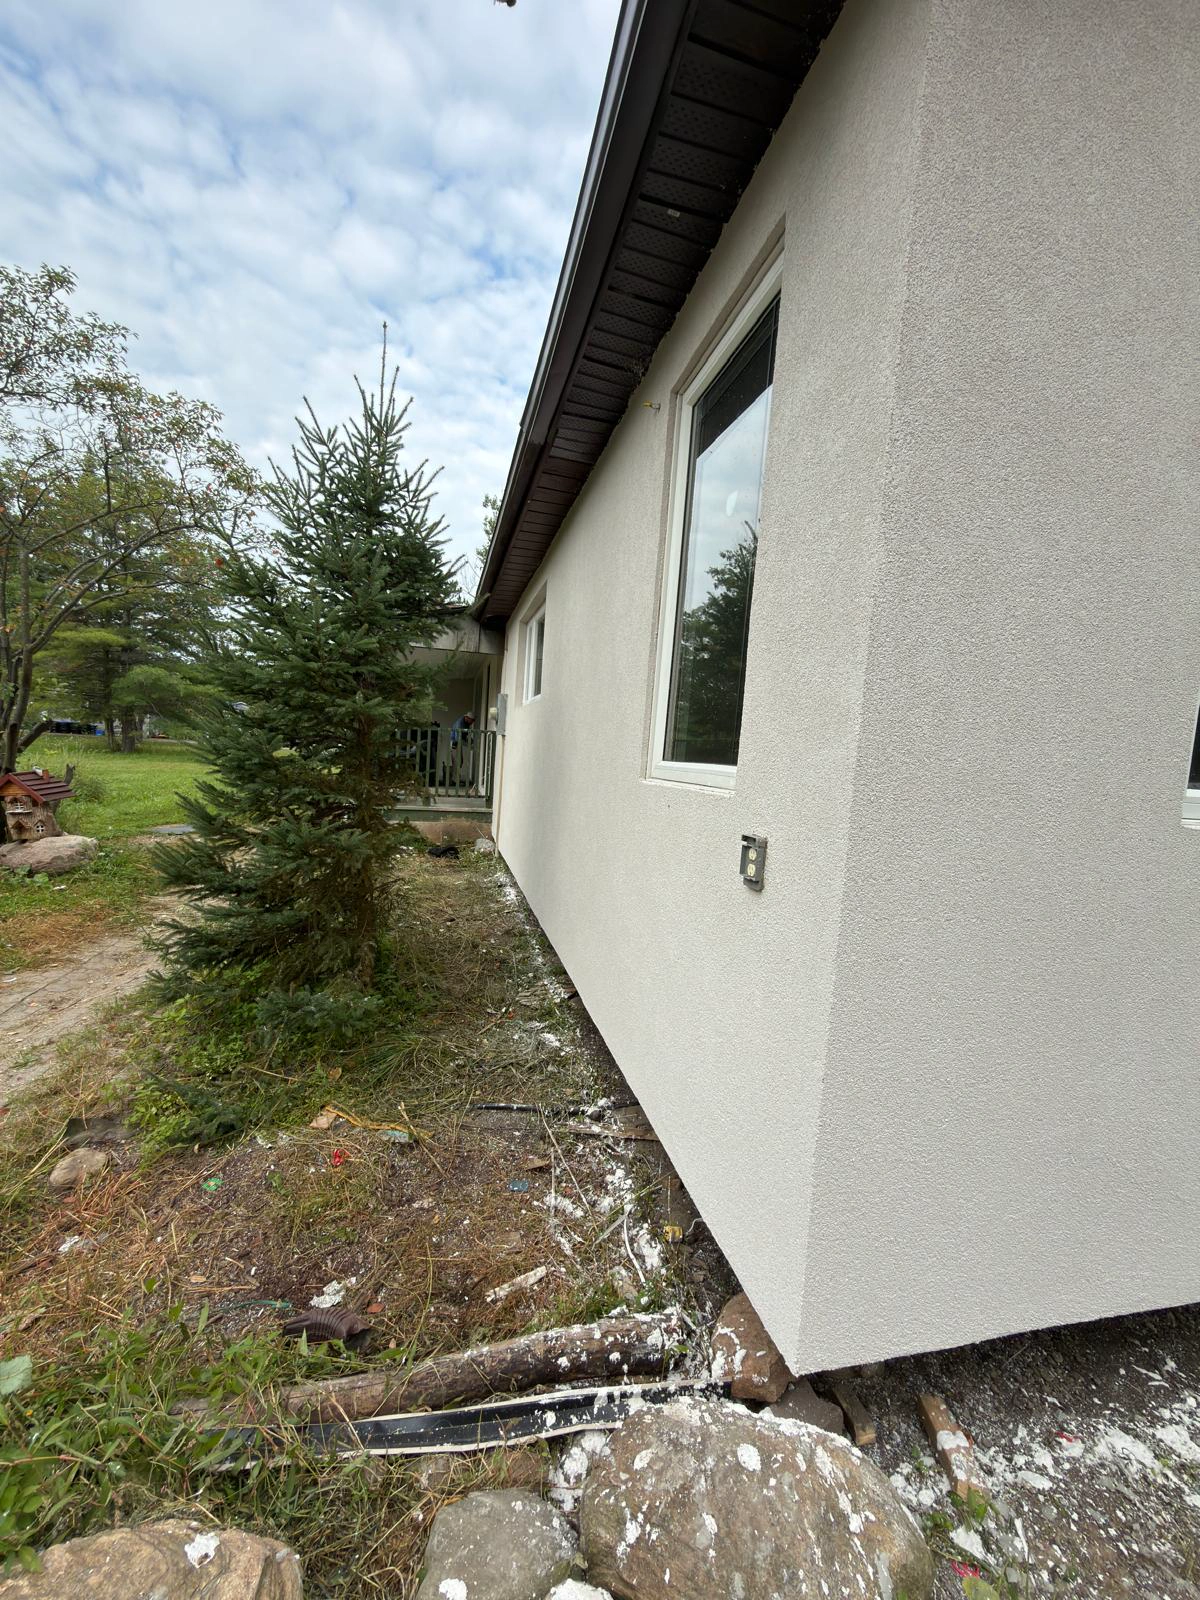
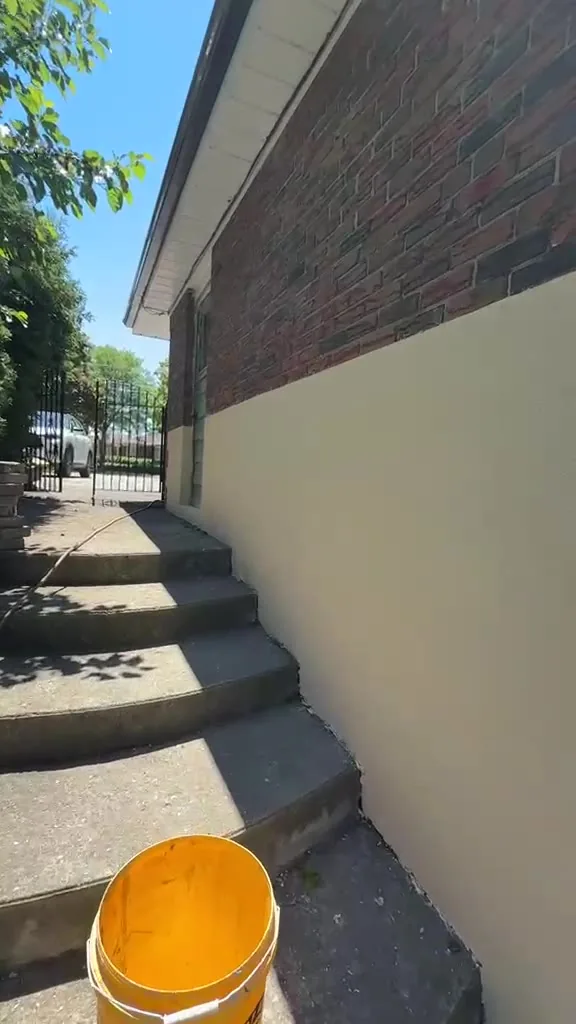
The long side wall of the bungalow finished end to end in the final texture
Finished — long side wall, even from end to end
Finished wall carried underneath and around the raised rear deck of the bungalow
Finished — carried under and around the raised deck
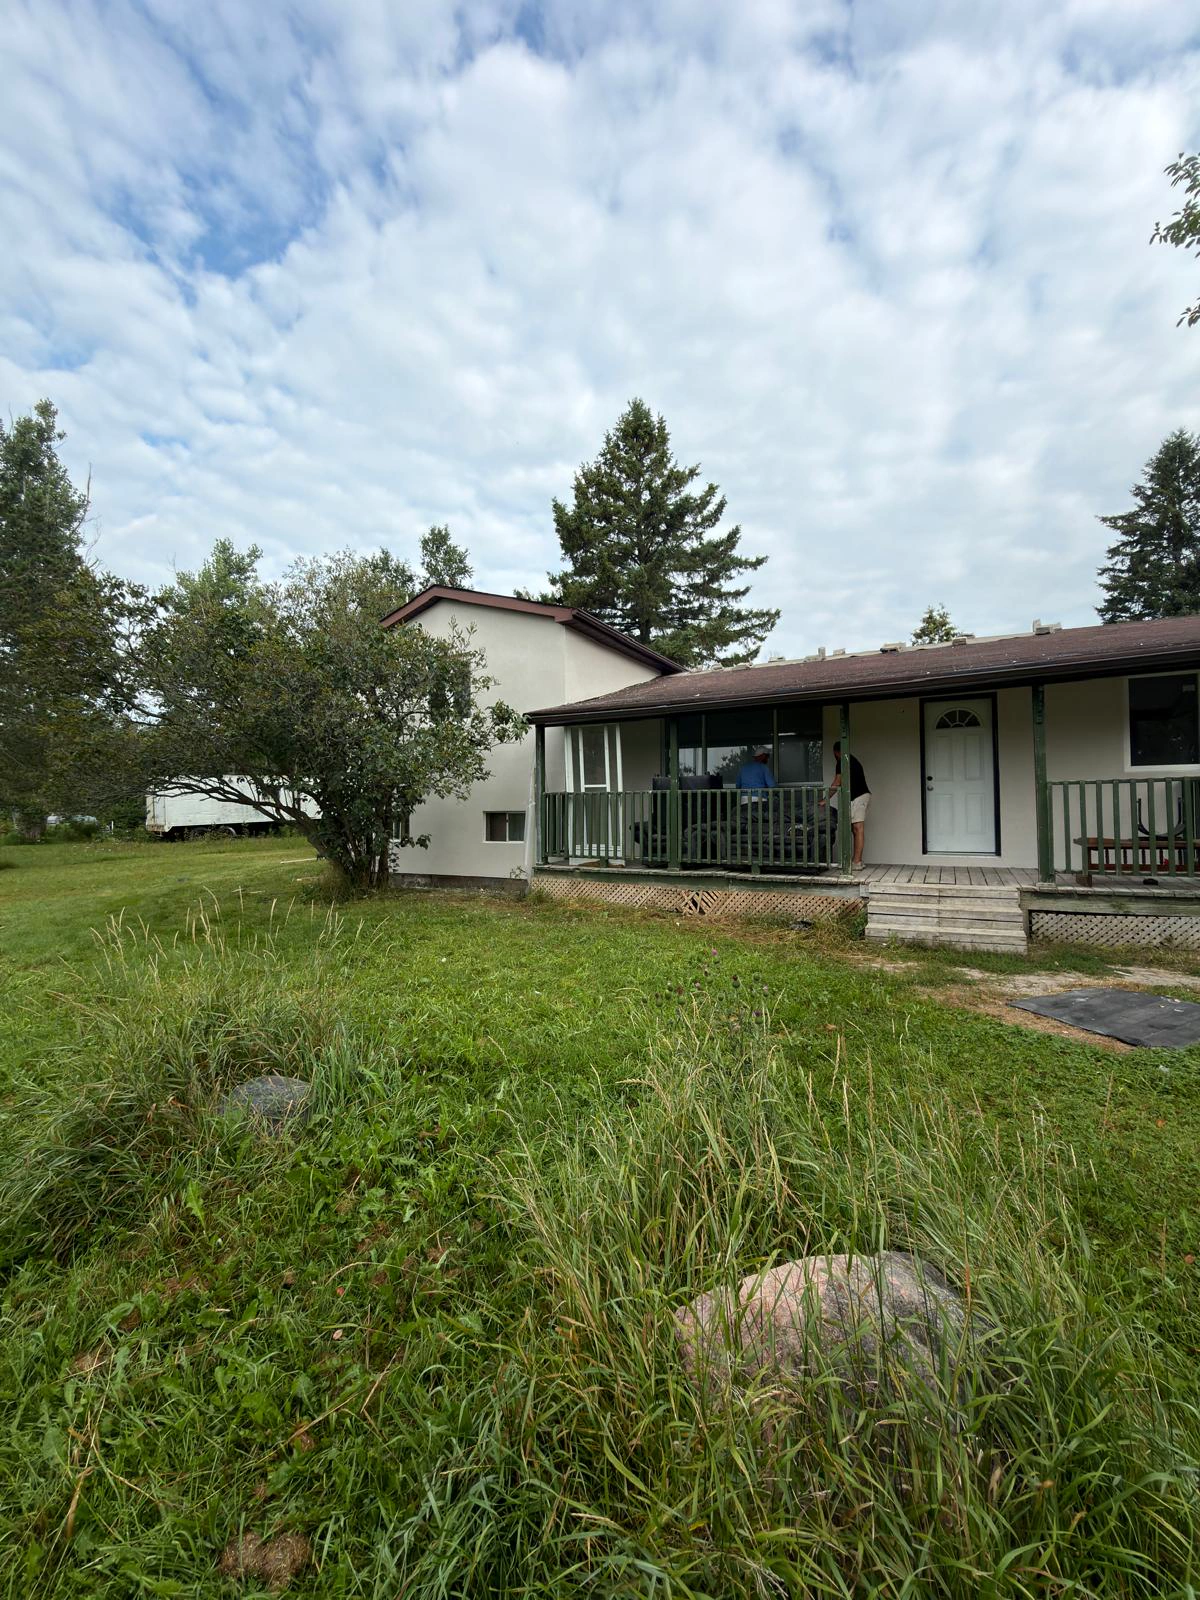
The completed front elevation of the Innisfil bungalow in its finished exterior
Finished — the front elevation, transformation complete
Drag to Reveal

See the Transformation

Grab the slider and drag it side to side to compare these elevations before and after FAIME rebuilt them. Real job photos from this Innisfil property — nothing staged.

Front Elevation — Weathered Boards to Finished Face

The finished front elevation of the Innisfil bungalow with a flat, even exterior finish The same front elevation before work, with weathered vertical board cladding Before After

The same porch and front door — from soft, weathered vertical boards to a flat insulated face with a clean, continuous finish.

Driveway Gable — Bare Sheathing to Finished Wall

The finished driveway gable end of the bungalow with a flat textured finish and clean window surrounds The same gable end stripped back to bare sheathing with removed material stacked against the wall Before After

The same gable end off the driveway — stripped to bare sheathing and cleared, then rebuilt, insulated and finished square.

On Site

Watch It Happen

Base coat going on beneath the raised deck — fastener heads already spotted.
Full walkaround of the property mid-build — insulation board fixed, base coat going up. Press play.
What Was Done

Scope Breakdown

01

Cover & Protect

  • Ground around the property covered before strip-out
  • Every window masked and sheeted off
  • Protection set before any material came off the walls
02

Wood Repair & Support

  • Loose and rotten boards cut out and replaced
  • Smaller splits and cracks filled with wood filler
  • Extra supporting timber added into the structure
03

Insulation & Spotting

  • EPS board fixed across every face of the building
  • Walls brought flat and true off the old uneven face
  • Every fastener head spotted with base coat and dried
04

Mesh, Finish & Close-Out

  • Full base coat with fibreglass mesh embedded and cured
  • Long-life finish coat troweled across the whole building
  • Entire property cleaned down and handed back complete
Good to Know

EIFS & Exterior FAQ

What is EIFS and how is it different from regular stucco?

EIFS stands for Exterior Insulation and Finish System. Traditional stucco is a cementitious coating applied straight onto the wall. EIFS adds a layer of rigid insulation board to the outside of the structure first, then builds a reinforced base coat and a finish coat over it. On this Innisfil bungalow that insulation layer is what let FAIME straighten out a wavy, weathered wood exterior and give the house a flat, continuous, insulated face instead of just recoating what was already there.

Why does the rotten wood have to come out before the insulation goes on?

Because everything above it depends on what it is fixed to. Insulation board is mechanically fastened to the structure, so if it is screwed into soft or rotten wood the fasteners have nothing to hold. On this project FAIME cut out the loose and rotten boards and replaced them, filled the smaller splits and cracks with wood filler where the board was still sound, and added extra supporting timber to the structure before a single sheet of insulation went up.

Why is base coat dabbed over every screw head before the main coat?

Fastener heads sit slightly below the face of the insulation board, and each one leaves a small dimple. If you skim straight over them, those dimples telegraph through the finish and show up across the wall in low sun. Spotting each fastener with base coat and letting it dry fills those dimples first, so the main base coat goes on over a genuinely even surface.

What does the fibreglass mesh in the base coat actually do?

It controls cracking. The mesh is embedded into the wet base coat and covered, which ties the whole wall face together into one reinforced sheet rather than a series of separate board edges. Without it, the joints between insulation boards and the natural movement of the building would eventually show as cracks along those lines in the finish.

How long does a full exterior transformation like this take?

It depends on the size of the building, how much wood repair is found once the old exterior comes off, and the weather. Each coat has to cure before the next stage starts, and cool or humid days slow that down. FAIME works to the condition of the wall rather than to a fixed number of days, and gives you a written schedule with your estimate.

Does FAIME work in Innisfil and Simcoe County?

Yes. FAIME Construction works across the Greater Toronto Area and north through the Simcoe County and Muskoka corridor, including Innisfil, Barrie and the surrounding townships. FAIME was established in 2021 with 15+ years of trade experience behind it, is WSIB Active, carries $2M general liability insurance, and backs its workmanship with a 2-year warranty. Book a free on-site visit and get a written quote within 48 hours.

Keep Exploring

More Projects

Have a Similar Project in Mind?

Tell us what you're picturing and we'll come out, look at what's actually behind your walls, and put together a clear written estimate — no obligation.

Google Reviews

Happy With Our Work?
Tell Google.

Reviews help GTA homeowners and contractors find a trusted specialty team. If we earned your confidence, we'd be grateful for 60 seconds of your time.

Leave Us a Google Review

Takes 60 seconds — helps us more than you know

Call Now WhatsApp