 FAIME

A Sto System Across the
Upper Façade of a New Hotel
FAIME's crew installed a full Sto stucco system on the upper façade of the new Comfort Inn & Suites in Kingston, Ontario, working as the stucco trade contractor to the project's general contractor. The crew installed the full system across the header sections at the top of the building: substrate inspection and preparation, the air barrier on the sheathing, EPS insulation board (Styrofoam), a Sto base coat with fibreglass reinforcing mesh embedded in it, a full cure, and an acrylic Sto finish coat colour-matched to the design. Up to five people on site, August to September 2019, delivered on time, on budget and with zero safety incidents.EIFS & stucco systems · Kingston & Eastern Ontario · project size 13,000 sq ft · WSIB Active · $2M CGL
Project Overview
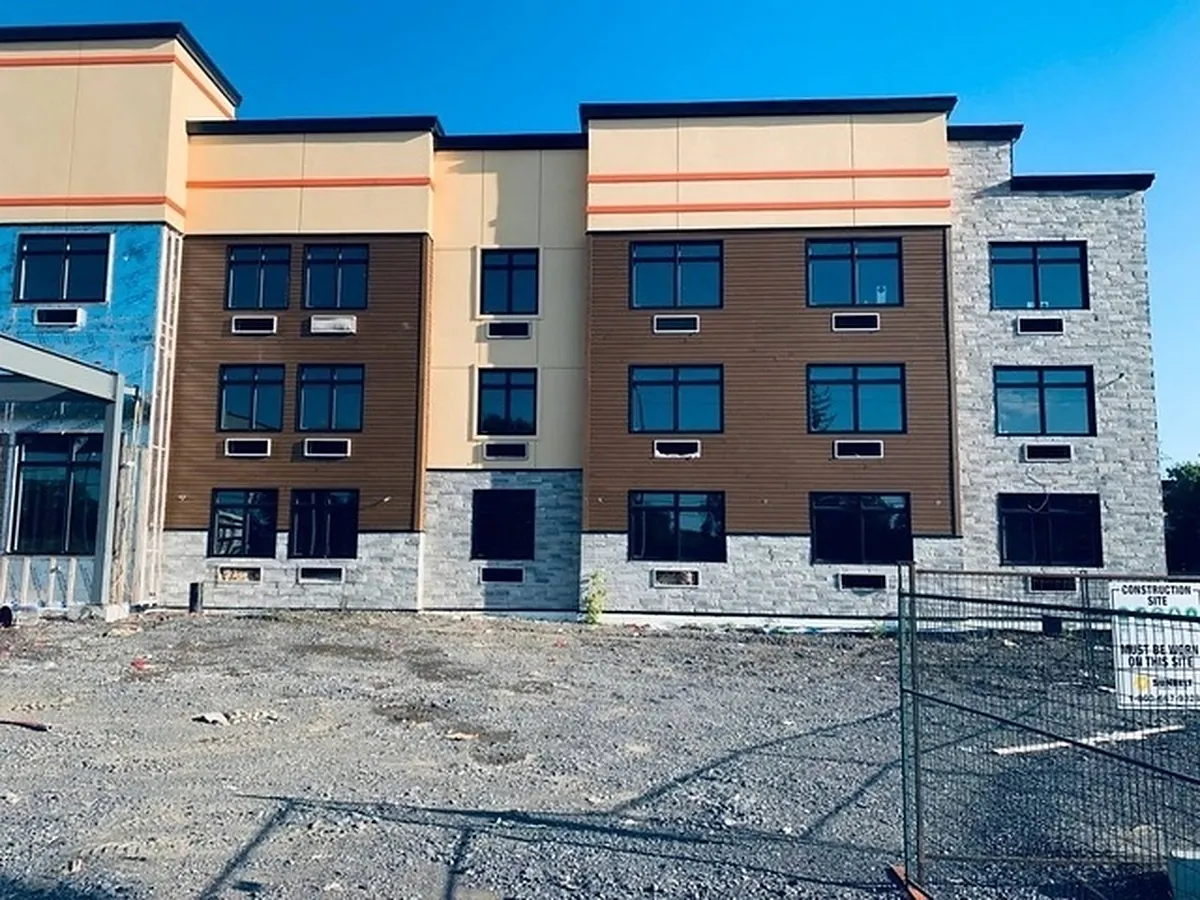
The Comfort Inn & Suites is a new three-storey hotel on a site run by a general contractor, with many trades working at once. The building uses three claddings: a stone base, brown plank siding on the towers, and stucco on the upper walls and the header bands that cap the front elevation. FAIME was the stucco trade. That meant the stucco had to look right on its own and also finish cleanly where it meets the stone and the siding, because those edges are what people notice from the parking lot.
How a Sto System Is Built
Sto introduced exterior insulation and finish systems (EIFS) in Europe in 1963, and its systems are still built the same way, in layers. On the sheathing there is an air and water-resistive barrier, then an adhesive and rigid insulation board, then a base coat with fibreglass mesh embedded in it, and finally a textured acrylic finish. The base coat, mesh and finish together are called the lamina, the weather face of the wall. FAIME's crew installed every one of these layers on this hotel's upper façade, from the air barrier out to the finish.
Each layer has one job. The board carries the insulation and gives a flat plane. The mesh-reinforced base coat gives the wall its strength against cracking and impact. The finish gives the colour and texture and sheds the weather. If any layer is rushed, the problems show up in the next one, so the stages below were run in order with nothing skipped.
Stage 1 — Inspect & Prepare the Substrate
Before any material went on, the crew checked the surface across every header and upper-wall area for soundness, cleanliness and alignment. A base coat cannot fix a wall that is loose, dirty or out of plane. It only copies it. Where the surface needed help to bond, a bonding agent was applied first. Every window was sheeted in plastic and taped at the frame, and stayed that way until the finish was done.
Stage 2 — Air Barrier on the Sheathing
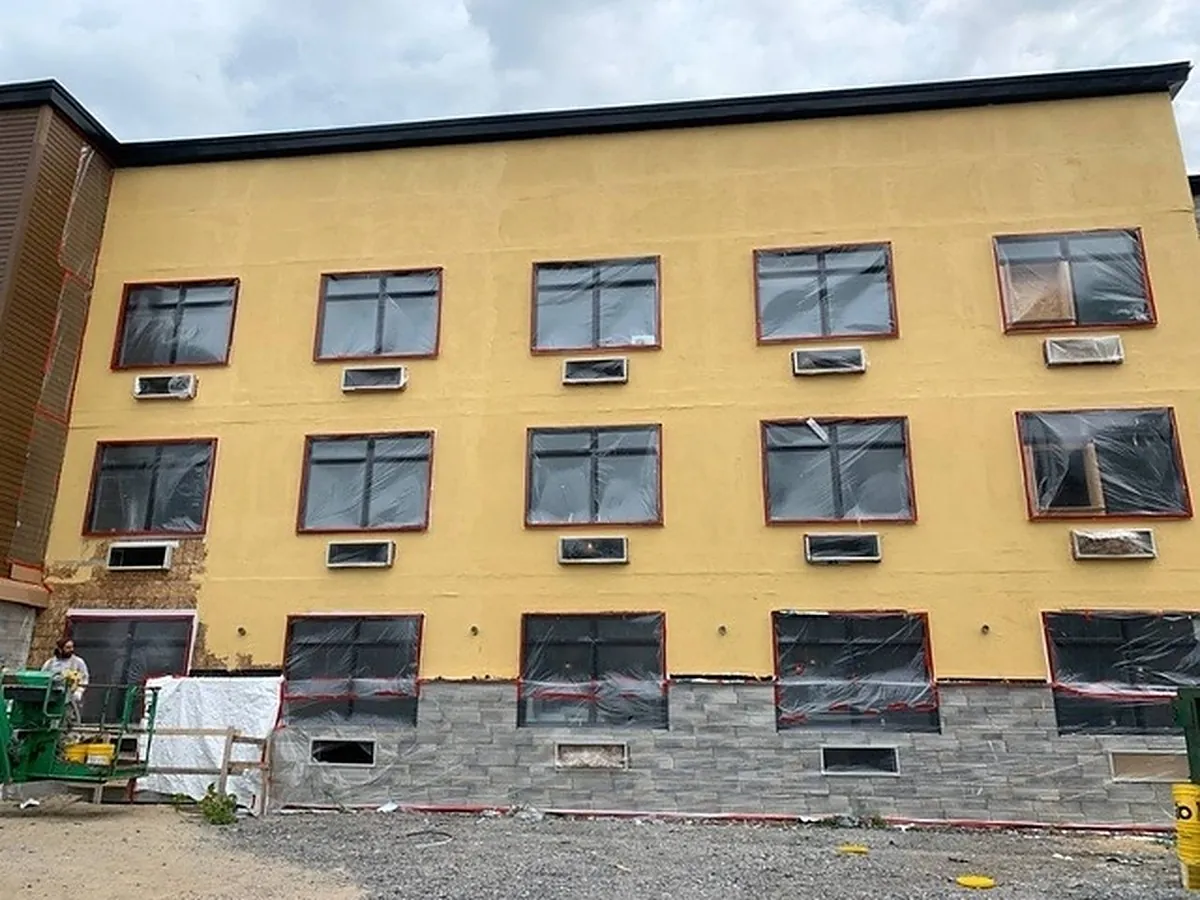
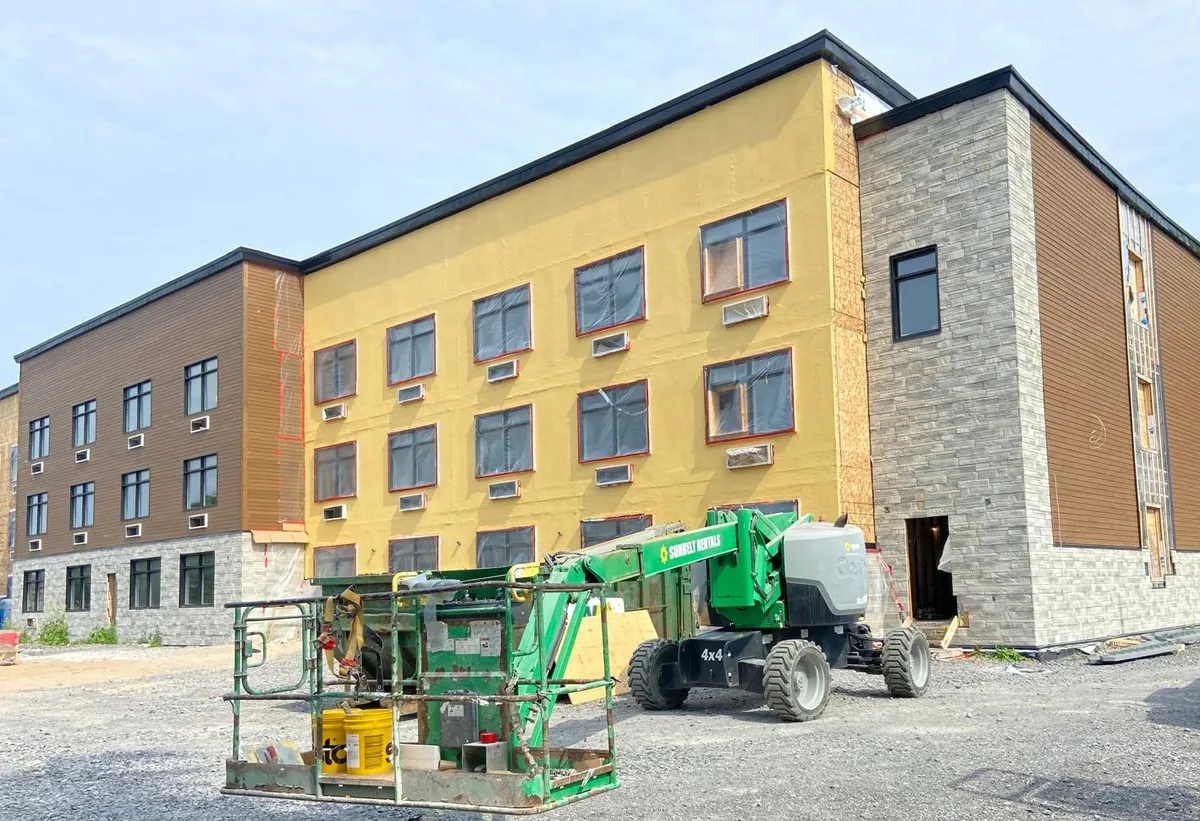
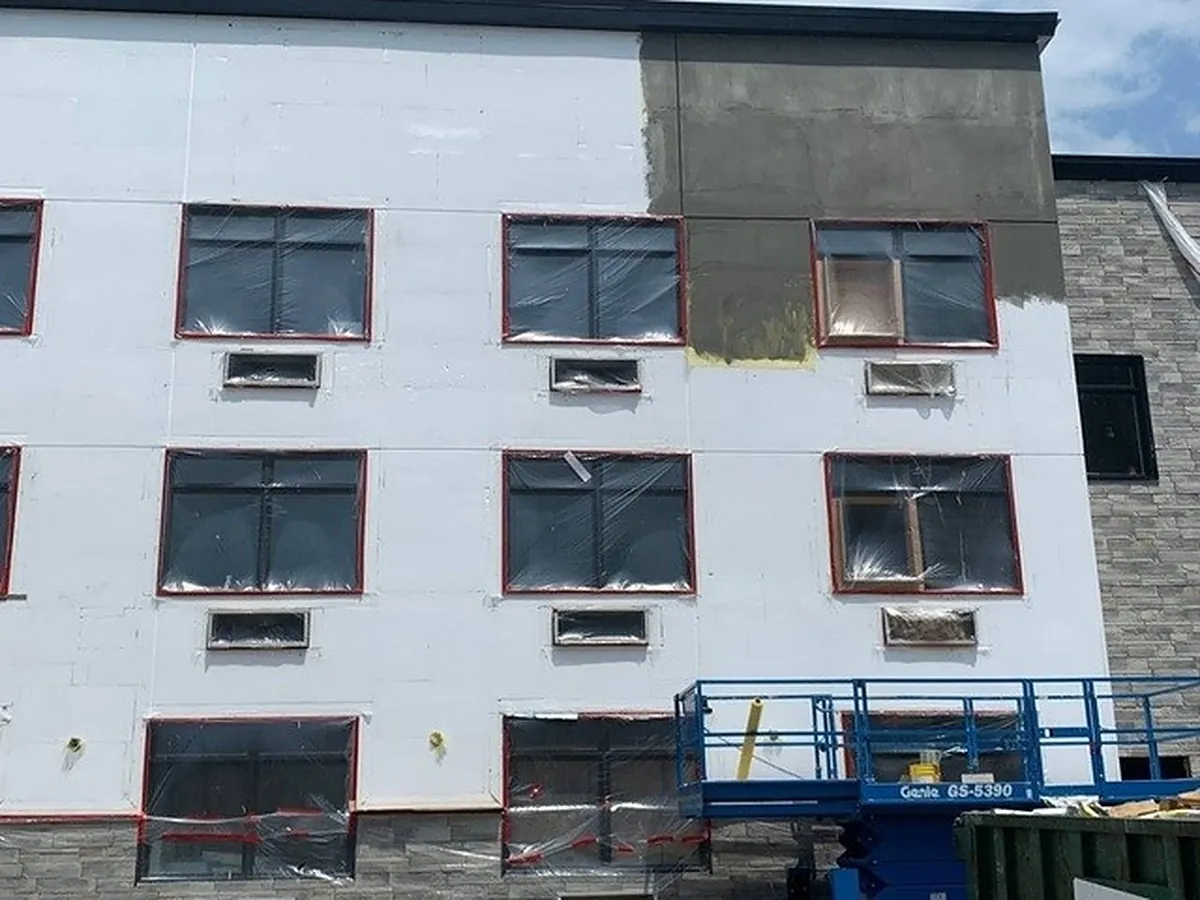
The first layer to go on was the air barrier: the yellow coat in the photos, applied across the sheathing before any insulation. It is the layer that stops air and water getting into the wall behind the system. Everything installed after it covers it for good, so it was run across every header and upper-wall area and around the window openings before the crew moved on.
Stage 3 — EPS Insulation Board
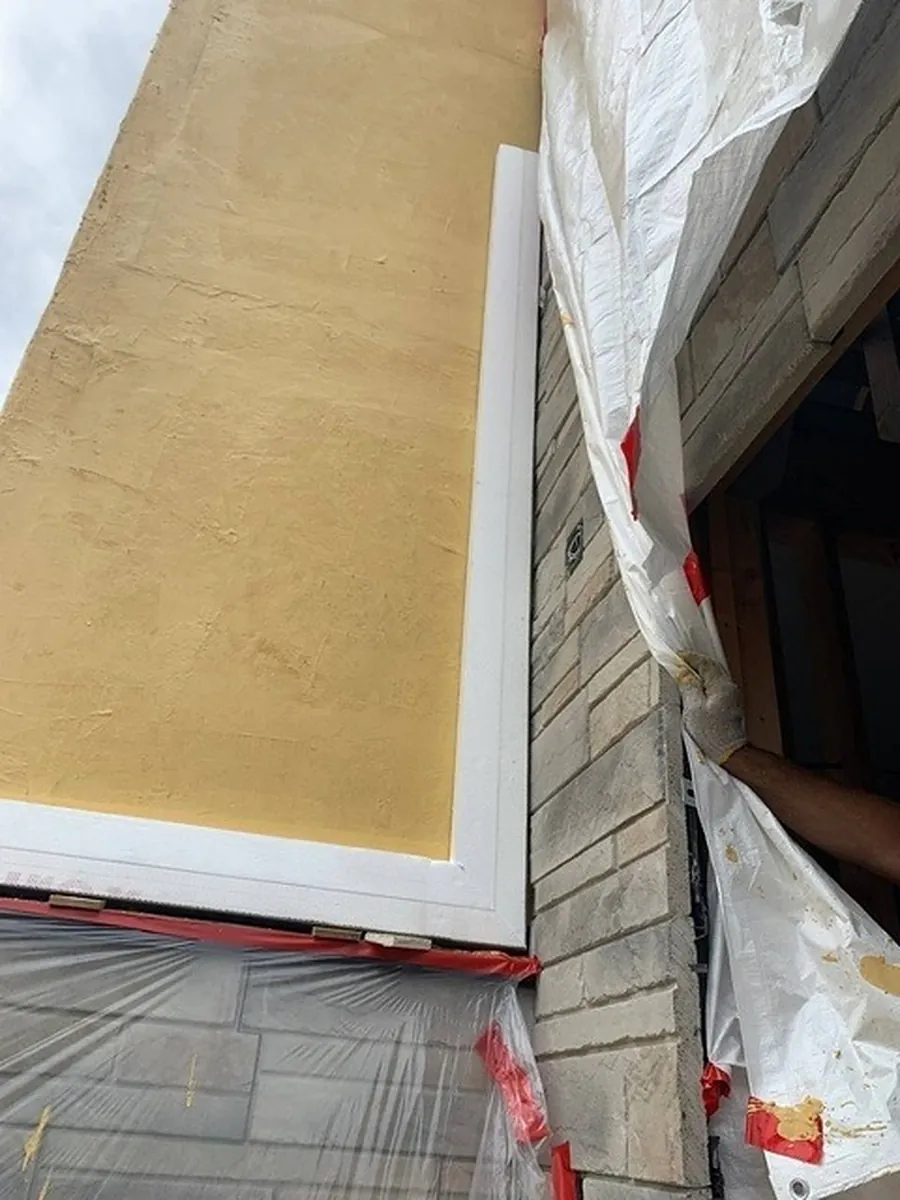
EPS insulation board (Styrofoam) was then installed over the air barrier. The board does two jobs: it puts a continuous layer of insulation on the outside of the building, and it gives the base coat a flat, true plane to go onto. A finish is only ever as straight as the board behind it, so the boards went up with tight joints and a flat face before any base coat was applied.
Stage 4 — Sto Base Coat With Fibreglass Mesh
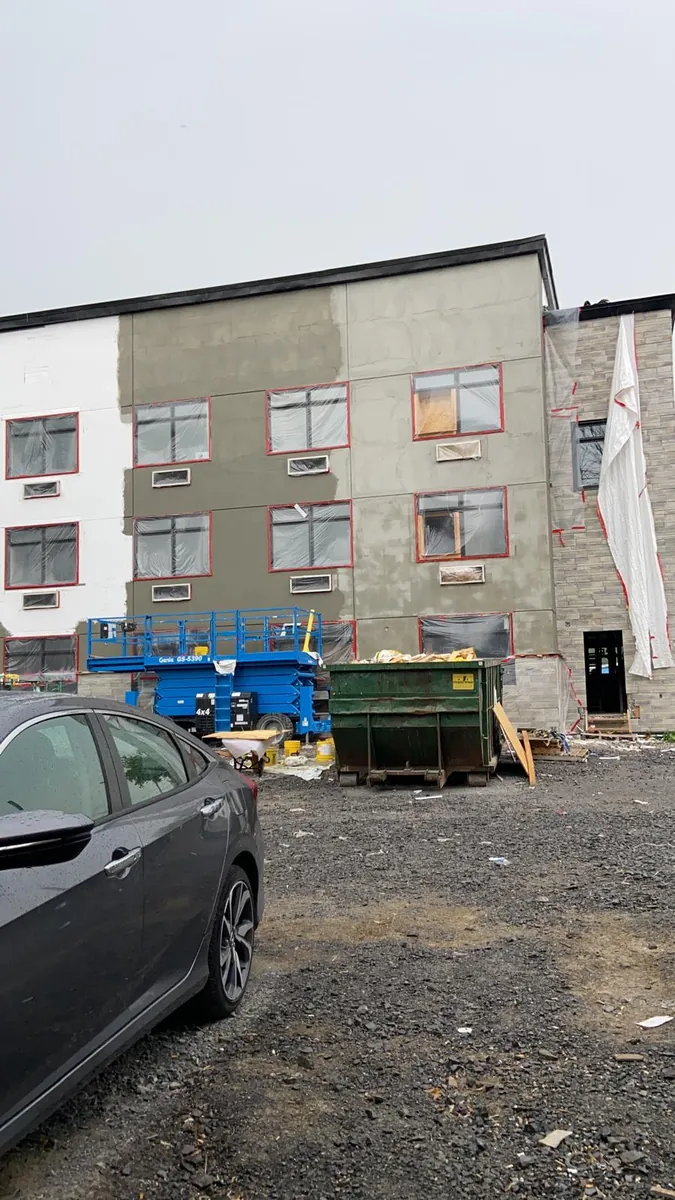
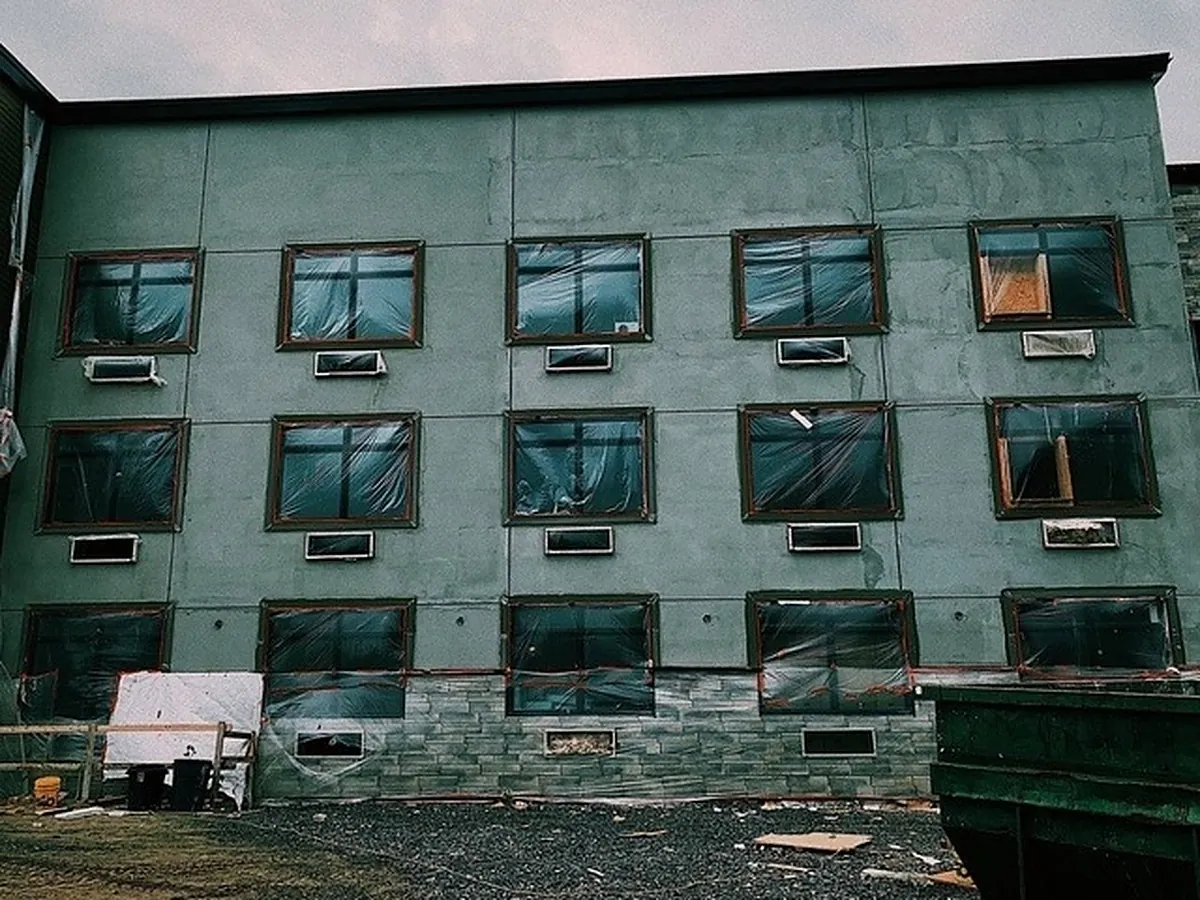
The Sto base coat was troweled evenly across the insulation board on all of the header surfaces, and fibreglass reinforcing mesh was pressed into it while it was still wet, then covered so no mesh pattern showed through. The mesh is what controls cracking: it ties the board joints and the corners into one reinforced sheet. Sto's installation guide calls for at least 2½ inches (64 mm) of overlap wherever two pieces of mesh meet, and for the mesh to be carried around corners, so there is no unreinforced line for a crack to follow.
Stage 5 — Cure to Sto's Guidance
The base coat was then left to cure following Sto's instructions, which require it to be fully dry before the finish goes on. This step can't be hurried. A finish put over a base coat that is still damp can trap the moisture behind it, which leads to weak adhesion and blotchy colour. The schedule followed the coat, not the other way round.
Stage 6 — Acrylic Sto Finish Coat
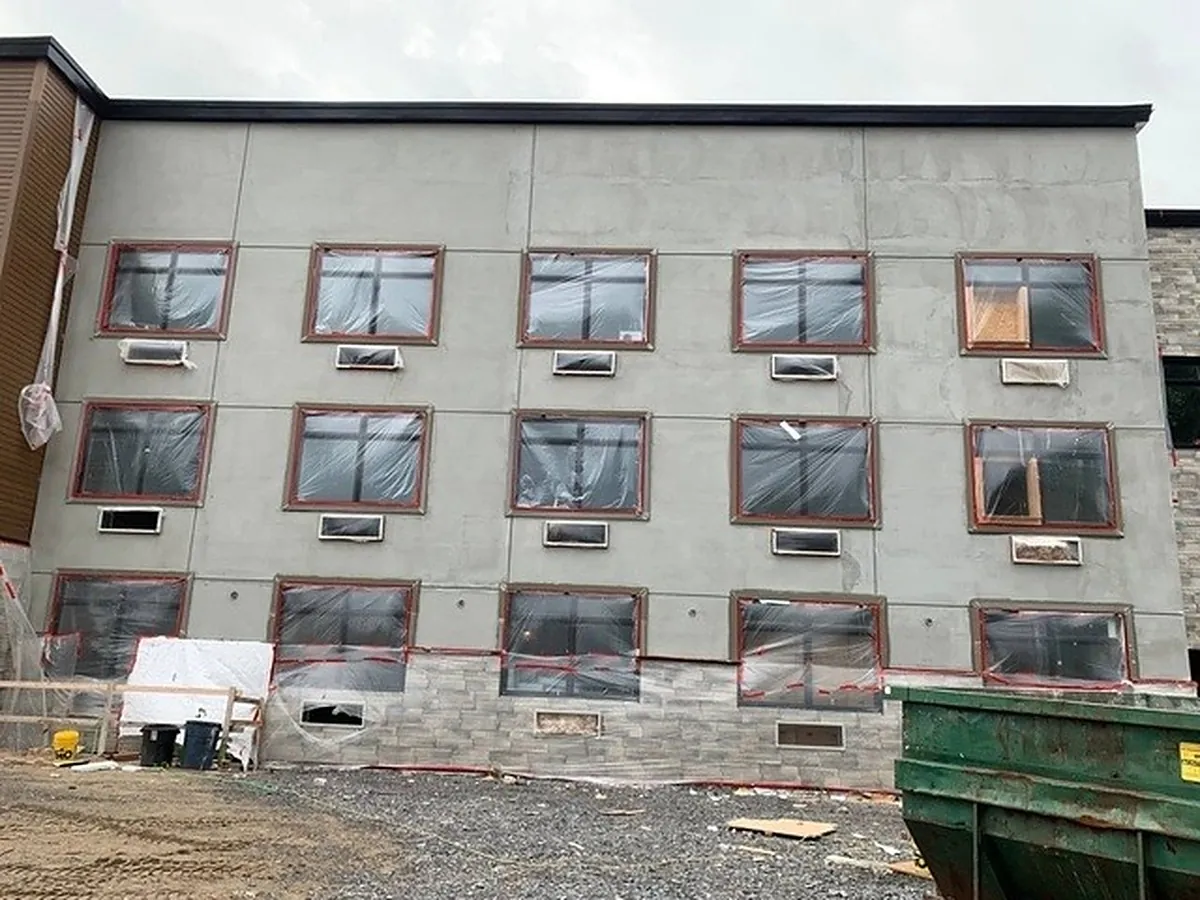
With the base cured, the acrylic Sto finish coat was applied with one consistent texture across every header section, in the colour set by the project design. The crew checked it for uniformity as they went, especially at the transitions to the stone and siding and around the window openings and architectural details, where a finish is most likely to look patched if it is not run carefully.
Stage 7 — Inspection, Touch-Ups & Clean-Up
Every finished surface was inspected for smoothness, coverage and adhesion. Minor touch-ups were made, and the work areas around the building were cleaned before the crew handed the façade back to the general contractor. The scope closed on schedule and on budget, with no safety incidents across the job.
Air Barrier — Board — Mesh Base — Finish
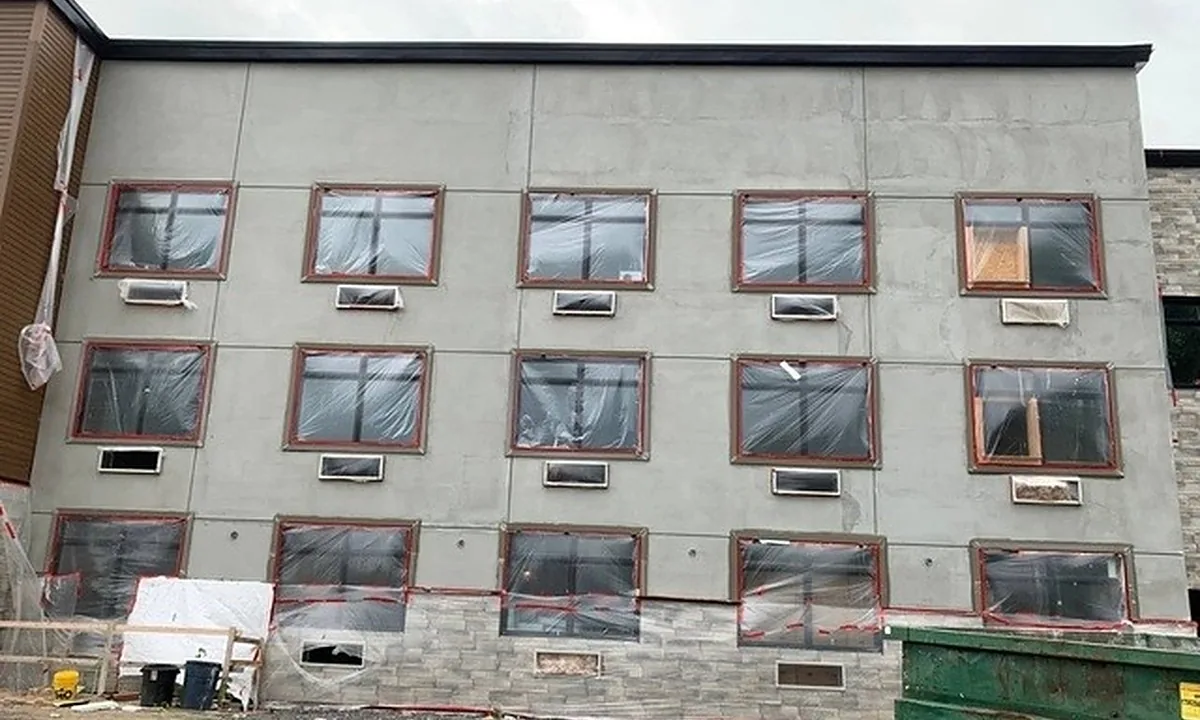
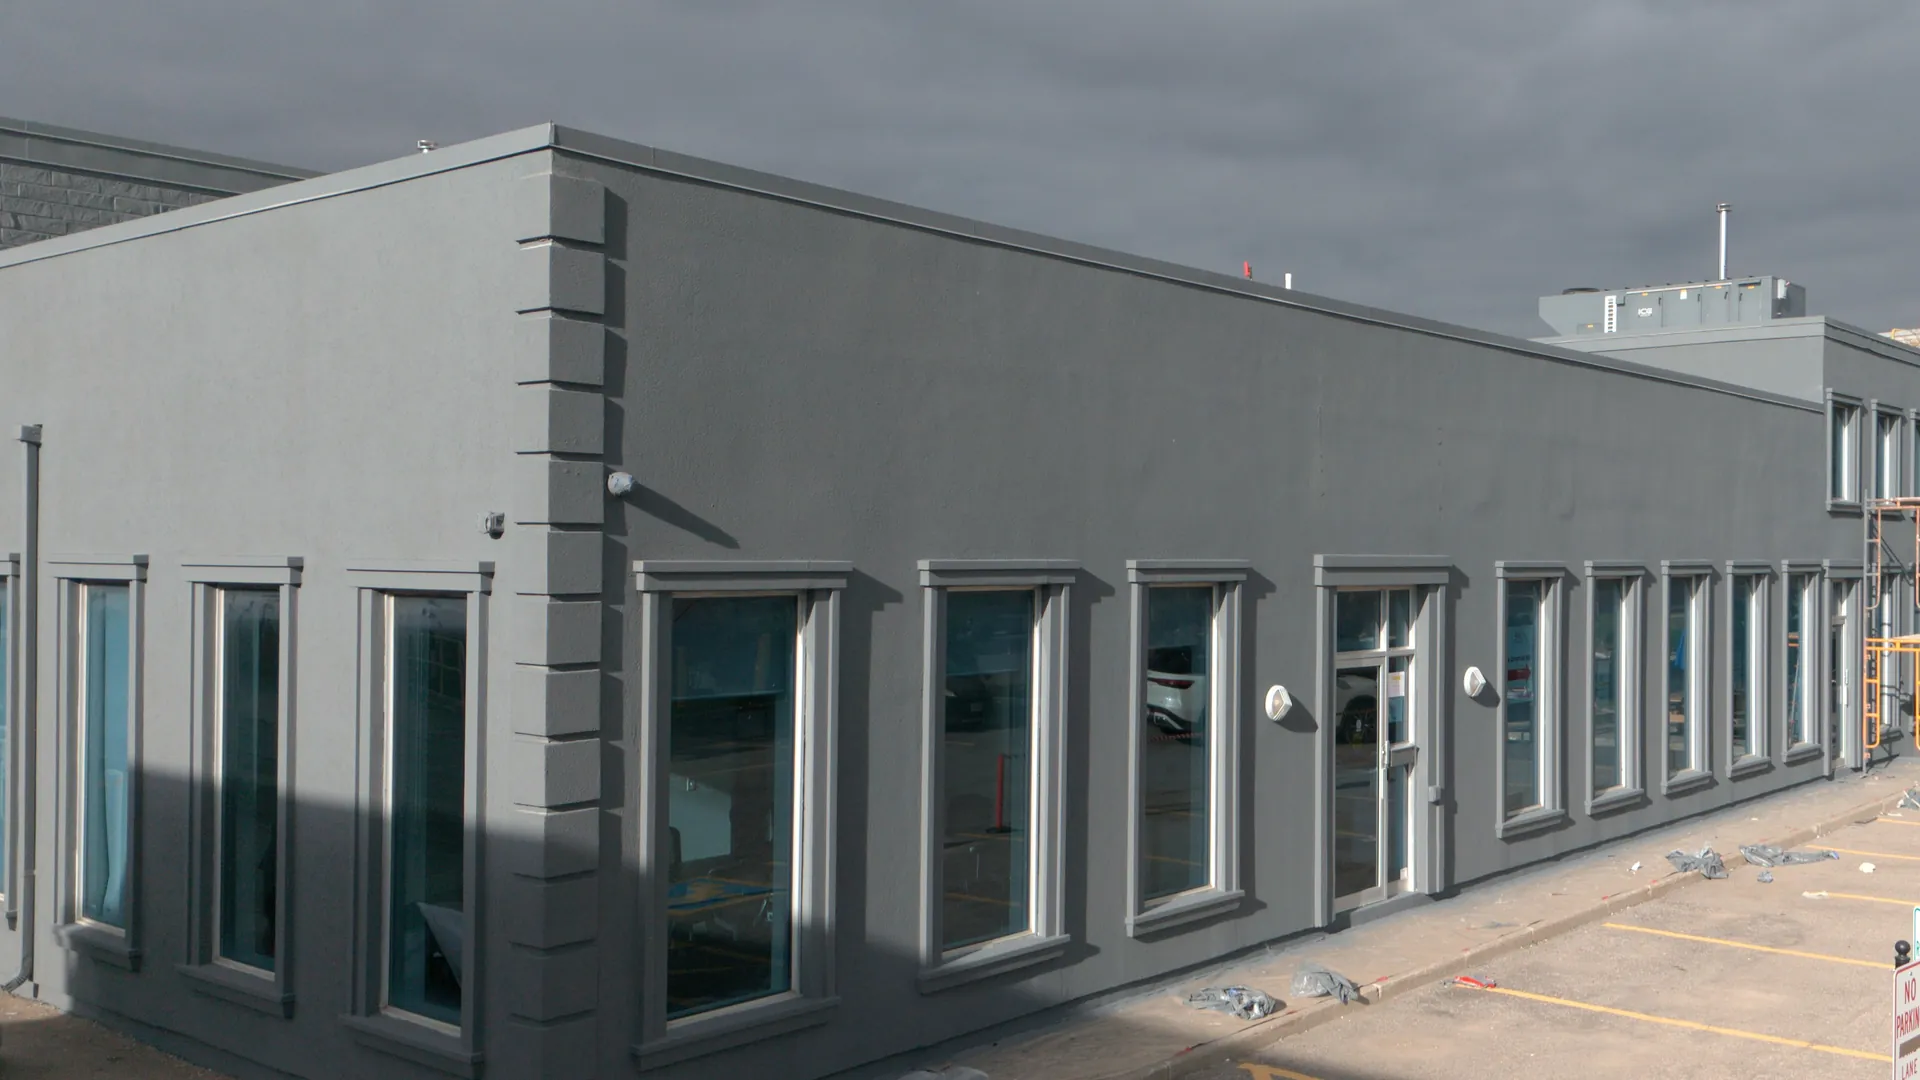
The photos follow the same front elevation through every layer: the yellow air barrier on the sheathing, the white insulation board, the grey base coat with its fibreglass mesh, and the finished acrylic coat.

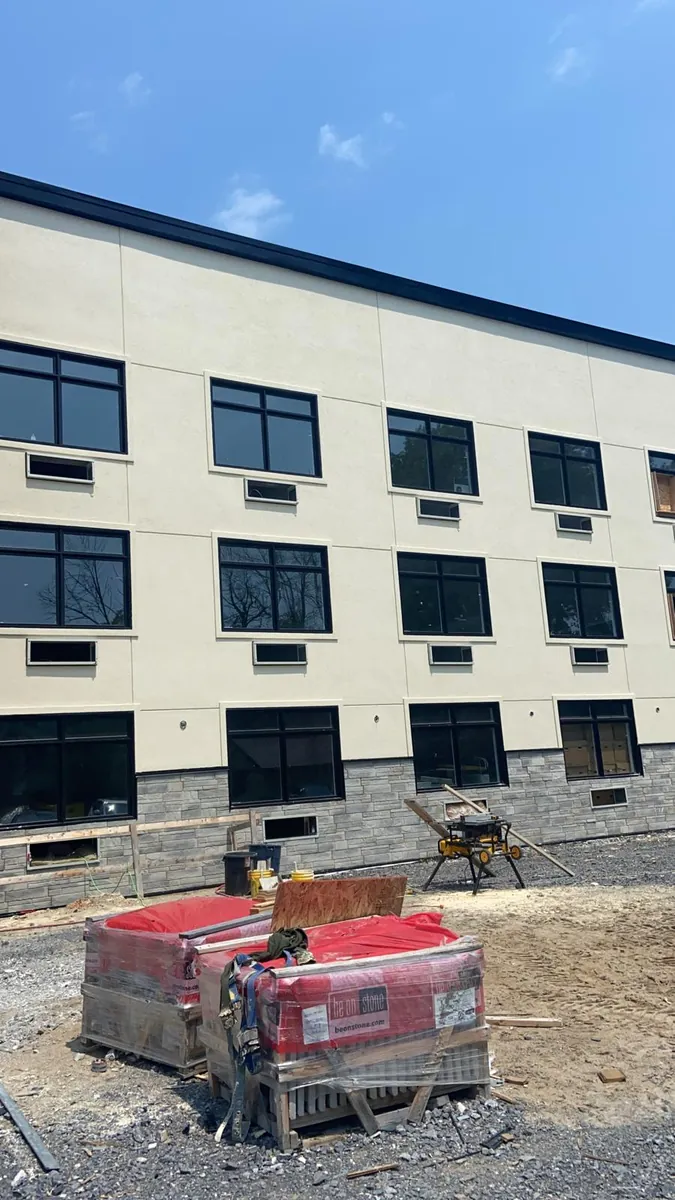

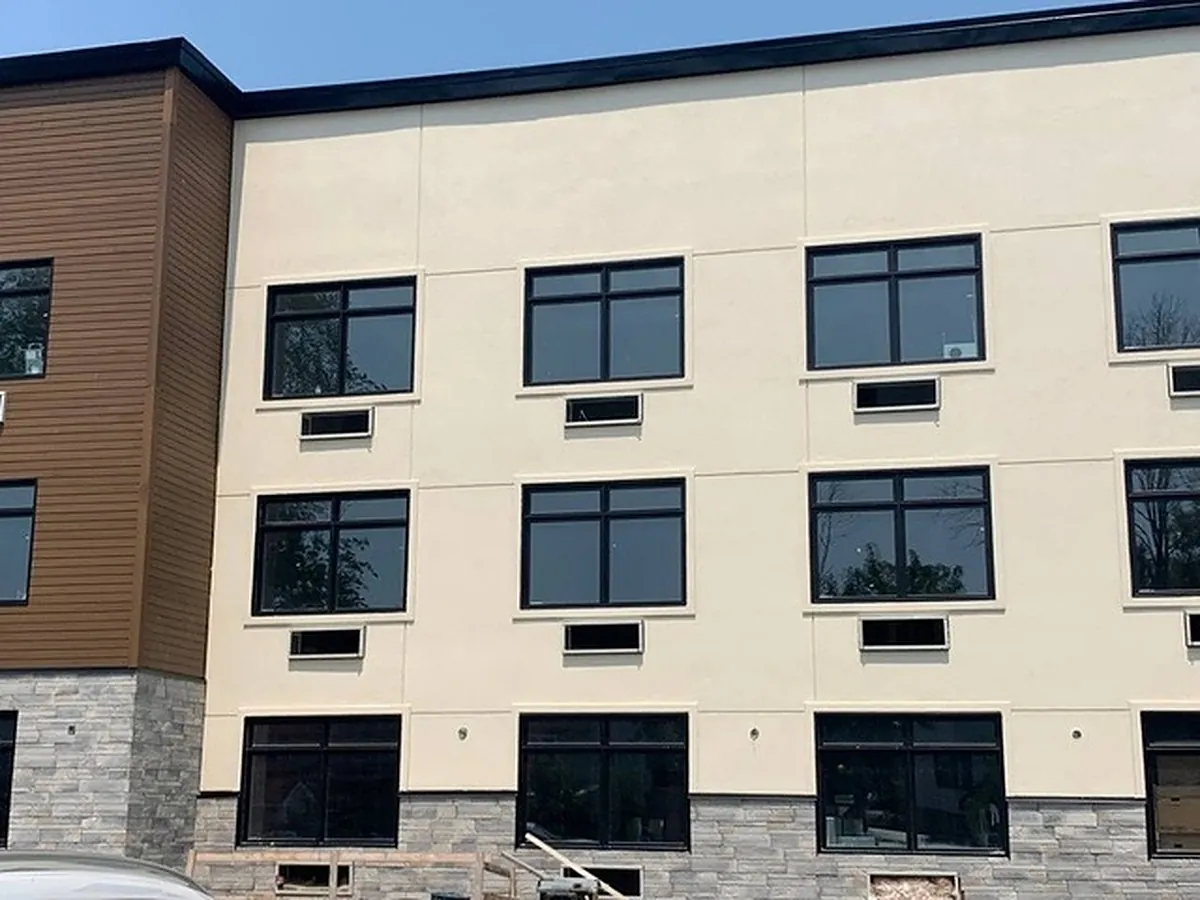
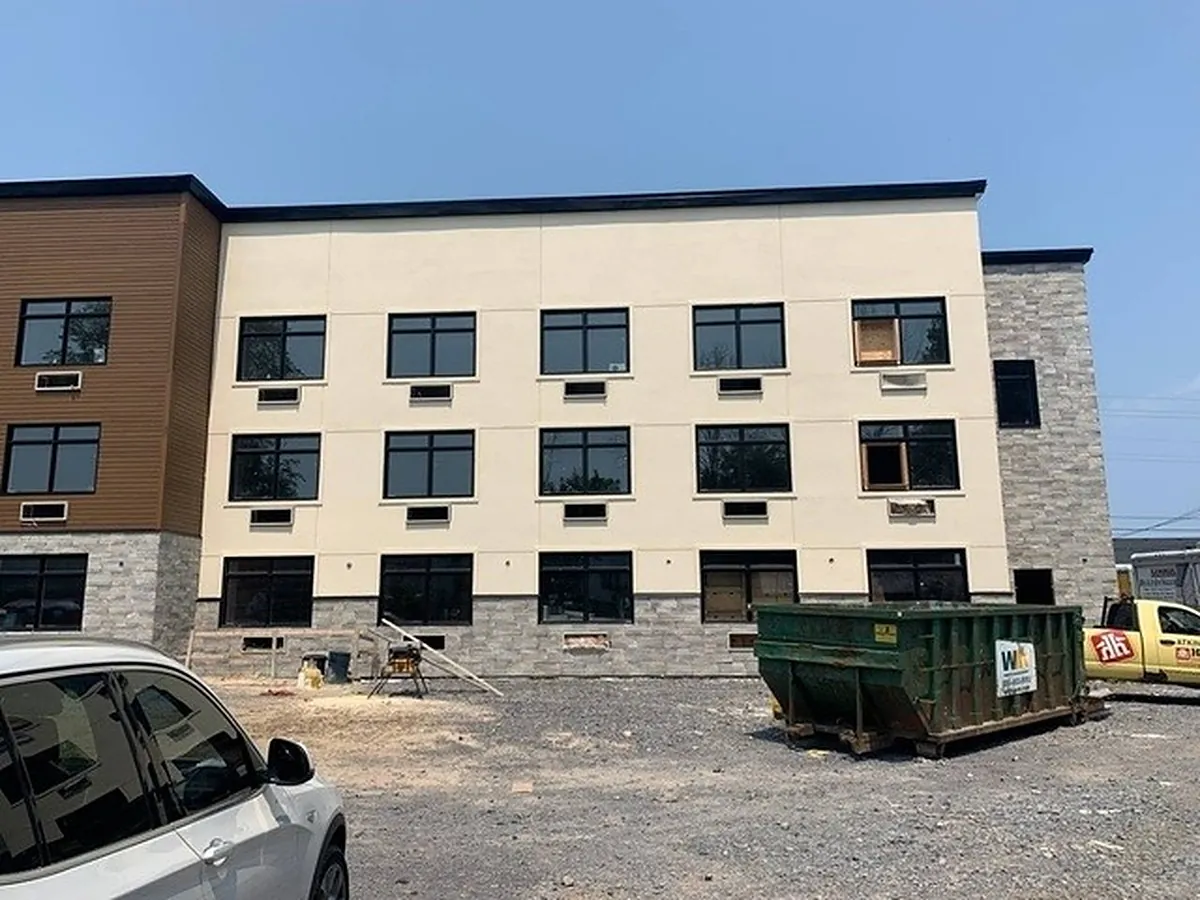
See the Transformation
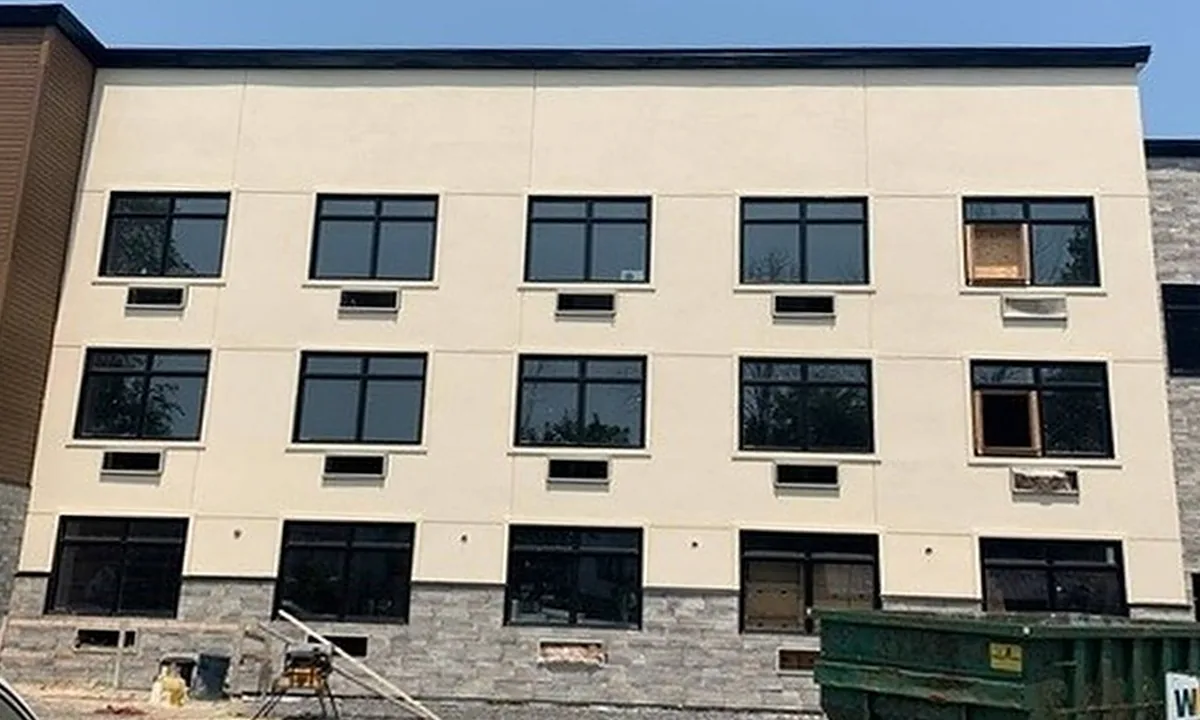
Drag the slider to compare the same front elevation in grey base coat and in its finished Sto coat. Real job photos from this hotel.
Front Elevation — Base Coat to Finished Sto Finish
 Base Coat
Finished
The same wall, mesh-reinforced base coat to finished acrylic coat. The finished photo was taken from slightly further back, so it was scaled and squared to the same window grid. Nothing else was changed.
Scope Breakdown
Inspect & Prepare
- Substrate checked for soundness, cleanliness and alignment
- Bonding agent applied where the surface needed it
- Every window sheeted and taped before any coat went on
Air Barrier & Board
- Air barrier applied across the sheathing and around openings
- EPS insulation board (Styrofoam) installed over it
- Tight joints and a flat, true plane for the base coat
Base Coat, Mesh & Cure
- Sto base coat troweled across all header and upper-wall areas
- Fibreglass mesh embedded wet, lapped at joints, wrapped at corners
- Base coat left to cure to Sto's guidance before any finish
Finish & Close-Out
- Acrylic Sto finish coat, one consistent texture
- Colour matched to the project design
- Clean transitions at stone, siding and window openings
- Inspection, touch-ups and clean-up before handover
Sto Stucco & EIFS FAQ
What is a Sto stucco system?
It is an exterior insulation and finish system (EIFS) built from Sto materials. Sto introduced EIFS in Europe in 1963. A full system is built in layers: an air and water-resistive barrier on the sheathing, an adhesive, rigid insulation board, a base coat with fibreglass reinforcing mesh pressed into it, and a textured acrylic finish on top. The base coat, mesh and finish together are called the lamina. FAIME's crew installed the full system on this hotel's upper façade, from the air barrier and EPS board through to the acrylic finish.
What does the fibreglass mesh do, and why does the overlap matter?
The mesh is what stops the wall cracking. It is embedded in the wet base coat and fully covered, so the board joints and normal building movement are spread across one reinforced sheet instead of showing up as lines in the finish. Sto's installation guide calls for at least 2½ inches (64 mm) of overlap wherever two pieces of mesh meet, and for mesh to be carried around corners. A butt joint or a gap leaves an unreinforced line, and that is where a crack will follow.
Why does the base coat have to cure before the finish coat goes on?
Sto's instructions require the base coat to be fully dry before the finish is applied. Some base coats dry only by evaporation, so cool or damp weather makes the wait longer. A finish put over a base coat that is still damp can trap that moisture, which risks poor adhesion and blotchy colour. On this project the base coat was left to cure to Sto's guidance before any finish went over it.
Does FAIME take on projects in Kingston?
Yes. FAIME takes on larger projects in Kingston and Eastern Ontario: multi-unit residential, commercial and institutional buildings, with a scope capacity of up to $2,000,000. The company is based in Woodbridge in the Greater Toronto Area, so every Kingston project is planned as a scheduled crew mobilization. This hotel was completed by FAIME's crew in 2019, before FAIME Construction Inc. was incorporated in 2021.
Can FAIME work as the stucco trade under our general contractor?
Yes. That was the arrangement on this hotel. FAIME is WSIB Active (Class G5) and carries $2M Commercial General Liability insurance, with Additional Insured endorsements and certificates available on request. Current EIFS and stucco work carries a 5-year workmanship warranty, and Sto materials carry their own manufacturer warranties.
Need a Stucco Trade for Your Next Building?
Send us the drawings or the spec and we will come back with a clear written trade price for the EIFS and stucco scope, in the GTA, Kingston or Ottawa.